This is the range of fabrics which I used to make each garment featured in the pattern. These fabrics are a very good quality quilting weight cotton from - believe it or not - Jaycotts! They are only available in store at the moment. You cannot buy them online.
You will however easily find good quality pure cotton in most fabric shops. Do choose a medium weight or quilting weight cotton as it will make sewing your garments so much easier.
Mix and match colours however you like, sewing is all about making something which you enjoy wearing.
We are going to start by making the jacket. The pants and top will follow in another blog post. I didn't want to put you off by doing too much all in one go!
In the next post I will show you how I styled all of my garments and there will be photographs.
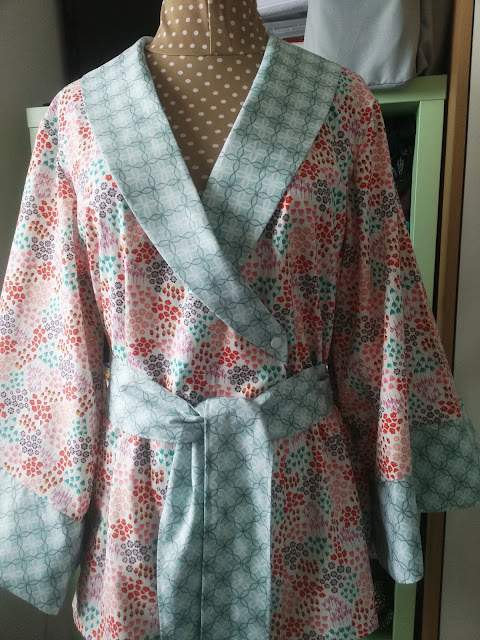
These are the fabrics I chose to use for the jacket. We are always told never to mix prints but never be afraid to bend the rules , these two prints actually sit very well together.
The biggest mistake everyone makes is when choosing which size to cut out. Do not ever just cut out your dress size as it will not correspond to your pattern size. Most likely your pattern size will be one or two or more sizes larger than your ready to wear size. This is normal.
Check your bust waist and hip measurements and write them down. Then study the back of the pattern and see which measurements most closely resemble your own.
Patterns have " wearing ease" included. This simply shows you what sort of fit it is, for example it could fit close to the body or it could be loose fitting. You will probably have to hunt around for this measurement, in this case the "Actual size" measurements are found printed on the pattern pieces.
Use both of these measurements to decide which size would be best for you. You may of course combine sizes for the top and bottom.
If in doubt go up to the next size as it is easy to take garments in, but not so easy to make them larger.
Before starting, wash dry and press your fabric as they often shrink in the first wash.
You will need various tools
Tape measure - a traditional one or retractable one is fine
Tape measure
You will also need a selection of scissors. This is where there is so much choice
To start with you need
a pair of good quality dressmaking scissors. These can be soft grip or traditional .
A pair of needlework or embroidery scissors for cutting thread etc
A pair of general scissors to be used solely for cutting paper.
Never ever use your dressmaking scissors for cutting paper, not even cutting out your pattern. Keep an older or cheaper pair for this purpose.
If you are choosing FISKARS scissors then they have a scissor sharpener which works very well with their products
FISKARS scissors sharpener
Once you have decided on your size cut the pattern pieces out and have a look at them to see how many of each you need and identify any which need to go on the fold line of the fabric.
There is a pattern layout guide on the first page of the pattern instructions which I suggest you follow.
In addition to making sure that the pattern pieces are the right way up they must also be on the grain of the fabric. You will see a line with an arrow at each end printed on each pattern piece. This line needs to be exactly the same distance from the selvedge of the fabric all the way along. Use your tape measure and pin your pattern to the fabric once you know it is straight.
Don't try to save fabric by skipping this step. If your fabric is not straight the garment will not hang straight either.
A tip is to put all your tissue paper and fabric scraps into a bin until you have finished your garment - it is so easy to throw a pattern piece out by mistake and you may need a fabric scrap.
I always keep larger pieces of left over fabric for other projects. Patchwork etc.
We need some way of transferring pattern markings onto fabric. My preferred way is with tailors tacks.
You will see various dots which need to be marked onto your fabric, or there may be darts
To mark the position with tailors tacks stitch on the spot a couple of times with tacking thread leaving long loops on the top.
Then simply ease the fabric apart and cut the thread in the centre leaving tufts of thread on each piece.
There are other methods including using marker pens but this is my preferred way as the fabric is in no risk of being damaged.
There is a glossary of seams and stitches on the pattern instructions, do read them as they will be invaluable when it comes to stitching your garment together.
I am using my overlocker to finish my seams but other methods are described above.
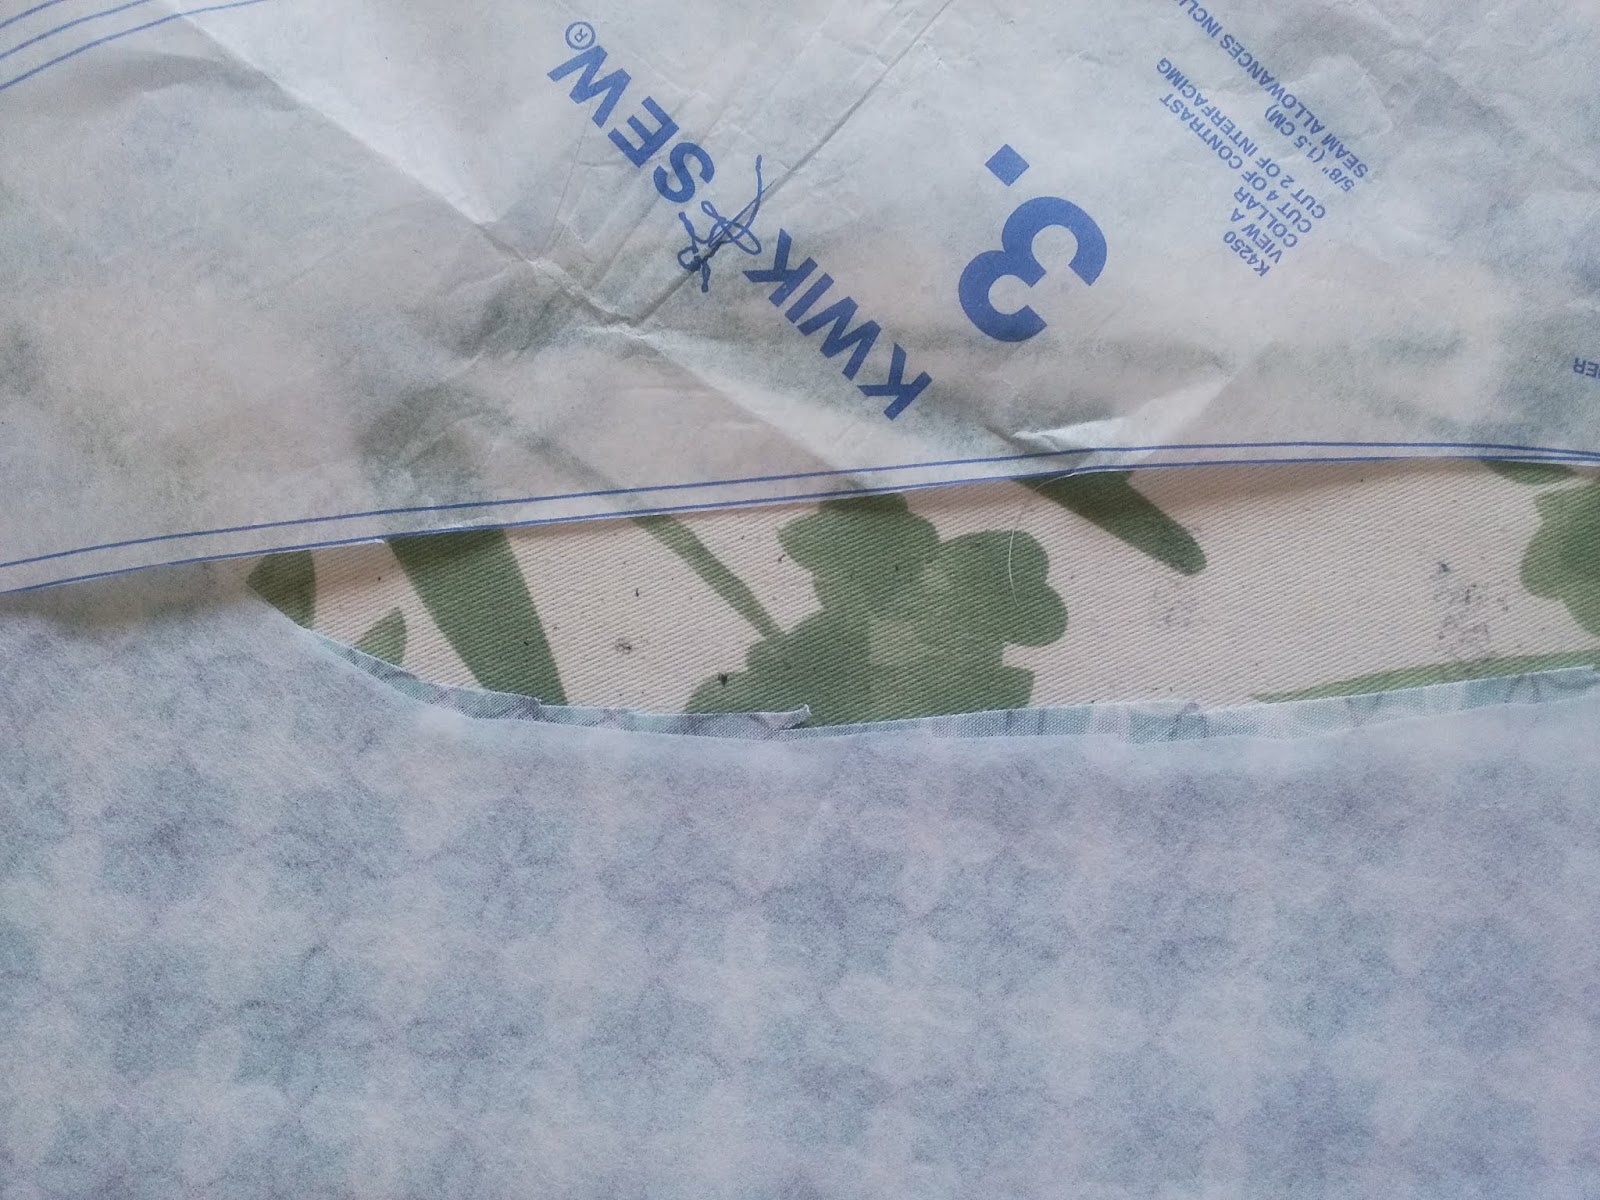
An early part of the jacket instructions is to attach iron on interfacing to one set of collar pieces. This is to stiffen the fabric slightly and make it lie flat. Always use a good quality interfacing such as
Vilene iron on interfacing there are cheaper brands but quite honestly why spoil your work with inferior products?
Be careful with your iron temperature when using iron on interfacing, use a pressing cloth as it can easily melt!
Hint! Press each seam as you sew it to blend the stitches into the fabric for a professional finish
I have made up the collar , stitched the fronts to the back at the shoulders and attached the collar.
The pattern instructions are easy to follow for this, but if you get stuck you can always contact me.
This is where I do things a bit differently to the instructions. I find it easier to attach the sleeves now before sewing the side seams.
These tools are pointing to two sets of notches . The double ones always match up to the back of the garment, the single one to the front.
Mark these notches and do a gathering stitch between them.
Start to pin the sleeve to the garment using the gathers to gently ease the sleeve into place. Check to make sure that there are no pleats before machine stitching.
Then stitch the sleeve and the side seam in one and finish the seam edge. Don't forget to match the underarm seams perfectly
Stitch the sleeve bands together and check that they fit the sleeve.
Clip the point down to the seam line where the band folds to make it lie flat
Press the seam open and then press the band in half. Follow the pattern instructions again here
This is my sleeve band attached to my sleeve shown from the inside.
We need to stitch the hems and side and to do this we need some sort of measuring tool. This is where your own preference comes in. This is my selection
You will find all sorts of measuring tools and other fascinating things on this link
Measuring Tool
There are also these
Ironing rulers , they do come in useful.
This is my favourite measuring guage, but unfortunately it does not get along with the iron and I keep melting them .
You need to press the hems up and then fold the top inside, press again and top stitch.
Match the side seams and with the hem even mark the spot on the centre front where the popper will go.
I love these poppers (snaps) I have a box of them
Box of snaps but you can purchase small packets instead in lots of colours if you don't want a whole box of them
SnapsI use them for lots of things, including bag making.
You also need a tool to attach them with
Vario-pliers you will quite honestly find lots of uses for these
The belt is simple to sew. The instructions suggest making thread loops but I made fabric loops very simply by taking a long piece of fabric, turning the ends in and then folding it in half and top-stitching - just like the belt holders on your jeans
This is the back of my lovely little jacket.
I'm really quite keen not to show you how to make the pants and top just yet - I have made them though and they are fabulous. This blog post is long enough for a beginner and I don't want to put you off.
So in a couple of weeks or maybe less, I will post the rest of this pattern tutorial .
I am also keen not to influence you too much on how to wear this garment , yes I have worn mine out and I loved it. I promise to show you photos wearing it on the next post though.
Sewing is a personal thing, we are not producing clones of what someone else has made - we are individuals with our own tastes and preferences, patterns do not have to be slavishly adhered to.( However having said that please take note of the suggested fabrics - they are there for a reason.)
More about that next time.
To purchase these items telephone Jaycotts on 01244 394099 or order online.
Jaycotts.co.ukIf you want to view the fabulous fabrics they now sell, or to try some of the sewing machines then the directions of how to find the store are here
Visit JaycottsThank you for reading this. I would love to see your jacket, the fabrics you used, and how you styled it.
Angela
Sewangelicthreads