Fast Shipping!
Free for Orders £25+
Free for orders over £25
This is where we start sewing Annie's new wardrobe. Lets start with pretty dresses. I think that dresses are the perfect garment to start wth because they are simple but look fantastic and you can make them in your own style,. Imade three different ones to give you some ideas. I bet you can think of many more, a nightdress for example would be lovely made from this pattern and if you are lucky enough to be a bridesmaid you could ask for a small piece of the material used to make your dress and make your favourite doll one to match
you will need your fabrics. I chose a bundle from Thread Head Fabrics, I picked the bundle called "City Girl" City Girl Fabric bundle This is a collection of 6 top quality fabrics and you will be able to make a full wardrobe of clothes from them. It is great value for money. The other collections are really fun too so please do look at the web site
You will find all the collections on this link under "latest products" Fabric packs by Thread Head Fabrics
I used the dark floral cotton from my collection to make the first dress. Cotton is the best fabric to start sewing with as it is so well behaved. I used the white from the collection to make the bodice of the two coloured dress and a scrap of left over fabric for the blue dress.
The pattern we are using is Kwik Sew 2878 from jaycotts.co.uk Kwik Sew dolls pattern This again is good value as the pattern contains a complete wardrobe of clothes to make.
Did you cut your pattern pieces out as instructed in the previous blog post? if not do it now..When you are ready open your pattern instruction sheet and find the instructions for making the dress as above.
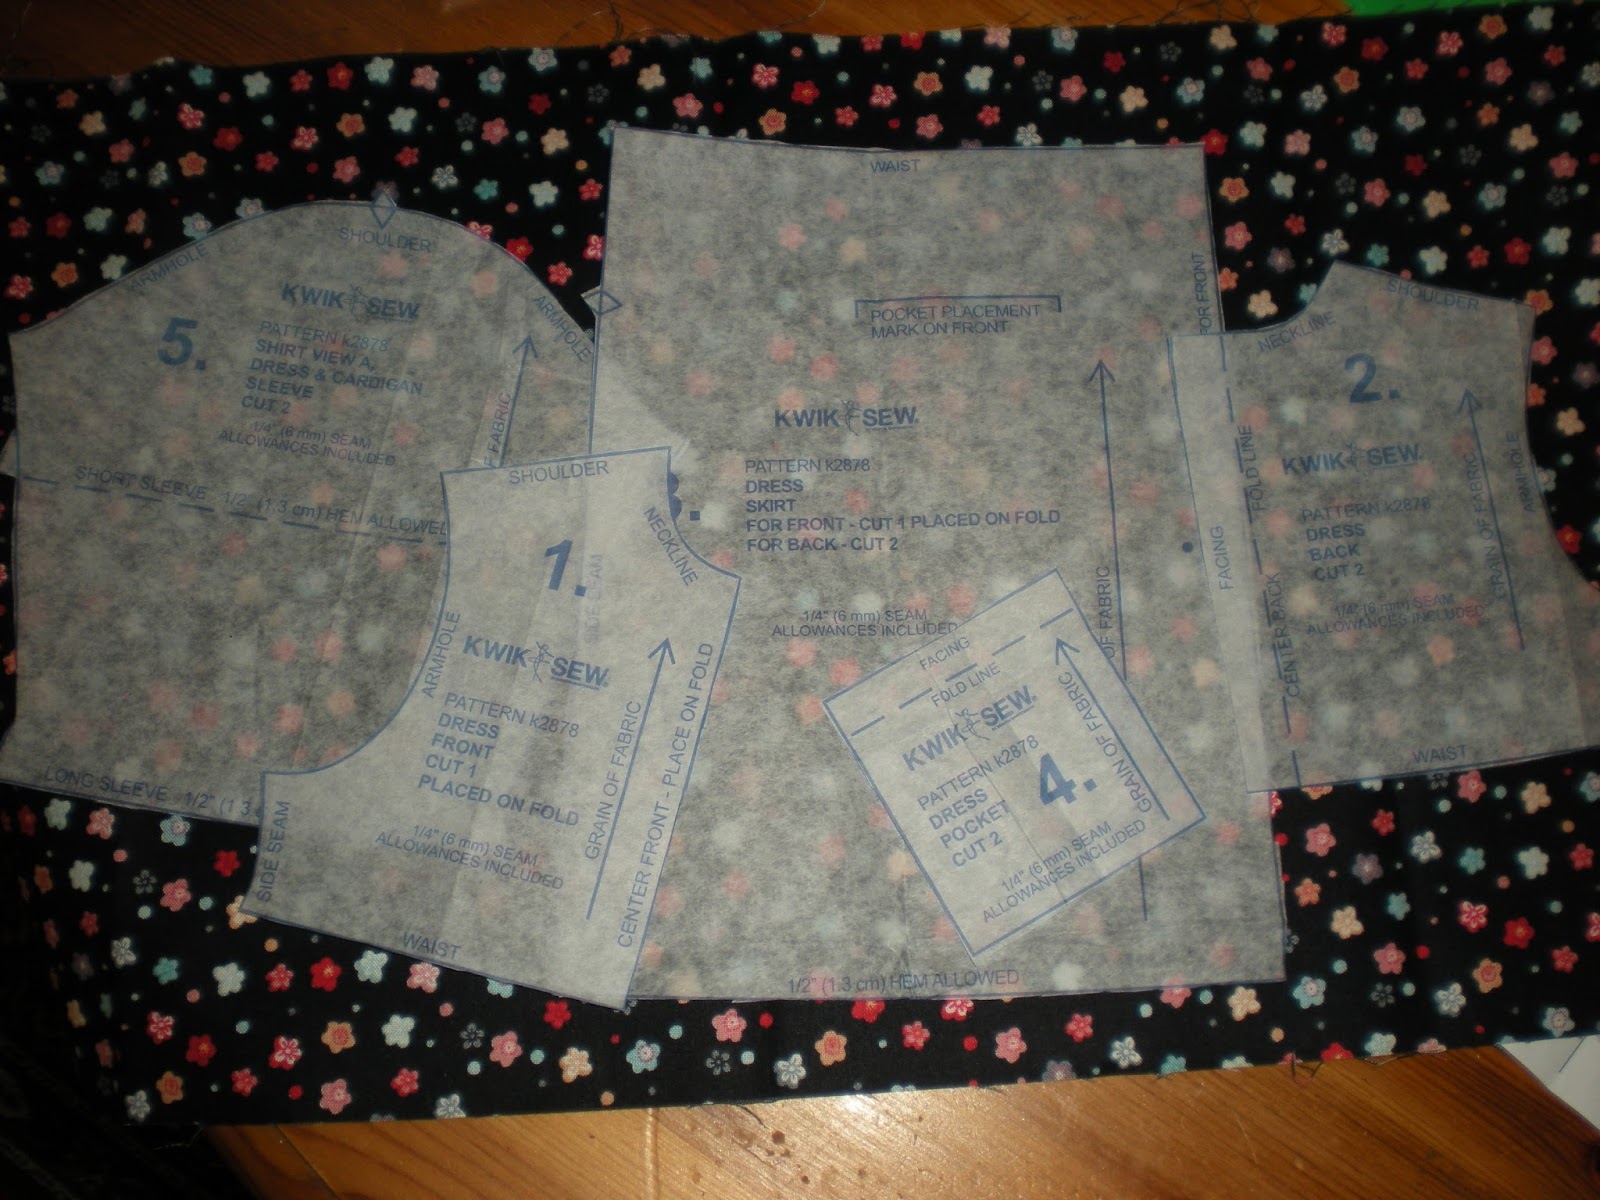
Find all the pieces you need to make the dress. These are clearly shown on the instruction sheet.Very carefully press the fabric and the pattern pieces in order to get the creases out. Do not do this on your own!
take a look at your pattern pieces. Some will say "place on the fold" that means you must pin them onto the fabric along the line where it is folded so that the piece is cut doubled. Some will have a line or an arrow saying "place on the grain line" That means that the line or arrow has to be parallel to the edge of the fabric all the way down. Grain lines are important because if it is wrong it could easily affect how the garment hangs.
The dress in this pattern is the one which takes the most fabric. There is enough fabric in the pack for you to make the short sleeved version of the dress.
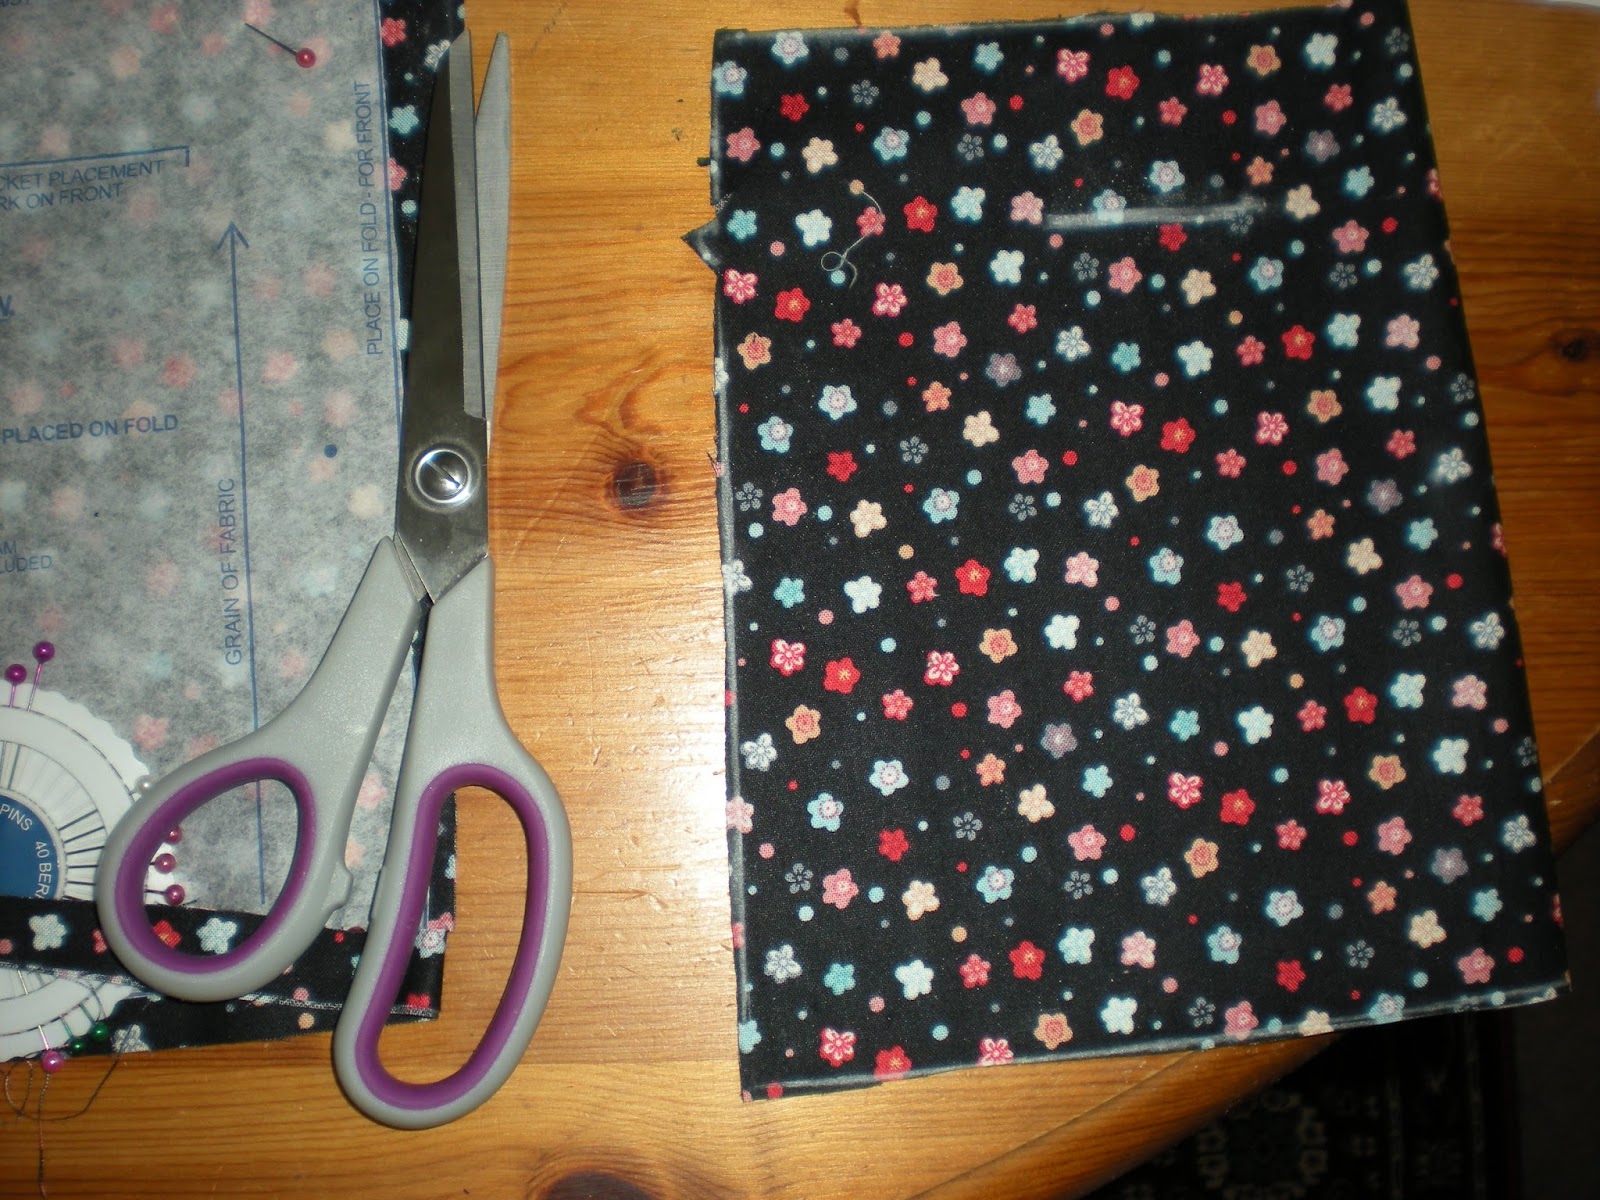
To get all the pattern pieces on to the fabric take a good look at the photograph above. There is enough fabric of any of the designs in the pack to make the dress but you need to fold it like this. Lay the fabric out flat and fold the left side in so that it is just wide enough to put the dress front on the fold and the dress back below it slightly away from the fold. Bring the right side over to meet the edges of the fabric.
You will now need some sewing supplies. If you are very lucky you may be able to ask your family for the complete sewing kit which Jaycotts.co.uk have kindly bought in specially for this blog, so do take a look at the sewing kit in its pretty sewing box Great Value sewing kit in box Jaycotts is where I also recommend you go to for advice when if you want to purchase a sewing machine.
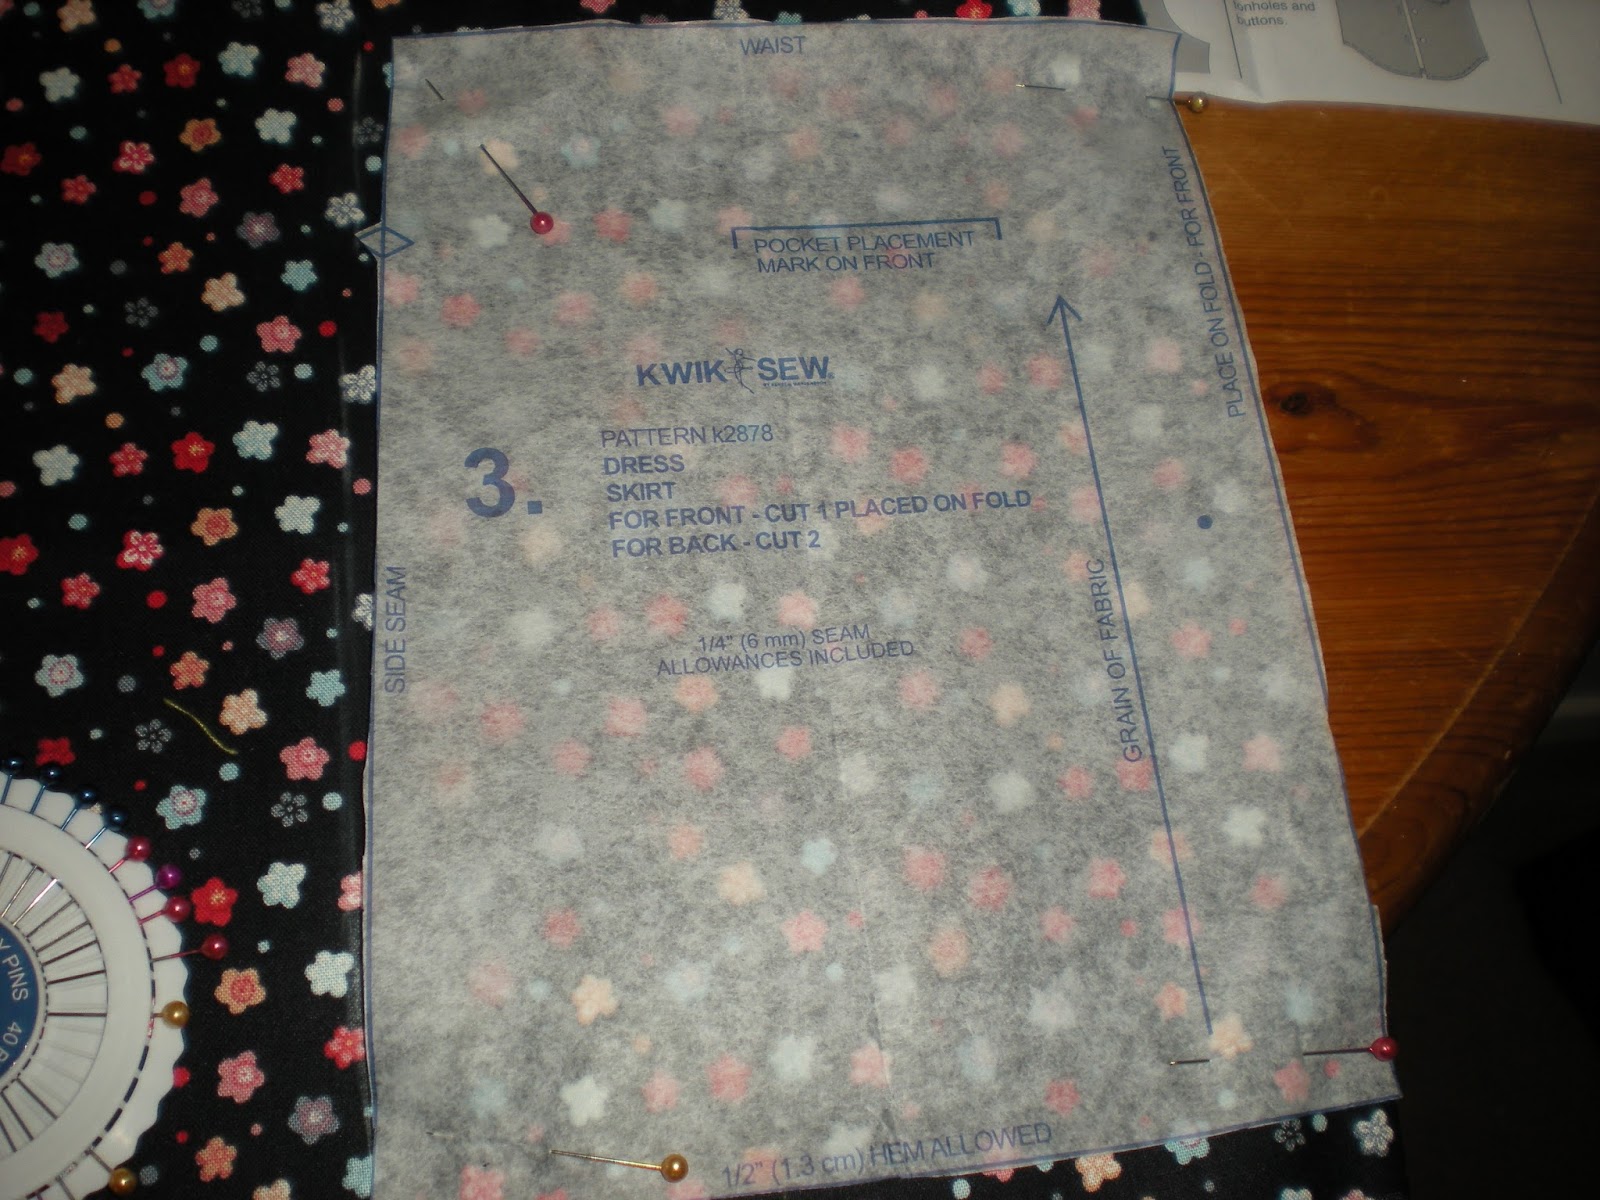
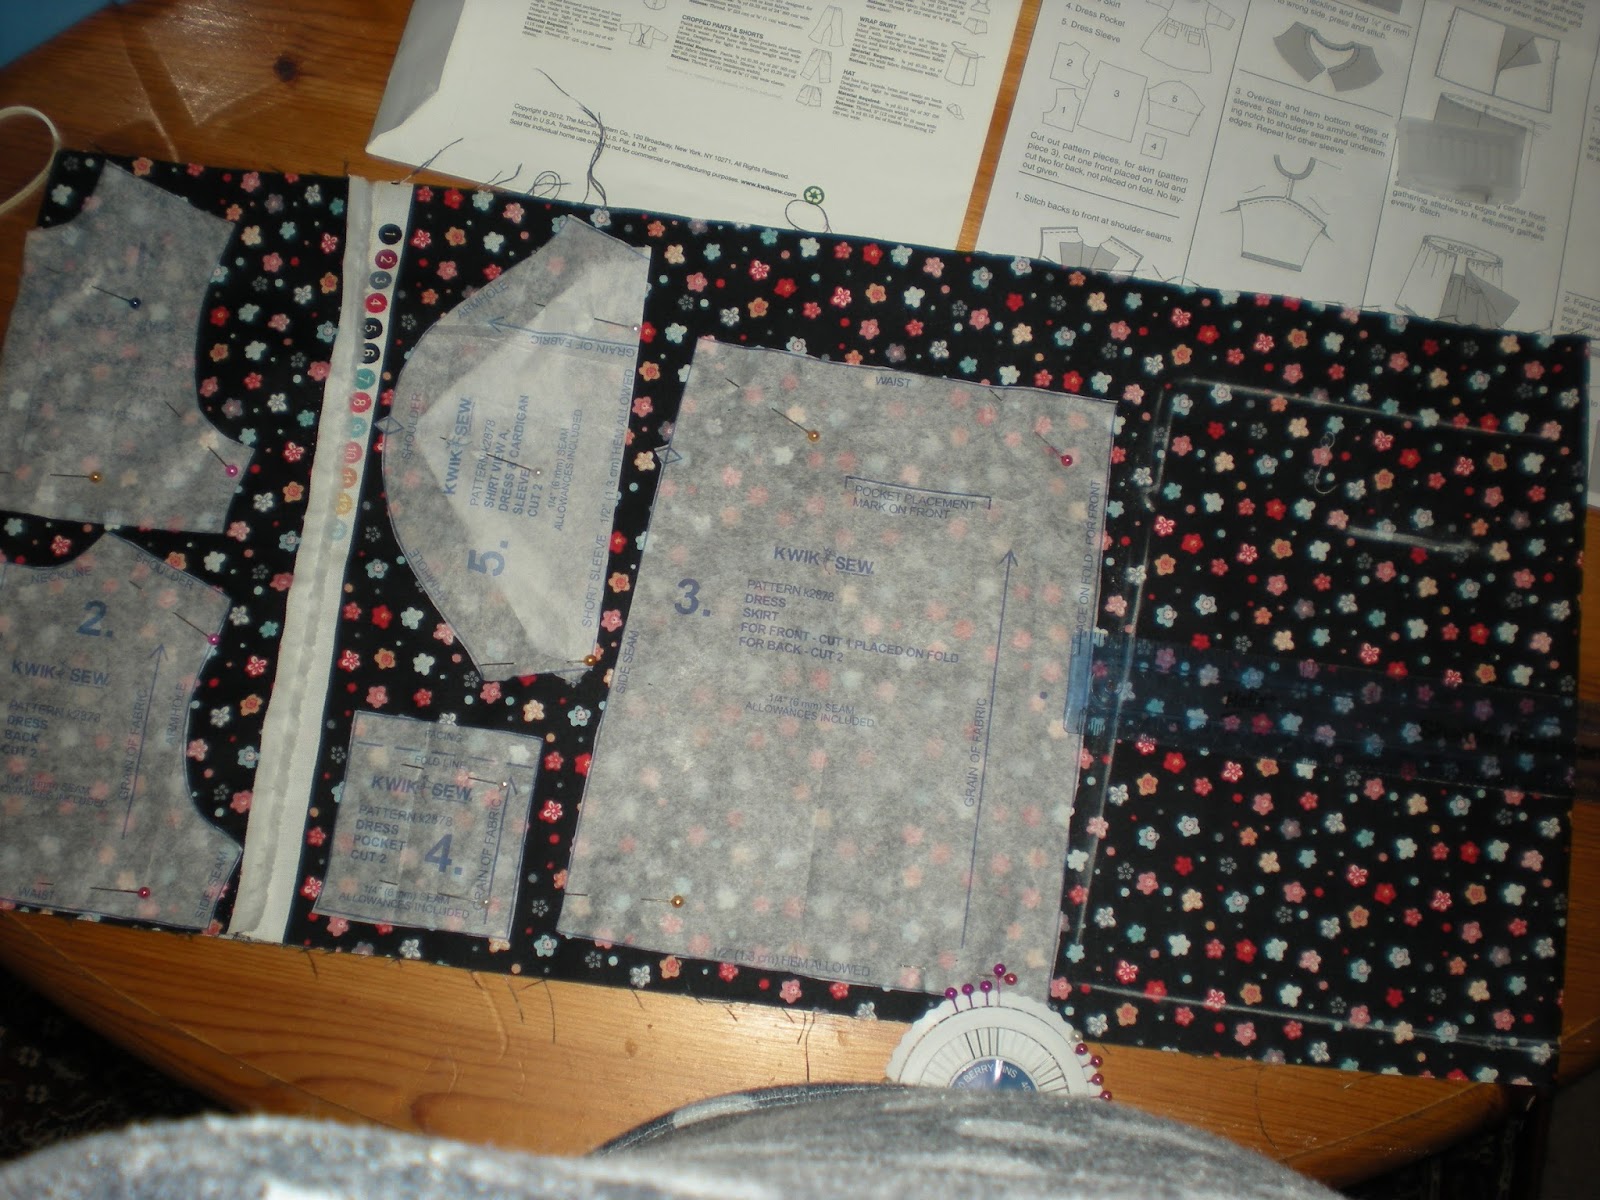
Pin the dress top pieces in place on the left side as shown. Then pin the front skirt right on the fold on the right of the fabric. Take your Tailors Chalk and a ruler and carefully draw exactly round the pattern piece.
Carefully remove the pattern piece and move it along next to the markings to cut out the back skirt. Pin that in place too. You need to take the sleeve pattern and fold the lower sleeve carefully along the short sleeve lines and pin that sideways next to the back skirt with the pockets underneath.
Take your scissors and very carefully cut around each pattern piece remembering to cut the little triangles facing outwards as they are important. A lot of adults make the huge mistake of just snipping into the points instead of cutting around them, but this is wrong and it means that if you need to make the seam a bit smaller you can't because you have cut into it. So learn the correct way now.
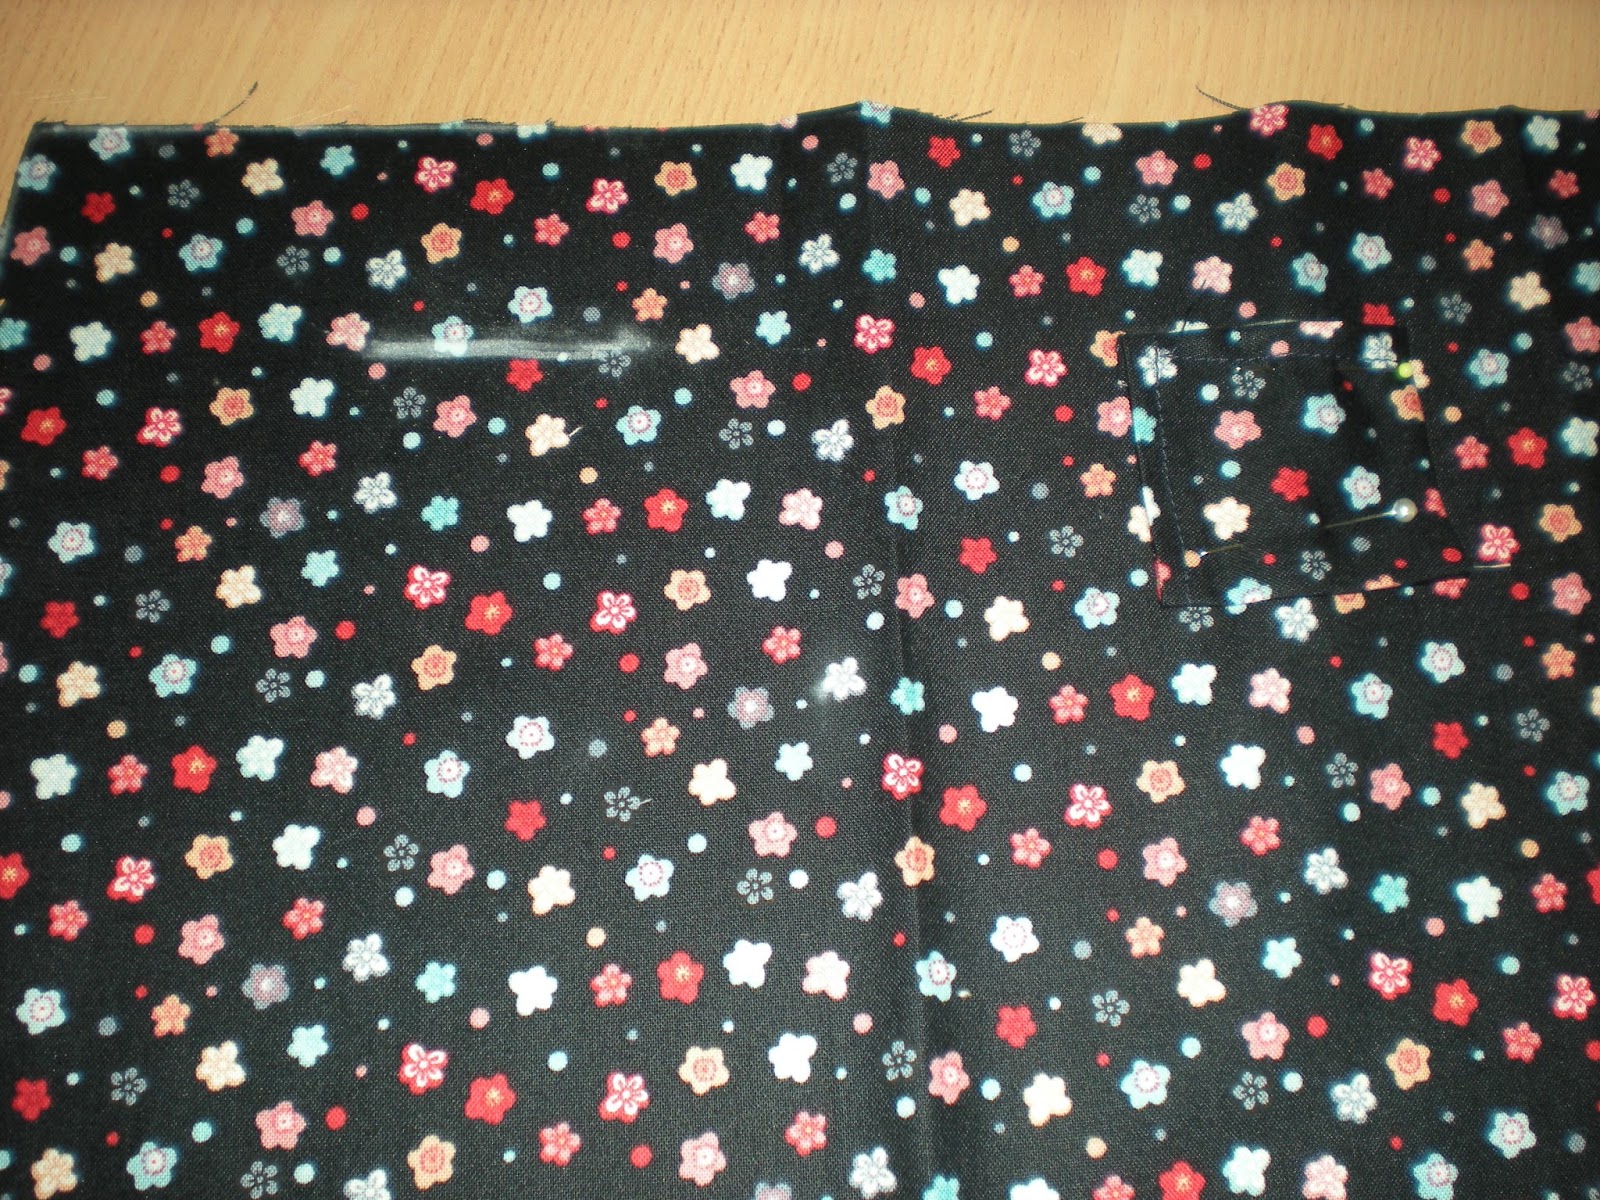
Using your tailors chalk again mark the position of the pockets. If you look at the frompnt pattern piece it shows you exactly where to place them. On this photograph one pocket is already in place. To make the pocket turn under the top by 1/4" and sew it down iether with your sewing machine or a neat hand sewn back stitch . Press the seam allowance, again 1/4" to the inside on the other three sides. Stitch the pocket to the skirt front lining up the top with the markings. Dont forget to leave the top open!
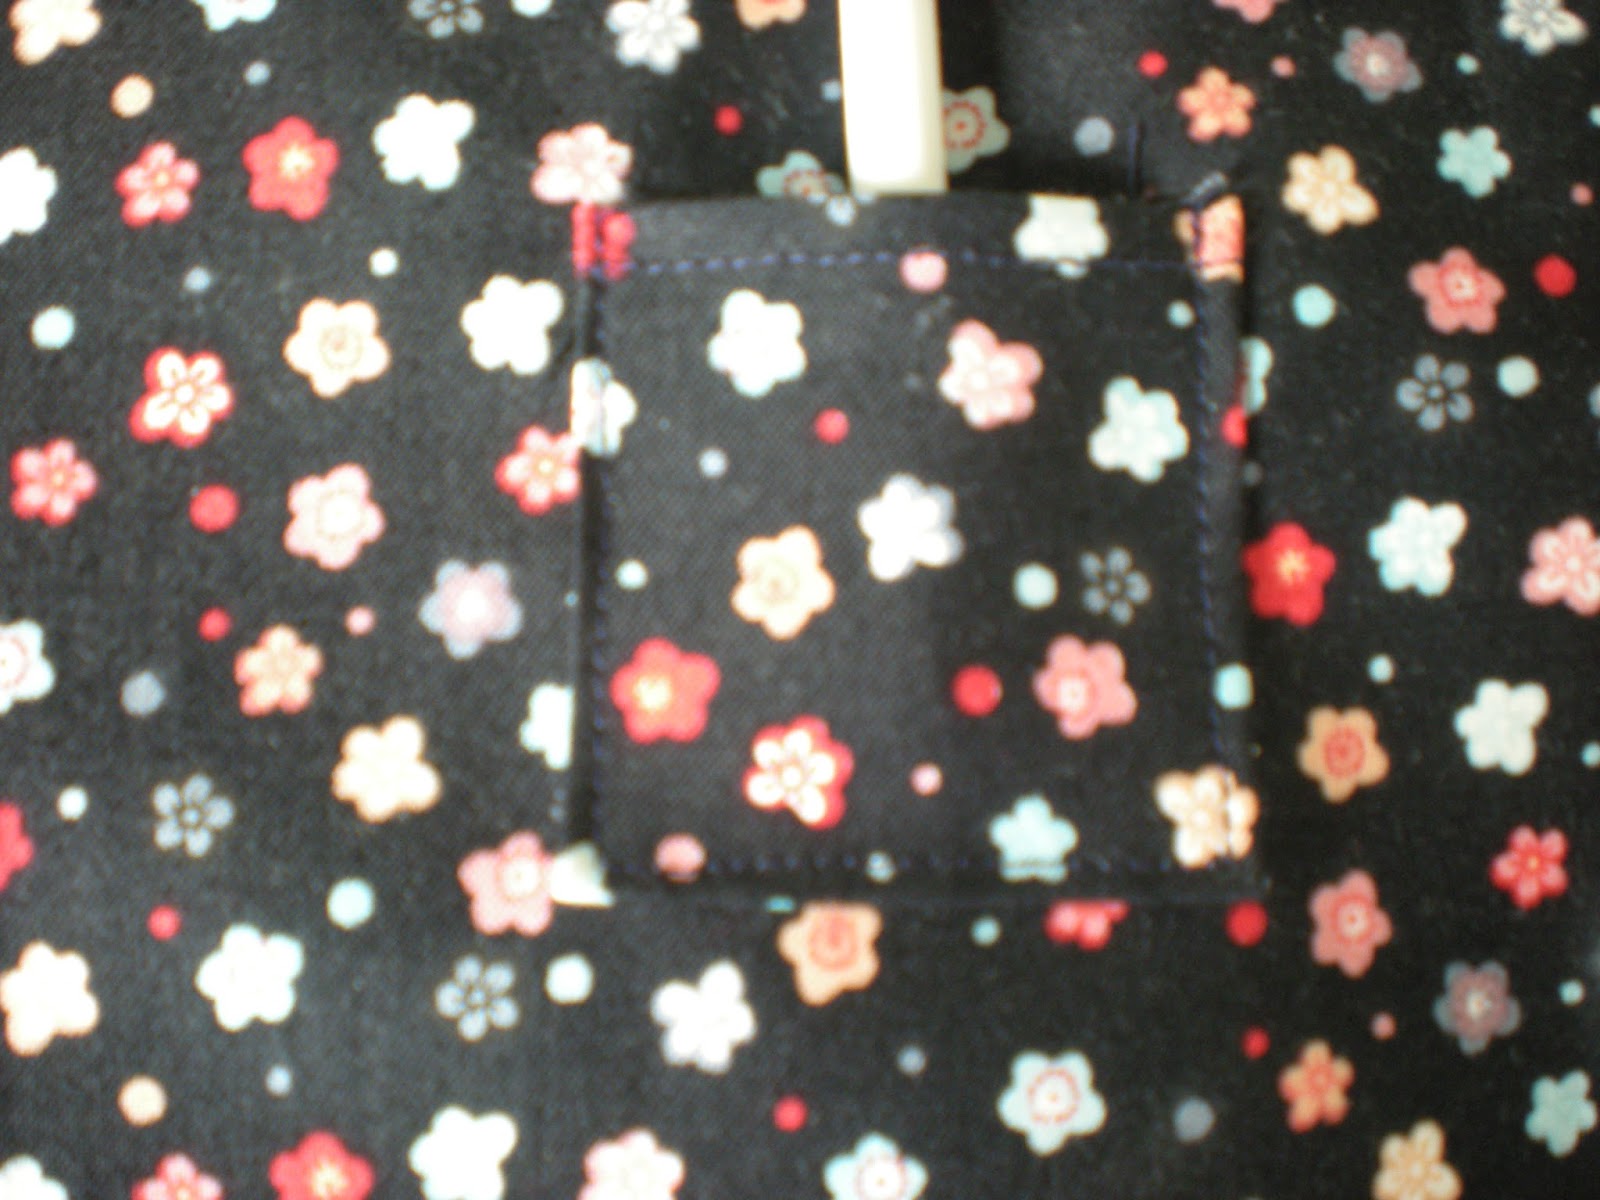
This is the pocket sewn in place.
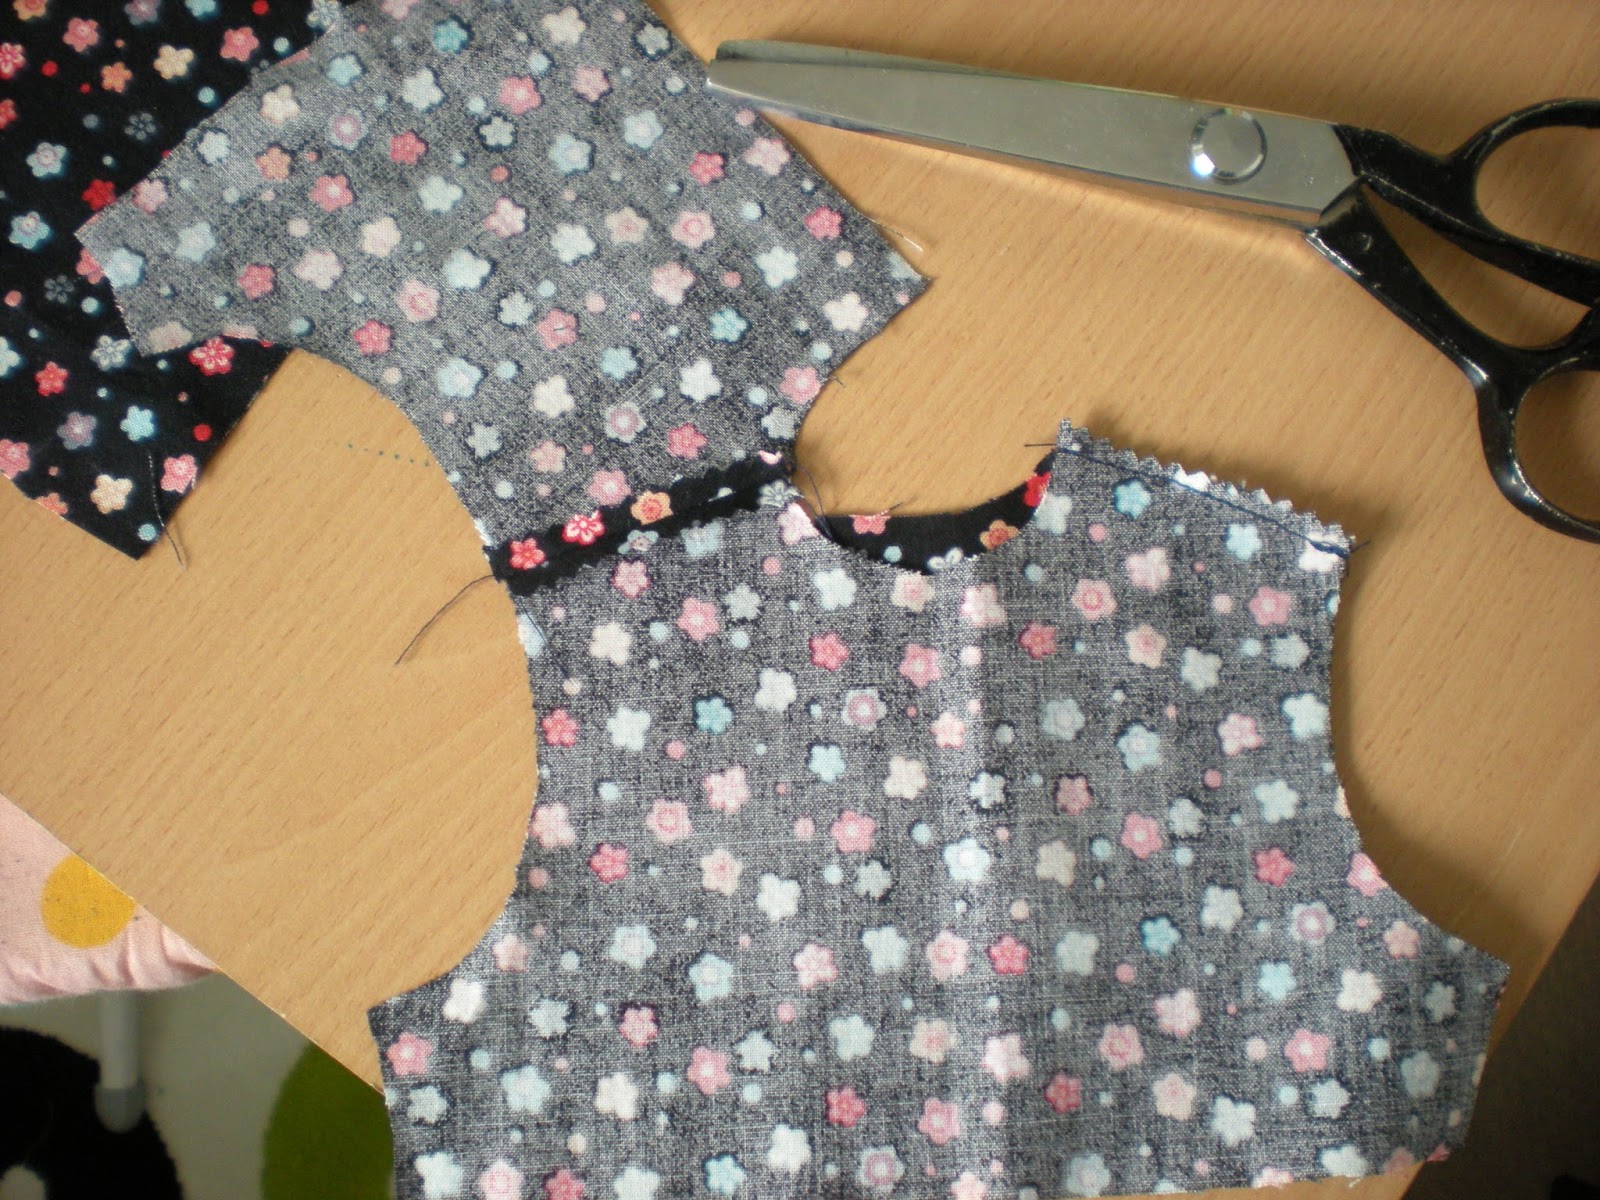
To make the bodice, (the bodice is the top part of a garment) sew the shoulder sea s together and neaten the edges. You can use pinking shears or if you have a sewing machine use a small zig-zag stitch.
You should now have something which looks like this. Neaten the sleeve edges next. Zig zag or pink the edge and turn under and top stitch.
Now to put the sleeves in. This is the hardest part because you have to sew two different shaped pieces together without spoiling the appearance by making any pleats or gathers show in the right side. A lot of adults struggle with this I can tell you.
So, matching the triangle to the shoulder seam and pinning the ends together start to pin the sleeve onto the sleeve opening using a lot of pins so that it is going in evenly.
To make it easier, close to the edge of the sleeve put a row of running stitches and pull them to gather the sleeve very slightly. You will find by doing this the sleeve goes in perfectly . If it doesn't, use your seam ripper (in the sewing box) to take your stitches out and try again.
You now should have this! Neaten the seam edges as before .
Then right sides together stitch the sleeve seam and side seam all in one go. Neaten the edges and press. Turn right sides out and press again.
That's the bodice done, so now we have to make the skirt part. Right sides together and matching the notches (the tiny triangles you cut out) stitch the side seams and neaten the edges. Press. Pressing is important, it makes the garment look professional and accomplished dressmakers and tailors press every seam every time they sew one. Whenever I start sewing I always set my ironing board up too and I have things like a pressing cloth and a sleeve roll and many other things ready too.
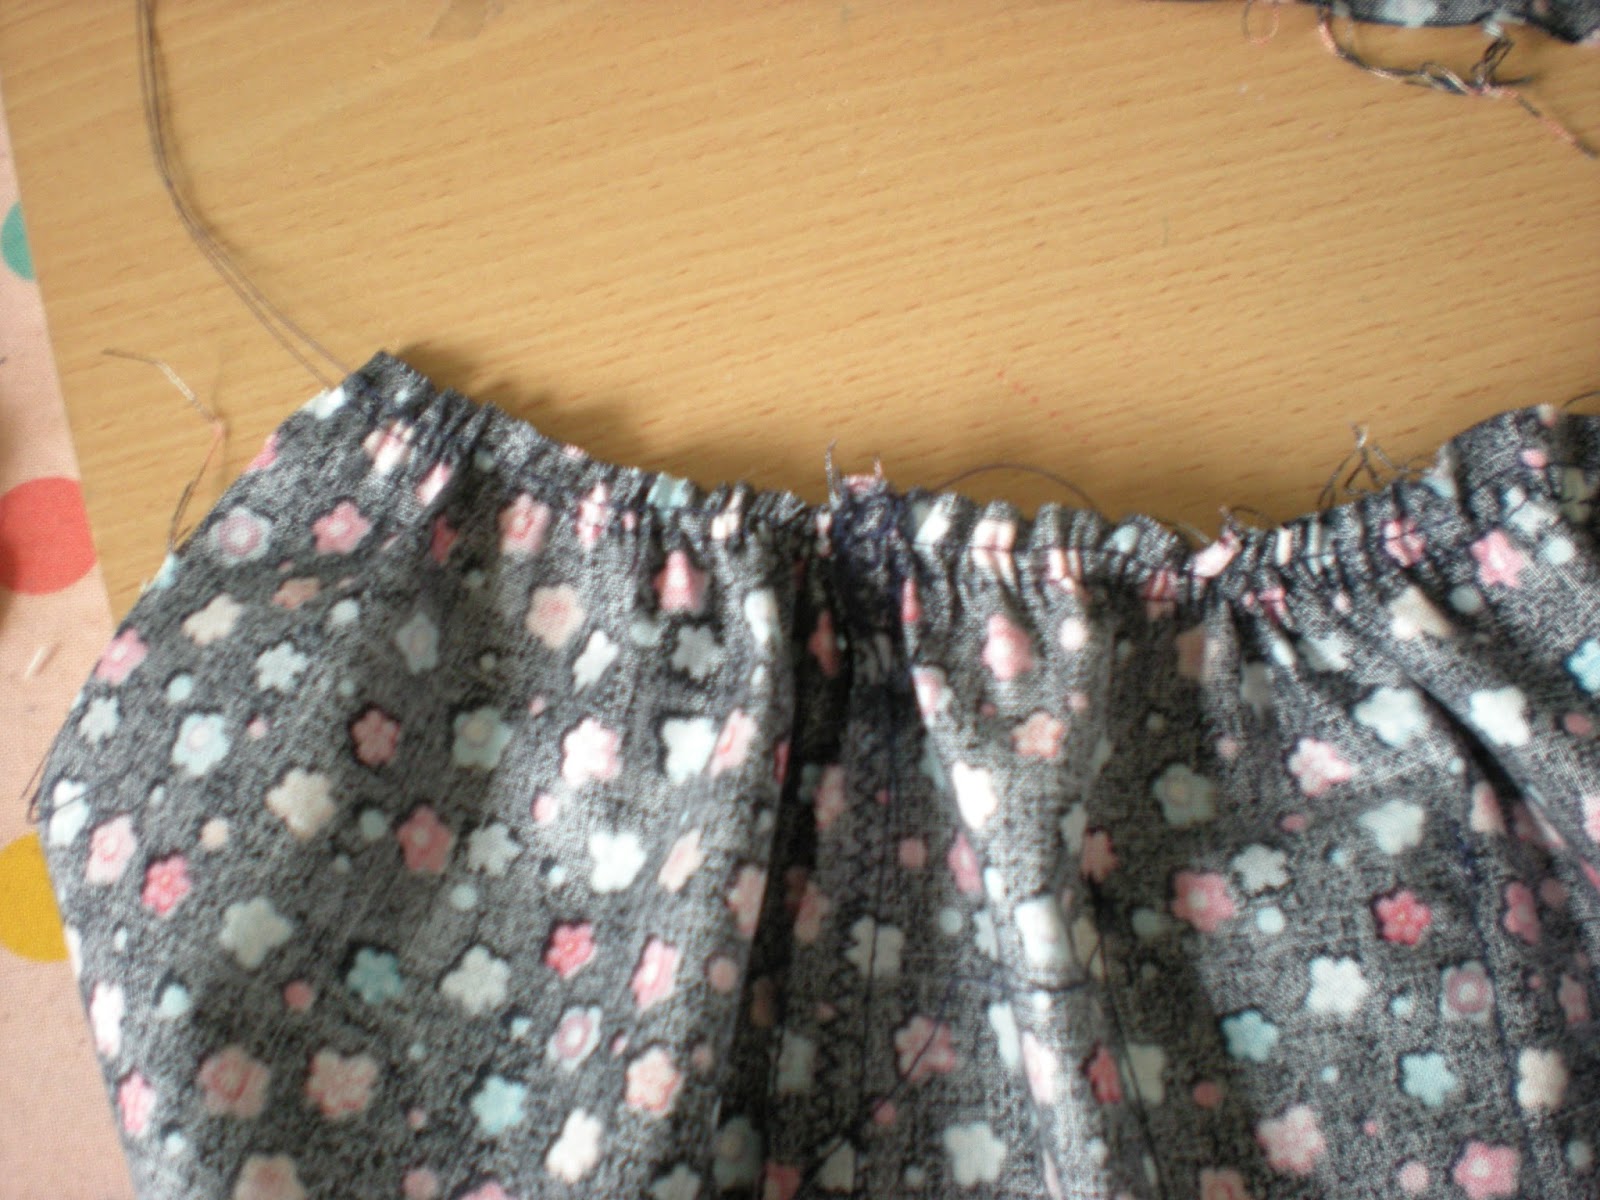
Very close to the edge of the skirt sew two rows of running stich to make the gathers. If hand sewing use a small running stitch with a knot in the end. On a machine use a long straight stitch. Start to pull the gathers up
Put the bodice and tbe skirt together, right sides together. Match the side seams together and adjust the gathers so that they are the same size as the bodice. Make sure that they are distributed easily and pin together. Sew the bodice to the skirt , neaten the seam and press.
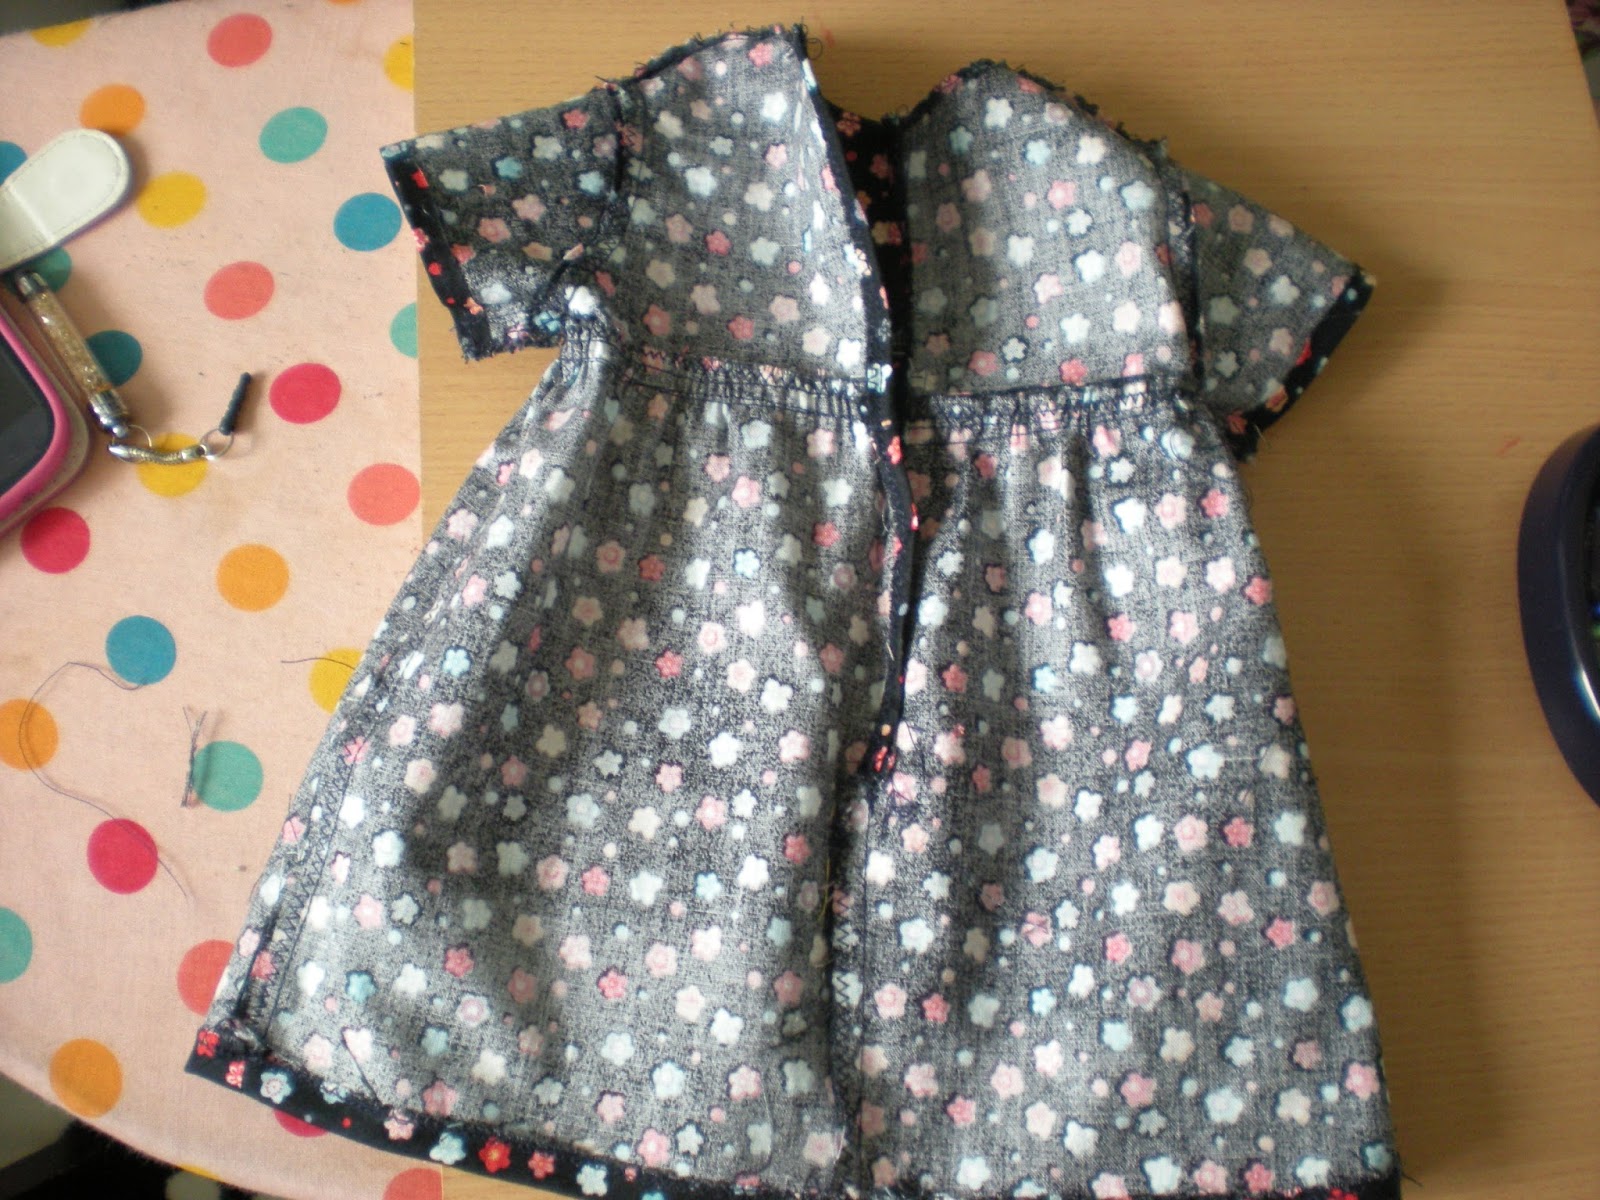
On the skirt pattern back there is a dot. Mark this position on the skirt back because you need to sew the back together from the bottom to this dot. Above it will be the back opening so you can get it on to your doll easily.
To finish the back opening neaten the edges and fold the ends in by 1/4" and sew them down with a straight stitchYou now need to think about how you are going to fasten the back. You can use press studs which you sew in yourself. Sew on press studs choose a small size.Or you can use one of these kits which are great fun and very easy to use, Non sew poppers they come in lots of sizes and lots of colours. In the kit is everything you need although you can purchase additional tools. I use the pliers but you do not need them to start off with, especially when using these tiny ones.Pliers for non sew poppers before you pipit one on your garment read the instructions and do a practise one. A tip for you is to put the top one on first. Cover the back with tailors chalk and press the front and back openings together with your fingers. The chalk will leave a mark where the bottom bit goes!
So, that's the dress almost finished just the hem now. Zig-zag or pink the end. Turn it under 1^4"and stitch it down iether buy hand with a tiny slip stitch or by machine with a straight stitch
Give it a final press and there it is finished!
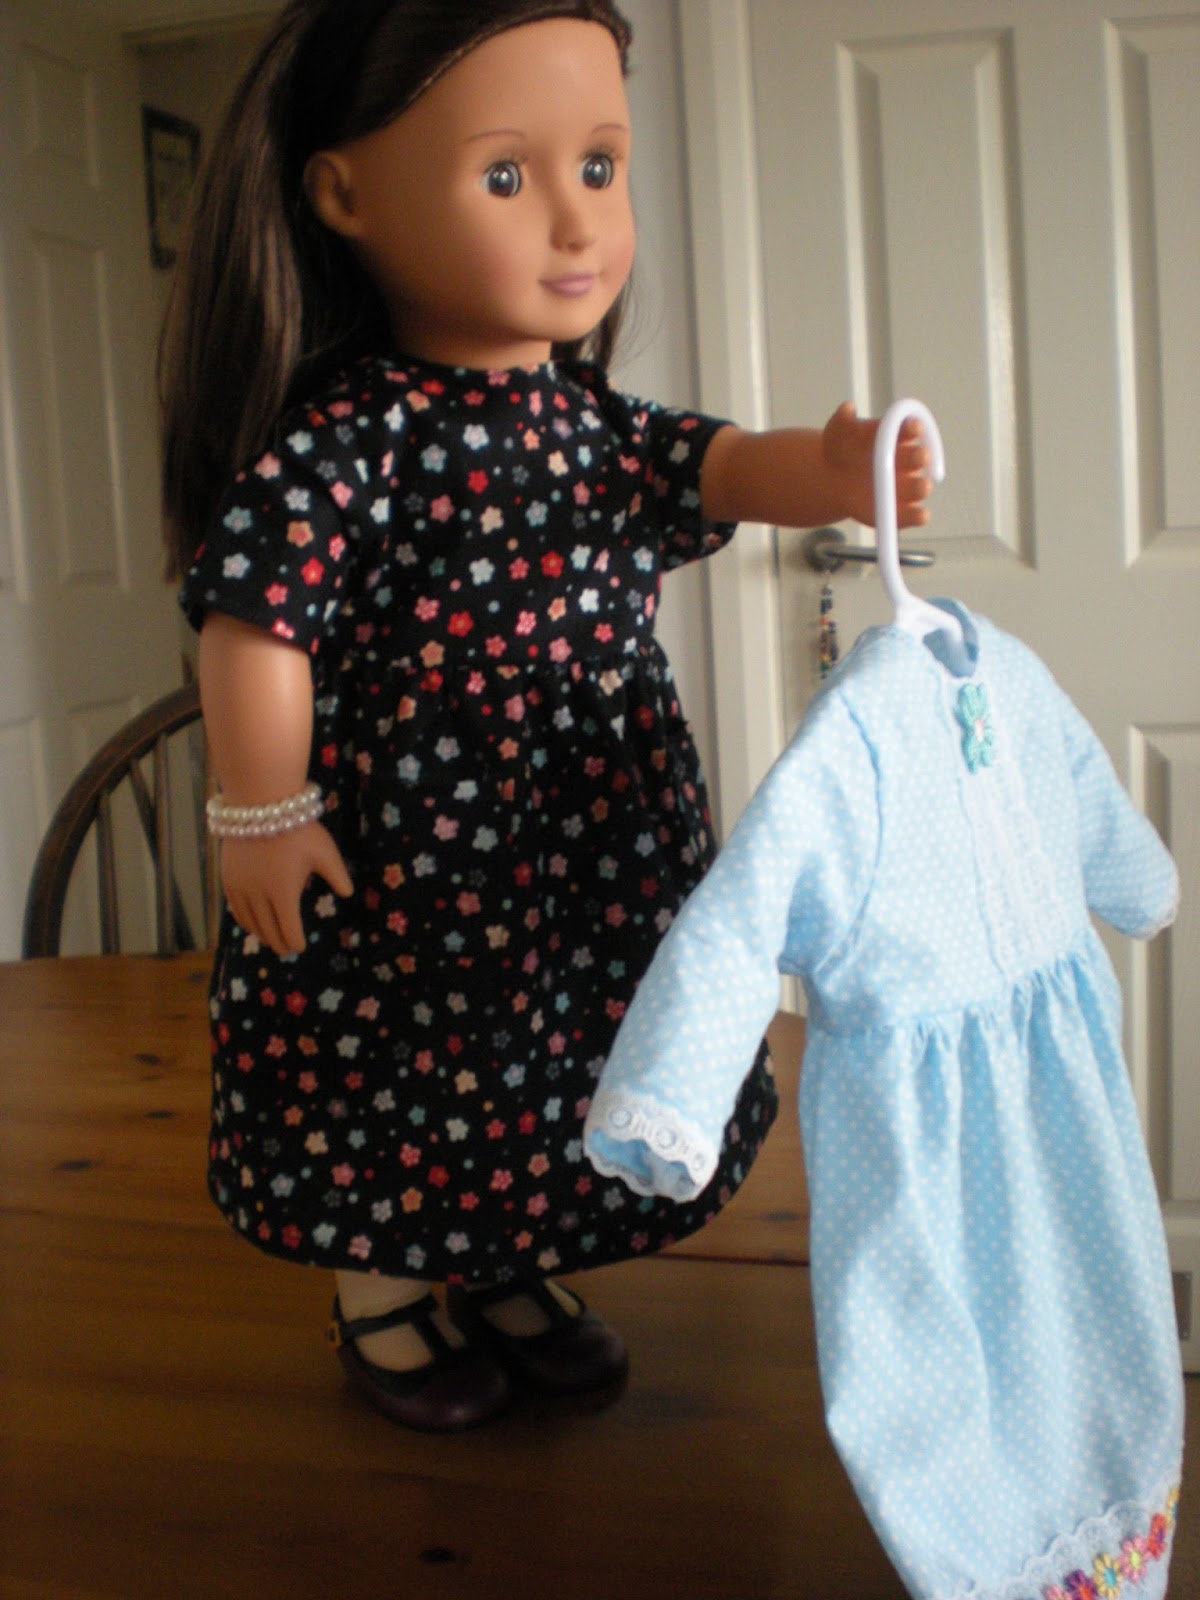
And here is Annie wearing her new dress, don't you think she looks lovely in it? The pockets are useful too, you could put a tiny toy in one or cut out a little handkerchief.
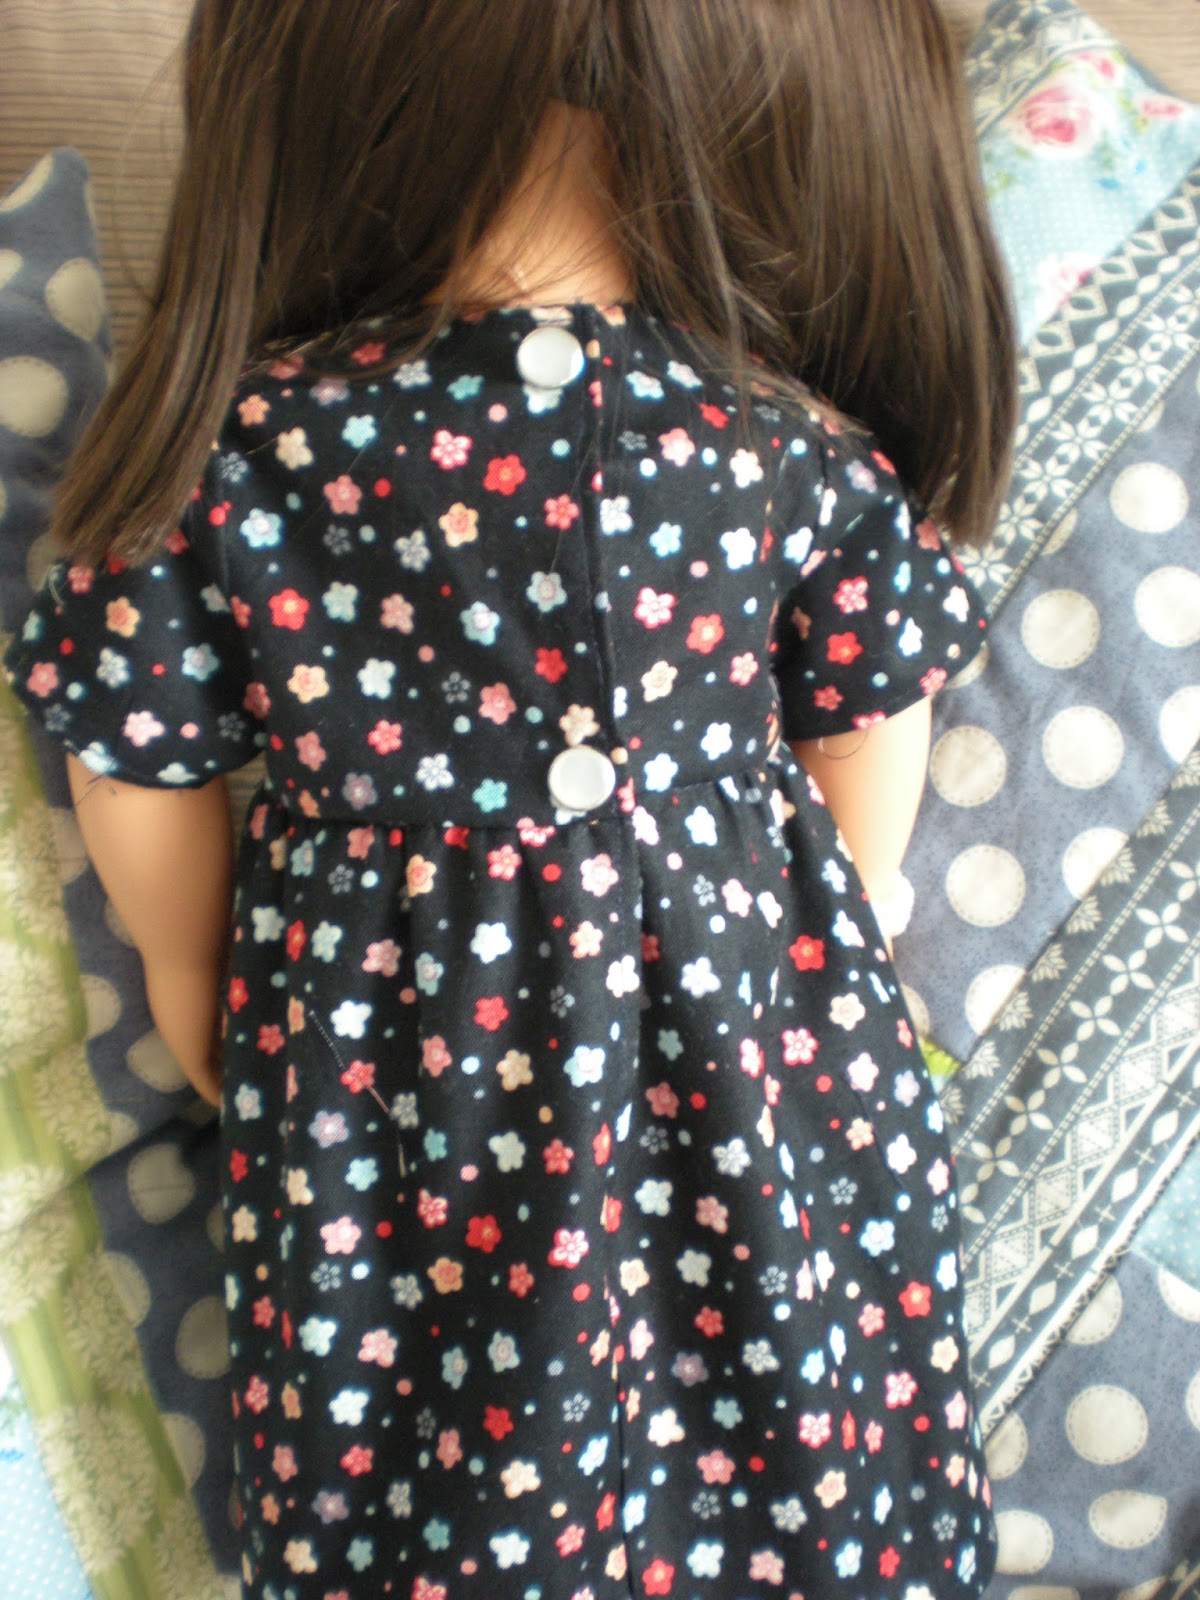
This is the back showing the non-sew poppers.
To make this dress which looks like a skirt and top. Use some of the white from your fabric pack and sew lace down the front and on the edges of the sleeves. Cut the skirt out of a different fabric and make it just the same as the previous dress. Add a ribbon bow at the waist. If this is for a very small child I would sew the ribbon on securely at one side or leave it off altogether
For the blue dress I added lace to the front and hem and sleeves. Then I added this pretty floral lace which you can buy in most haberdashery shops. I added a small flower to the front. You could make her a headband to match.
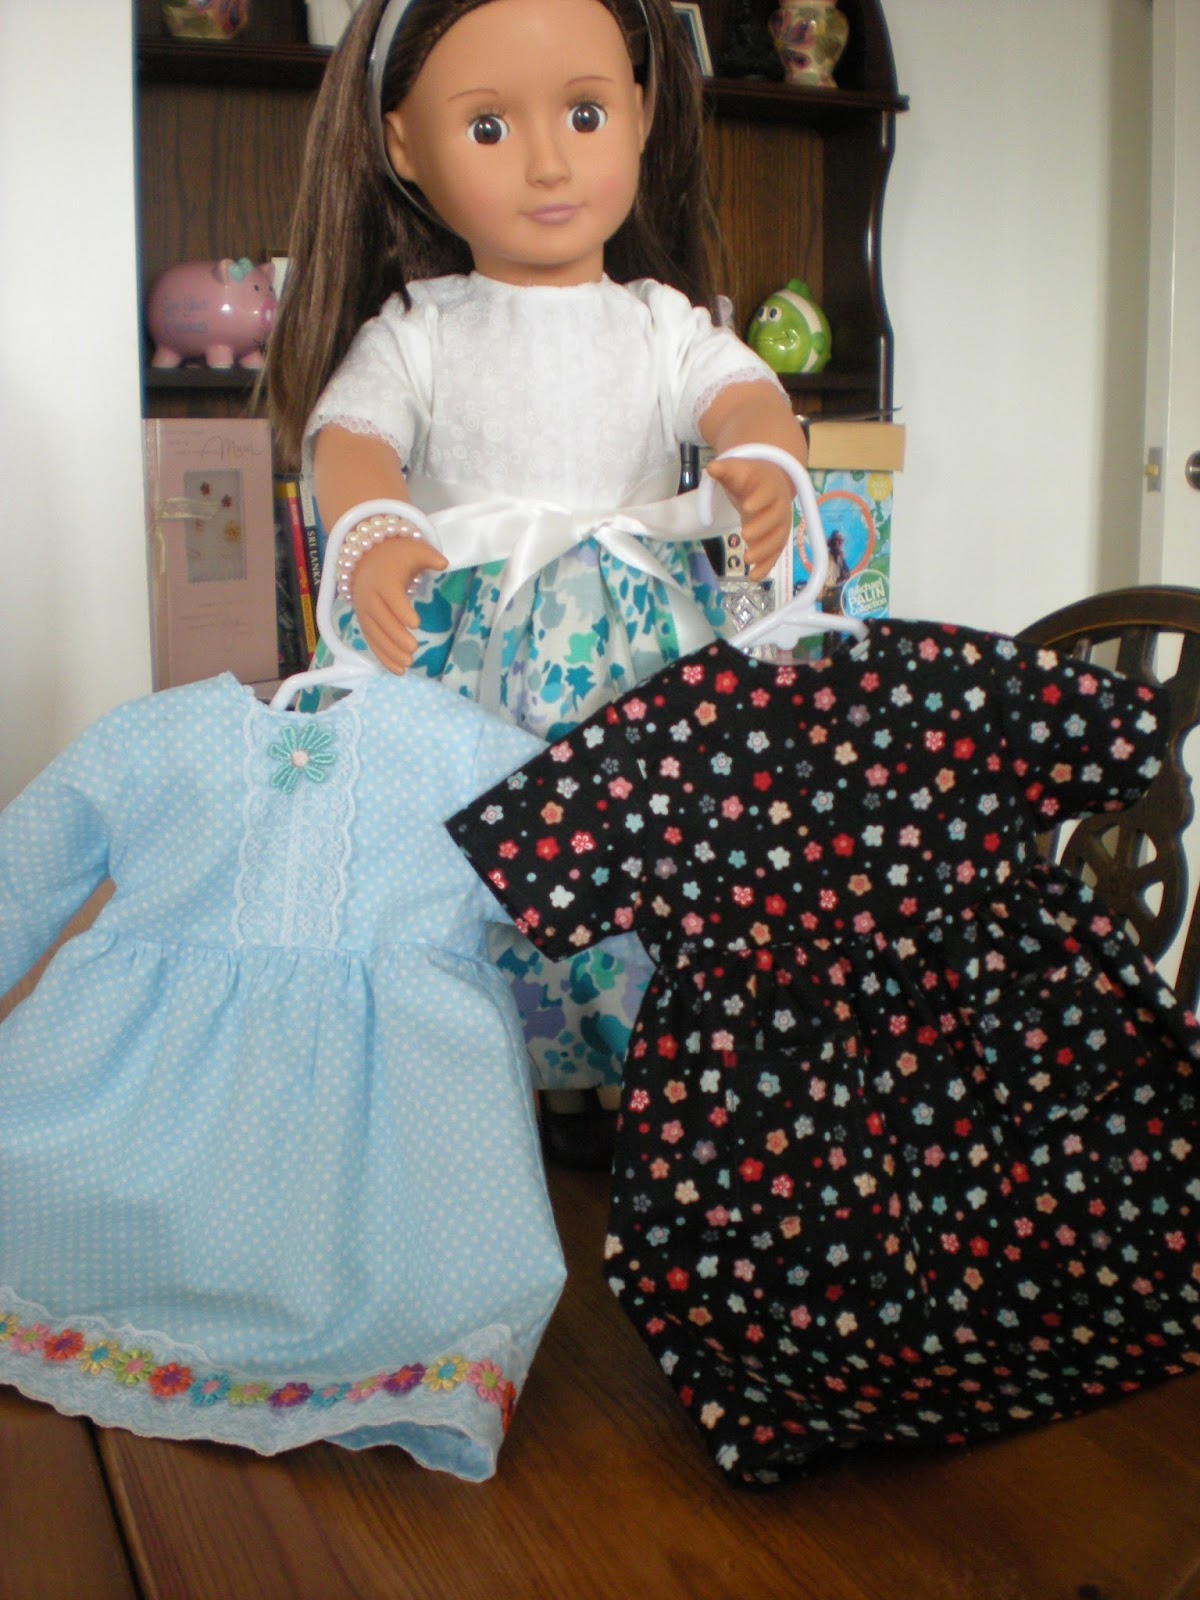
These are the three dresses all together. Now Annie has some pretty summer dresses to wear.
I hope that you have enjoyed this blog post and that you will make some for your doll. You can have fun with trimmings and fabrics too.whatever you make nobody else will have one like it!
Please do ask permission to send me a picture of your makes and if you have a question please fill in the contact form
Happy sewing to all my Cadetts.
Angela