Fast Shipping!
Free for Orders £25+
Free for orders over £25

Easter is a delightful time of year, Even if you do not celebrate the Religious festival, we all enjoy heralding the joy of spring and the new life which is emerging after a long cold winter.
My aim is to give you some ideas to copy, but don't just stop there gather your children and grandchildren and enjoy making some fun Easter decorations and table wear.
This post is suitable for beginners and children right up to advanced sewers as everything can be made either by gluing, hand sewing, machine sewing, and with embelishments either done with basic hand embroidery or with an embroidery machine
These are some of the pretty items I made, and you can make them too, they really are very easy. With each item I will give you alternative ways of making it so that they are suitable for everybody to join in.
You will need to gather your supplies for these Easter crafts, first of all we need to make templates for bunnies, chickens, eggs and anything else you like. You can draw them freehand onto thin card or download and print off the templates which are easily available online. Do make sure that the designs you choose are not copyright protected.
I used simple hand drawn shapes, some of which I scaled up for the table mats.
You will need a supply of pastel coloured felt, mine is from MinervaCrafts . You can purchase a few sheets of your favourite colours Individual felt squares or they sell them in larger packs .
I strongly suggest that if you have children helping you that you use these wonder clips Wonder Clips this is the small pack, they come in different amounts and a smaller size so do contact Jaycotts for more information and prices.Contact details are at the bottom of this blog post.
Even if you do not have children this is a great product which I use a lot in all my sewing as they are much easier to use than pins and are especially useful when you do not want holes in your work or are sewing lace.
You will need some ribbon, I really love this Gingham ribbon from Jaycotts Gingham ribbon but they sell lots of other ribbons too so choose what you like best. Ribbons at Jaycotts
First I am going to make some gift bags to fill with small Easter eggs and chocolate bunnies.
Cut out two squares of fabric for each bag and cut out your rabbit or chicken or egg shape - whatever you like best and stick it to the front of one of the pieces of felt.
This Prym Aqua Blue Marker is brilliant, and you can purchase refills too Prym Aqua Glue Marker this is great for positioning not only decorations like these, but zips and trimmings too. It is yellow in colour when it is first applied but don't worry because it dries clear and can be washed out. It has so many uses you will wonder how you managed without it.
Once you have positioned your shape then using an Open Toe Embroidery Foot stitch around your design with either a zig zag stitch or applique stitch. This foot enables you to see the area you are stitching clearly. This foot is for my Bernina Sewing machine, Bernina 350PE Sewing machine again do contact Jaycotts for current prices.
Open toe embroidery feet are available for other makes of sewing machines too.
Stitch just inside the ears to give an impression earlobes and embroider simple features by hand or machine.
The process so far can be done entirely with craft glue so long as the children are supervised of course.
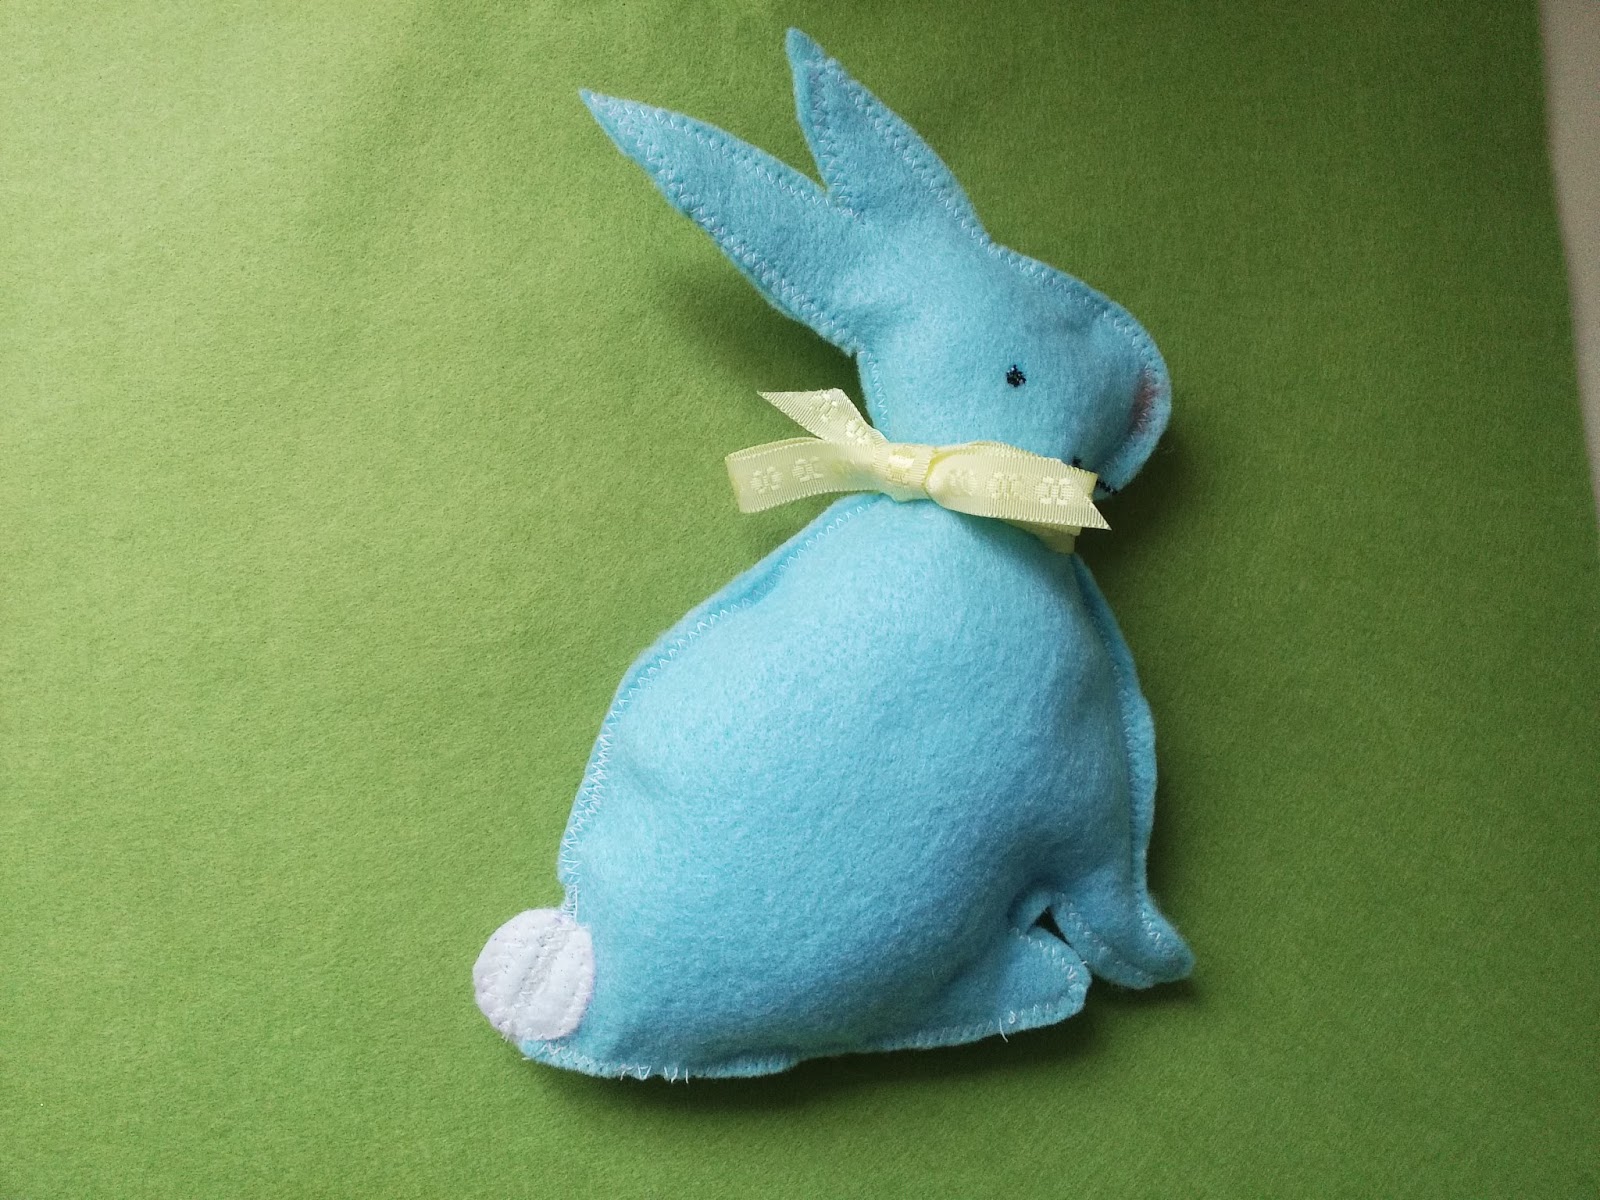
This is our bunny so far. You could add a bow to his neck or decorate him in whatever way you like. Or you may want to add a tiny pom pom for a tail.
Stitch on lengths of ribbon to the front and back of the bag on the back, marking the position with a marker pen to make the handles I used a vanishing ink pen Vanishing Ink Pen
Stitch around the three sides of the bag with a zig zag stitch or by hand with some embroidery thread and a small running stitch.Fill with sweets and chocolates and maybe a small felt Easter Bunny like the one below
Another idea is to cut out Easter egg shapes and make them into decorations which you can hang on twigs sprayed with white paint placed in a vase. Or you could attach them to ribbon to make bunting.
Cut out your egg shapes and decorate them however you like, with ribbons, felt strips, felt flowers or use the opportunity to practise some of the embroidery stitches on your sewing machine. Sandwich two shapes together with a ribbon loop at the top, Stitch around the outside by hand or machine leaving a gap in the bottom, stuff lightly with toy stuffing and close the gap. Simple!
Using the same method make Easter Bunnies to either hang up or to give as gifts. Please remember that they may not be fire retardant and should not be given to young children unsupervised. Also ensure that all trimmings are sewn on extremely securely.This is common sense isn't it.
Here are just two Easter Decorations, i am sure that you will come up with lots of ideas, this is just to give you a bit of inspiration.
We are going to make a breakfast set for Easter day. Take your egg cup and allowing for an egg, draw roughly around it make sure that the egg cosy will be big enough.
Using your Egg cosy shape as a template draw a rabbit or other shape to fit on it. Cut out paper templates in an egg cosy shape and a rabbit shape.
Draw round the templates onto felt using your disappearing pen and cut the shapes out.
Stick the rabbit onto the front of the egg cosy and draw some features on
Sew the rabbit shape into the base shape as before and embroider the features as before too.
Add a piece of felt around the bottom roughly cut to look like grass and stitch or glue in place . Stitch the front and back together to make a delightful egg cosy.
This is the finished cosy, you could use other designs instead of the bunny ,a simple flower shape would be pretty.
For Easter day what could look lovlier than these pretty felt place mats. Please note that if you do decide to make them in craft felt they are not washable.
Cut out a rectangle, you can use pinking shears if you like and then stitch a decorative border all the way round. I used a zigzag stitch.. You could hand sew a running stitch if you prefer.
Draw a simple shape, I chose a chick, and using temporary glue stick it to the left of the mat. Cut out a wing shape in the same felt and stick that on too. Stitch the chick down as we did before and add a few lines of straight stitch to the wing to represent feathers.
Embroider an eye and stitch on a beak. If you are gluing your table mats instead of stitching them then draw the features on with a felt tip pen.
Cut out a very simple flower shape and a centre in a contrast colour .Stitch the flower down just in the middle.
And that's your Easter breakfast set made. This really is a lovely project to make with your children or with your children's group.
Table linen
I was practising some embroidery on my new machine and came across the Easter egg in the centre of the design. I then found another design and wanted to learn how to combine the patterns to make one design.
The machine instructions are so easy to follow. In Editing mode you can change positions of designs, add Lettering and other designs so long as the combination fits into your embroidery frame area.
It is a touch screen and you are able to drag designs into position with the touch of your finger. There is a ROTATE button which I used to reverse the design on the bottom so that I could mirror it on the top.
The machine enables you to change the colours and to manipulate lettering into curved shapes. There is such a lot this machine can do and if you are travelling near to Chester , which is well worth going to for a short break anyway, do pop into Jaycotts and ask for a demonstration.
This is the machine itself Brother Innov-is NV 800E it is an embroidery only machine. If you are short of space then there is an alternative choice of a machine which combines an embroidery machine and a sewing machine. For more information and to discuss the options then do please contact Jaycotts, the details are at the end of the post.
You will need stabilisers and embroidery threads too. I discuss all these things in two previous blog posts . They are on my own blog and also on Jaycotts Blog which you can read here Jaycotts blog
If you are not reading this post on Jaycotts newsletter then do sign up on the top of this page Jaycotts and you will then be the first to read about new products and hear about sales and competitions.
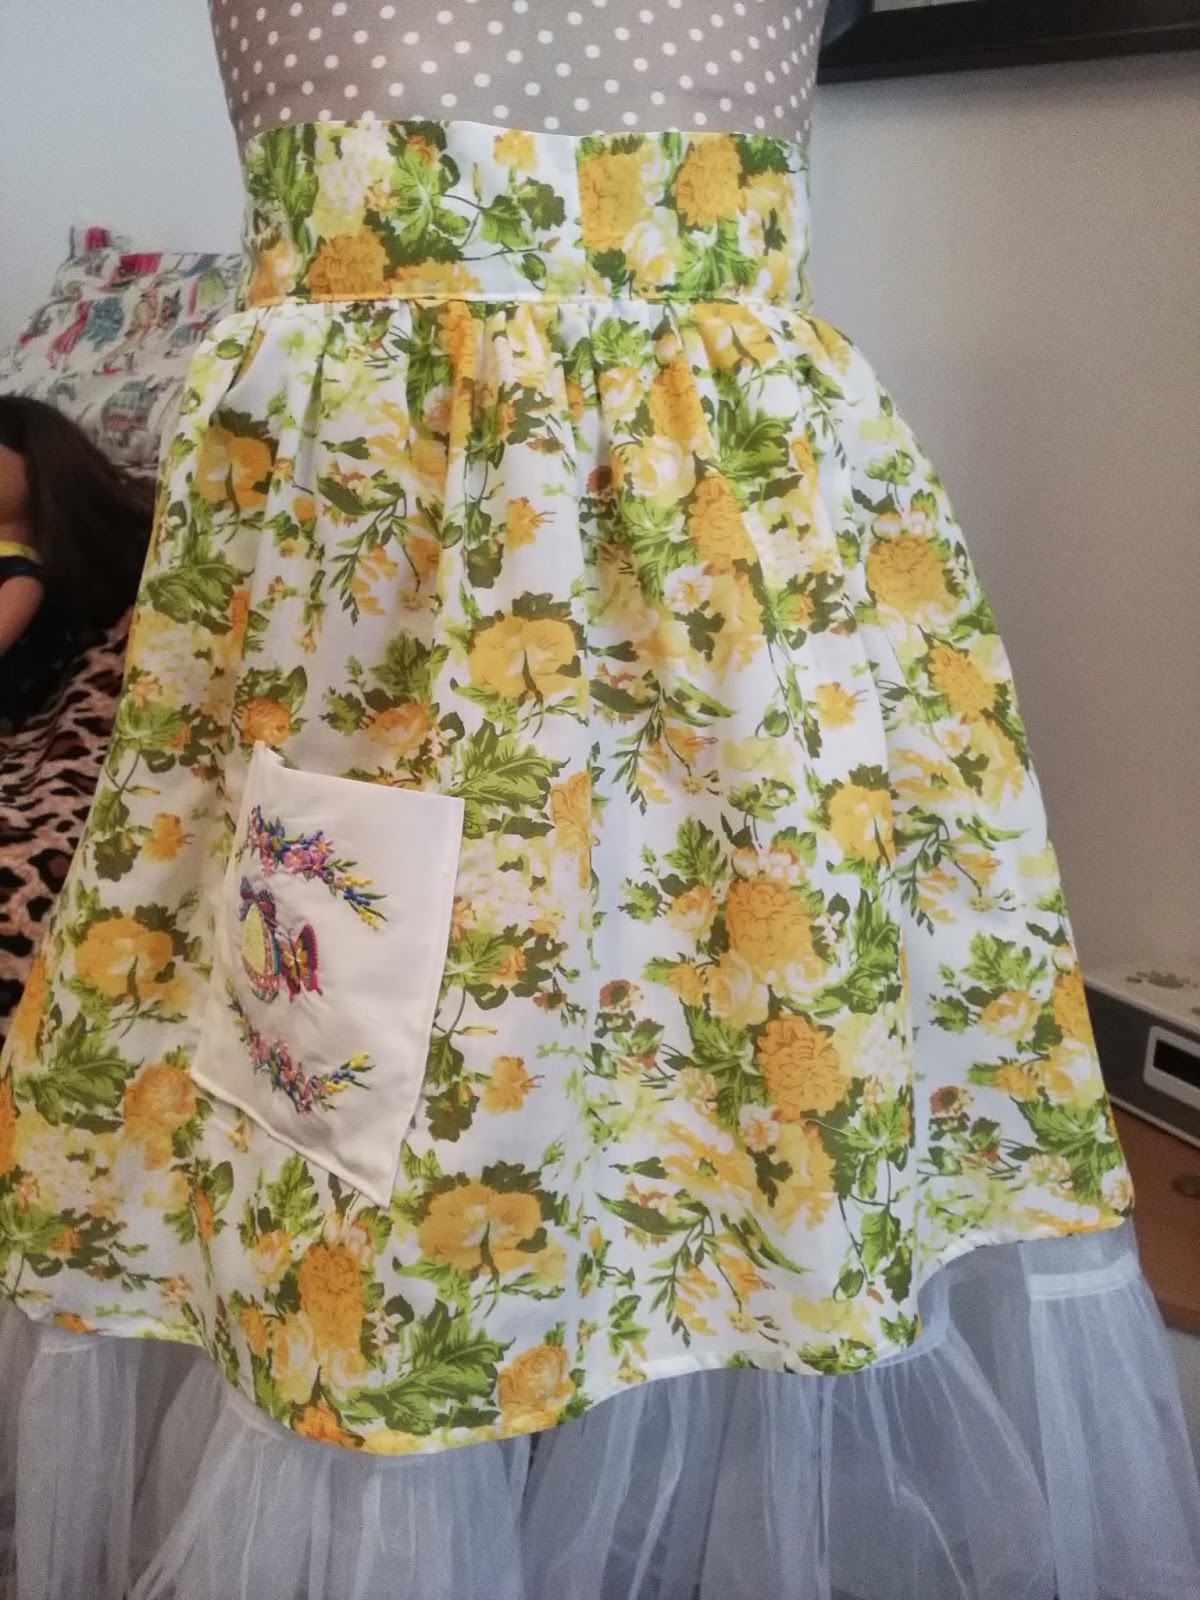
Aprons are out of fashion but are totally practical garments. How many times have you wanted to wear something nice because you have guests but are worried about splashing your clothes? They make perfect sense!
Cut a length of fabric one and a half times the width of your hip measurement from one side to the other. I shaped the hem on mine to make it curve at the sides and stitched a simple double fold hem. Cut a long piece of fabric to make the tie and fold it in half lengthways. Stitch it together right sides together along the ends and the long edge leaving room to insert your gathered apron skirt.
Turn the band right sides out. Press. Stitch the apron to the band right sides together leaving one side free which you then will stitch down by hand.
I turned my embroidery into a pocket by hemming the top and turning the sides in, mitering the corners. Position on the apron and stitch down on three sides. Press.
You can add a plain pocket or add an applique design if you like instead.
I made my tie long and wide so that it would tie into a huge bow at the back. This is a gift for a friend who I know loves vintage style clothes and it will be perfect for her.
To make a tablecloth cut a piece of fabric to the length you require, and hem it with a double fold hem, or you could overlock the edges or sew a narrow rolled hem.
The fabric is polyester cotton from MinervaCrafts this is the one I used Polycotton in Yellow
It is really pretty for spring and washes easily too.
There are a lot more other prints including pretty butterflies and sweets as well as plain colours on Polycotton fabric it is an inexpensive fabric too.
I made a set of table napkins too in the same way as I made the tablecloth, do make them large enough, and tied them with a ribbon bow tucking some chocolate inside.
This is a really simple collection of spring and Easter Tablewear and decorations. They would make lovely gifts too. The bags of chocolates will be lovely for little guests over Easter. Why not make larger bags to hold a bigger Easter Egg?
Everything is very easy to make and is very inexpensive too. So I hope that you will enjoy making these. Do let me have your feedback and I would love to see pictures of your lovely Easter makes
Thank you for reading this post.Angela xSewangelicthreads.blogspot.com