Fast Shipping!
Free for Orders £25+
Free for orders over £25

It is daunting knowing where to start isn't it, so I am going to talk about the basics of cutting out and why you need to follow the guidelines on your sewing pattern. I am making two garments, one in velvet the other in suiting and at the end of the post you should be well on your way to cutting out with confidence.
You can start with any garment but I have chosen a pair of straight leg trousers which are actually simple to make and always look good on.
All the links to patterns and haberdashery are given in the post making it easy for you to place you order with Jaycotts
When choosing a pattern consider what styles you already own and like and look for patterns which are similar. After a while you will want to make garments which are new to you, so it is a good idea to go and try clothes on and to take a photograph if at all possible, then you can look for patterns in a similar style.

The pattern I have chosen is one I have made before. There is a straight leg option as well as dungarees, so you will be able to use this pattern many times. The pattern is McCalls M7547
Do take a look at other trouser patterns, I am fond of McCalls and they have some great patterns
I am also briefly going to mention sewing with a fabric such as this velvet which has a "nap" and therefore needs special treatment. More about that later.
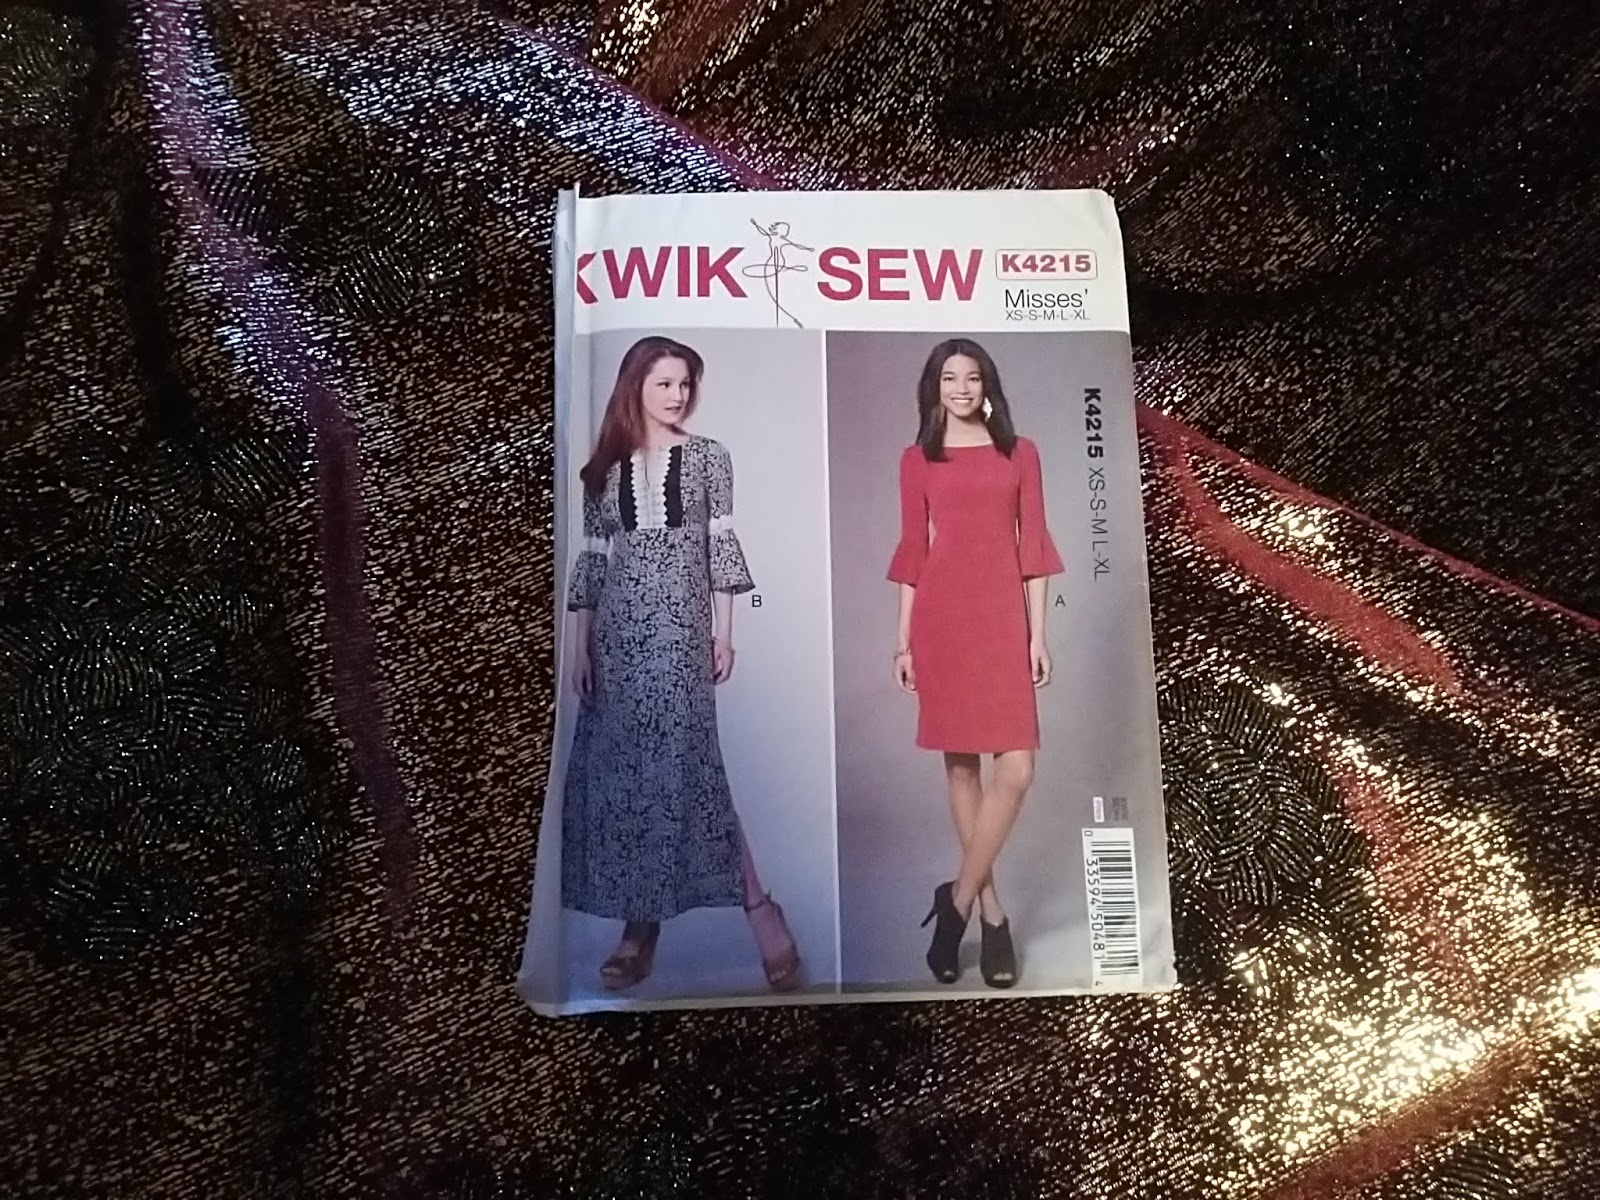
The pattern I used is Kwik Sew K42215
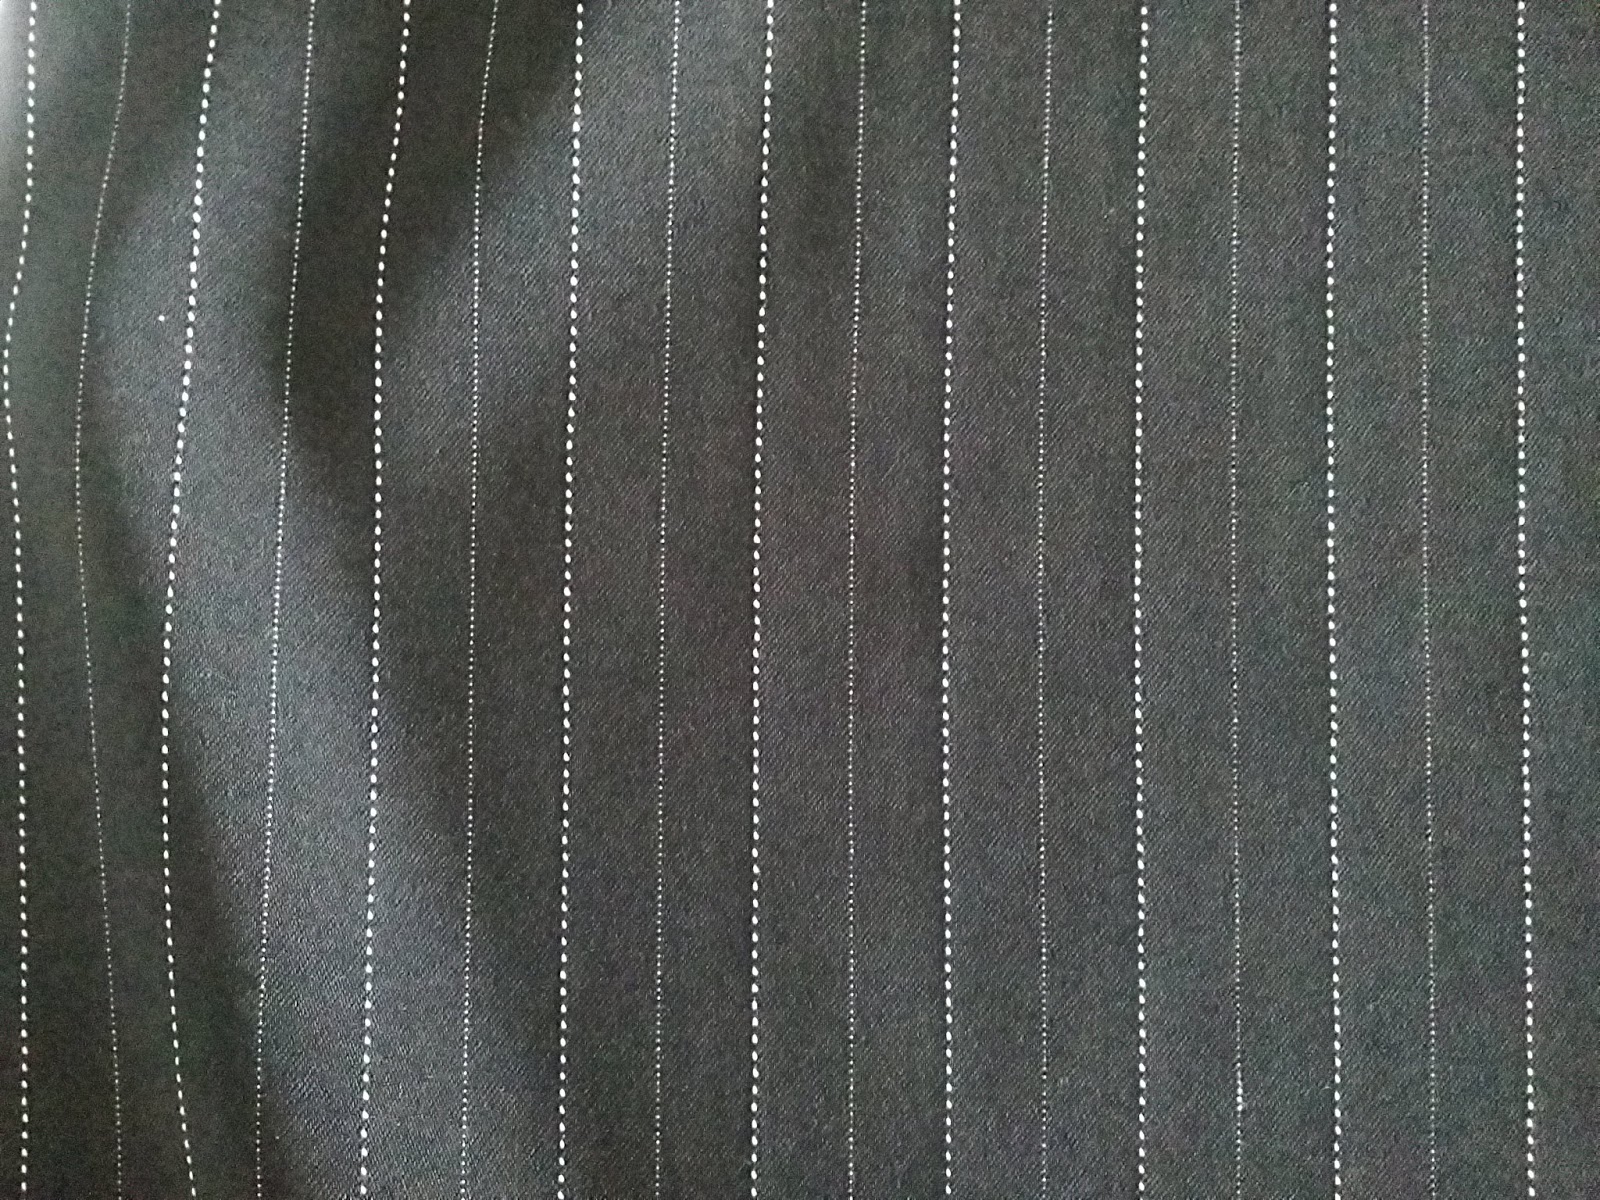
To make my trousers I chose a wool mix suiting which is widely available.
The first thing which needs to be done before any fabric is cut out is to shrink it. A lot of fabrics will shrink by up to 10% on washing so if this step is skipped your garment will shrink on first wash.
When purchasing your fabric the fibre composition will be shown on the label and from this you can easily find out by doing an internet search if the fabric is washable or not. Assuming our fabric is washable then give it a wash, dry it and iron it. If you are in any doubt then cut out an exact 4" square and put it in the washing machine with your next wash and measure it again after drying. If it contains a high wool/cashmere content the fabric will quite possibly have felted which indicates that your fabric is not washable.
It still needs shrinking though so use plenty of steam and a good pressing cloth and go over every inch of your fabric lifting your iron off the fabric rather than sliding it as you go along. Then hang the damp fabric up to dry.
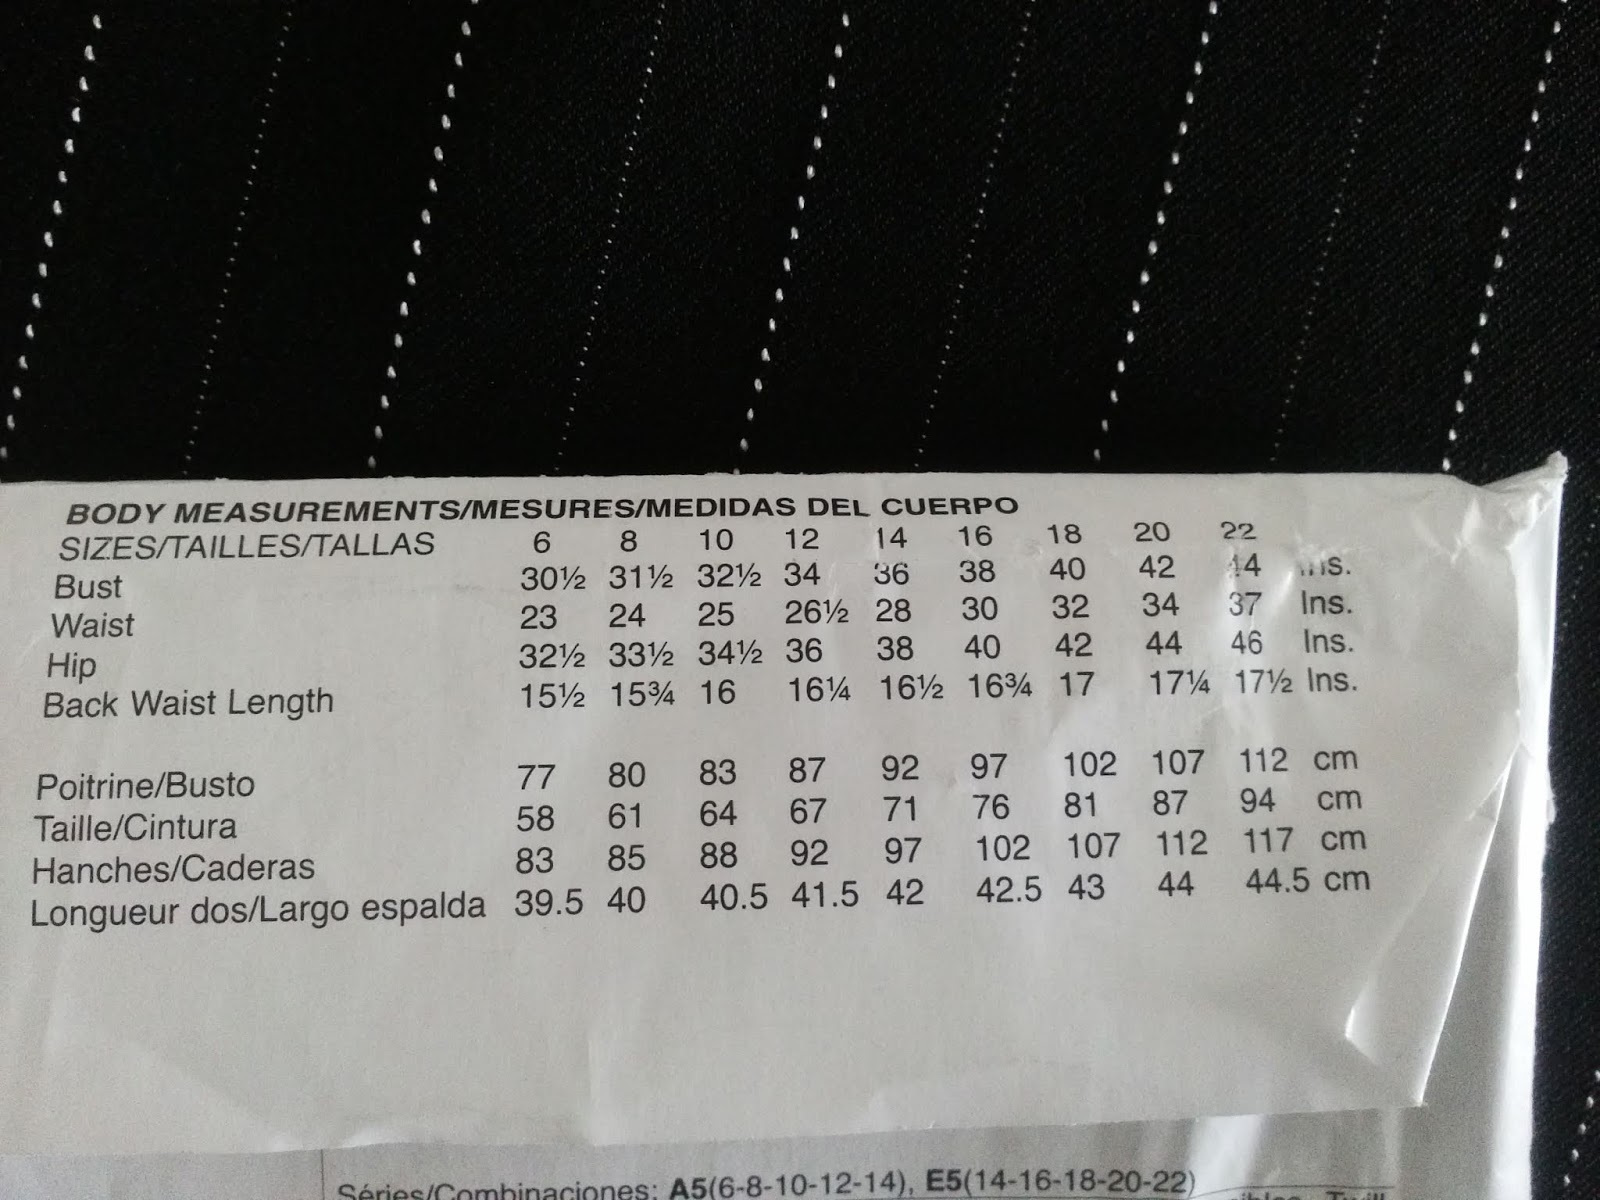
We now need to choose the pattern size. Somewhere on the pattern envelope you will find a list of body measurements. Wearing well fitting underwear take your body measurements honestly and write them down. Use these to determine your pattern size.
Please don't be upset if your pattern size is a couple of sizes larger than your commercial dress size, this is perfectly normal! If you buy a ready made garment from a store and it is a size 12 for example then you may well find that your pattern size is a 14 or 16 - and that is the pattern size you need to cut out. Stores have their own way of sizing as you may well have already found out.

On the back of the pattern envelope you will find line drawings of the garment - which are great for viewing details not obvious on the photographs on the pattern front.
You will also find details of the amount and type of fabric required and notions, for example this pattern needs a 7" zip etc. Everything is listed so that you can take the pattern with you when you go shopping and buy everything you need.
When you purchase your pattern from Jaycotts you can view this information on their brilliant new website, enabling you to order everything you need to complete your garment.

Now that we have decided which size to cut out go ahead and cut out each pattern piece required using an OLD pair of scissors or a pair kept especially for paper. Never ever use your fabric scissors on anything other than fabric, seriously, it is not good for them!
Take a look at Jaycotts selection of scissors. Scissors and cutting tools
As a bare minimum you will need a pair of fabric shears and a pair of embroidery scissors as well as a pair just kept for paper and interfacing etc.
In practice I have a couple of pairs of fabric shears - a pair with long blades and a pair with short blades. I have a pair of household scissors for cutting out patterns. I have a couple of pairs of embroidery scissors, a small pair and a pair with pointed ends and I have a pair of duckbill scissors which are brilliant for trimming layered seams and lots of other uses.
I do have a rotary cutter and mat but these are only used for craft projects.
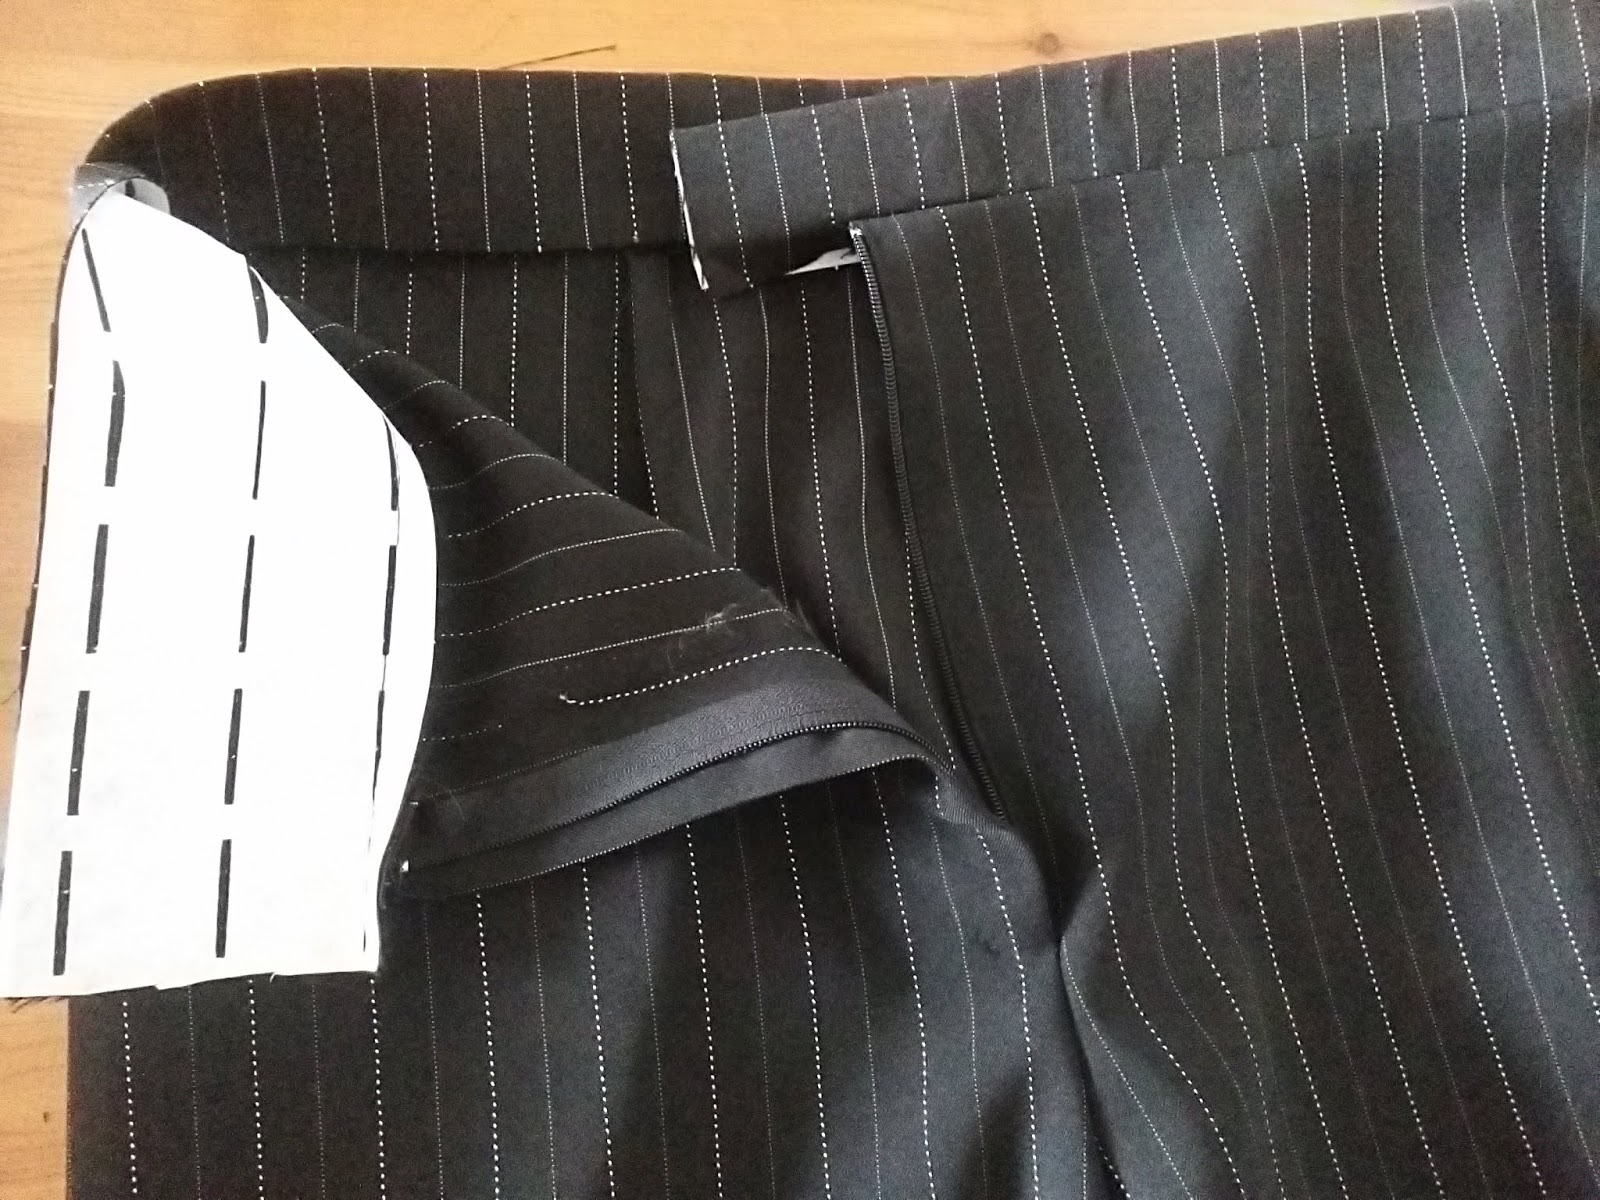
You will notice that I have pinned the selvedges together all the way down the fabric. This is very important as the fabric needs to be straight. Woven fabrics are made from threads running in different directions. The WARP runs the length of the fabric and the WEFT is woven between these threads running across the fabric.
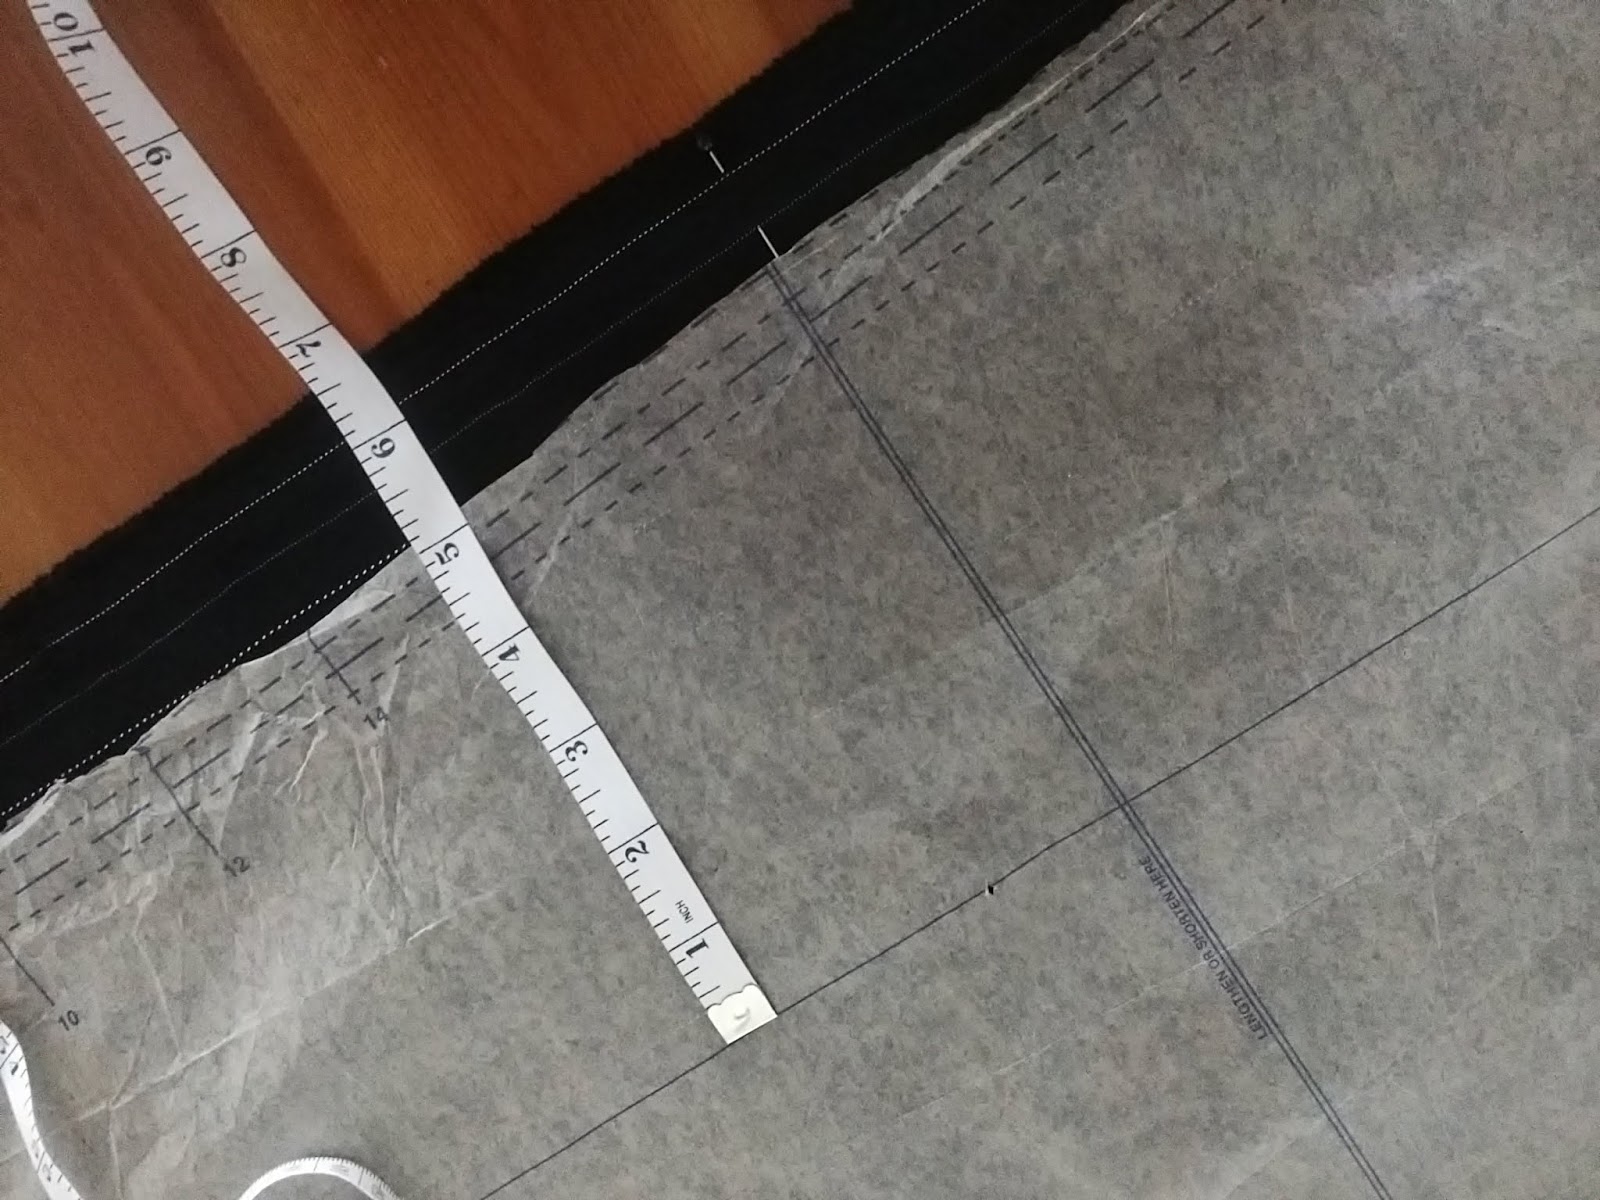
Every pattern piece has a Grainline marked on it. This line must be positioned so that it is exactly along the warp and to do this take a Tape Measure and measure from the grainline to the selvedge all the way along. There are exceptions of course, such as cutting on the bias, but I will leave that for another time. Why do we need to go to so much trouble you may be asking? If your fabric is not straight then your garment will not hang properly and it will not look or feel professional
so, measuring from the Grainline to the selvedge, pin and then cut out the front and back trousers.
Leave the waistband for now, I like to cut mine out later so that I can make it the exact size wanted.
When placing your pins on the fabric keep them well away from the edge of the pattern to avoid damaging your scissors.
Never ever go into your sewing room barefoot. I can vouch for that having spent three weeks on crutches and tolerating a general anaesthetic after standing on a pin. Don't do it!
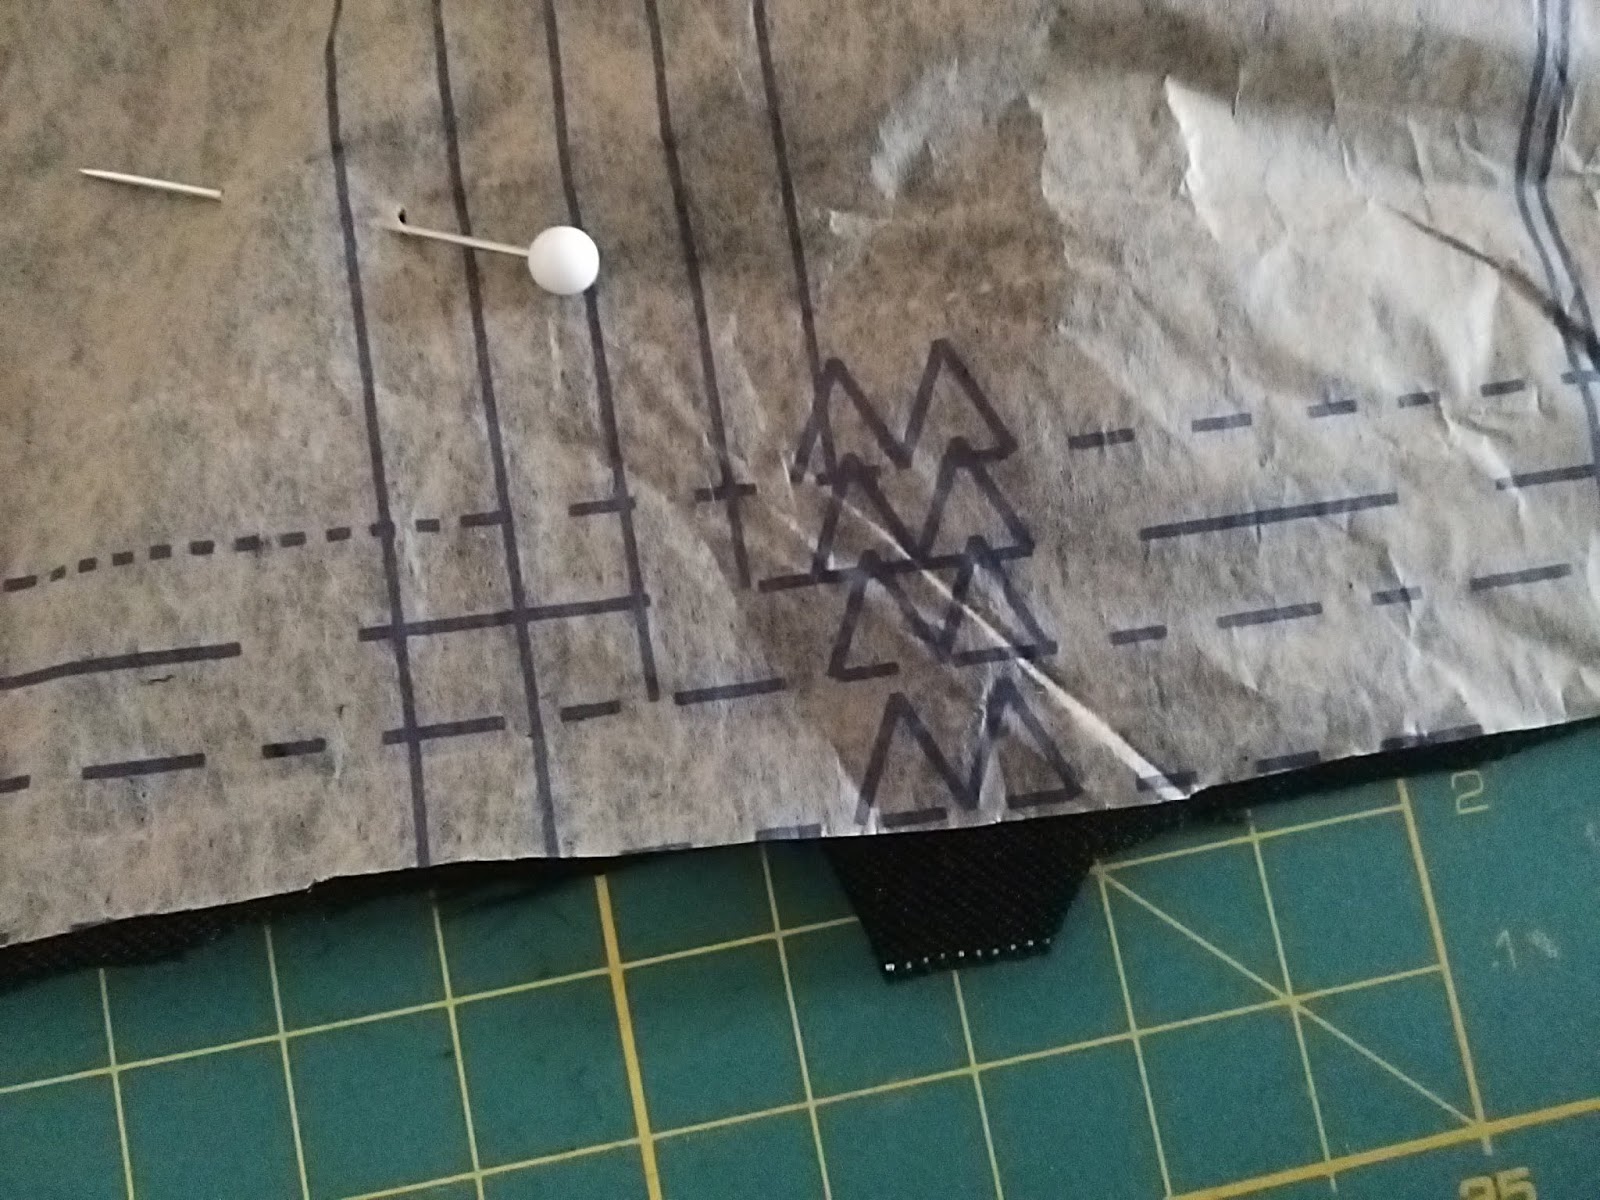
You will notice that there are triangles and double triangles at various places on the pattern pieces. These are used to match one piece to another . I have seen people snip into these triangles but it is very bad practice. The triangles need to be added to the seam allowance - if you snip into it you could very well have problems if you need to pinch some of the seam allowance to gain a bit of extra room , another reason not to snip into your fabric is that if it frays you are creating a weak point which could develop into a hole during wear. So please cut your triangles outwards .

You will need to transfer all of the pattern markings onto your fabric and there are lots of ways of doing this.
The first product is Tailors chalk. I use this to mark the wrong side of every pattern piece, and for marking hems and so on.
Chalk comes in many different forms, it is easy to use and easy to remove and is a very useful addition to your sewing kit.

The next set of marking tools are Marking pens I actually dislike these. They come in many different forms, some disappear with water, some will disappear when exposed to the air. But, they all can become permanent if they are not properly removed before ironing, and they may not disappear at all from some fabrics. So only use these with very great care.
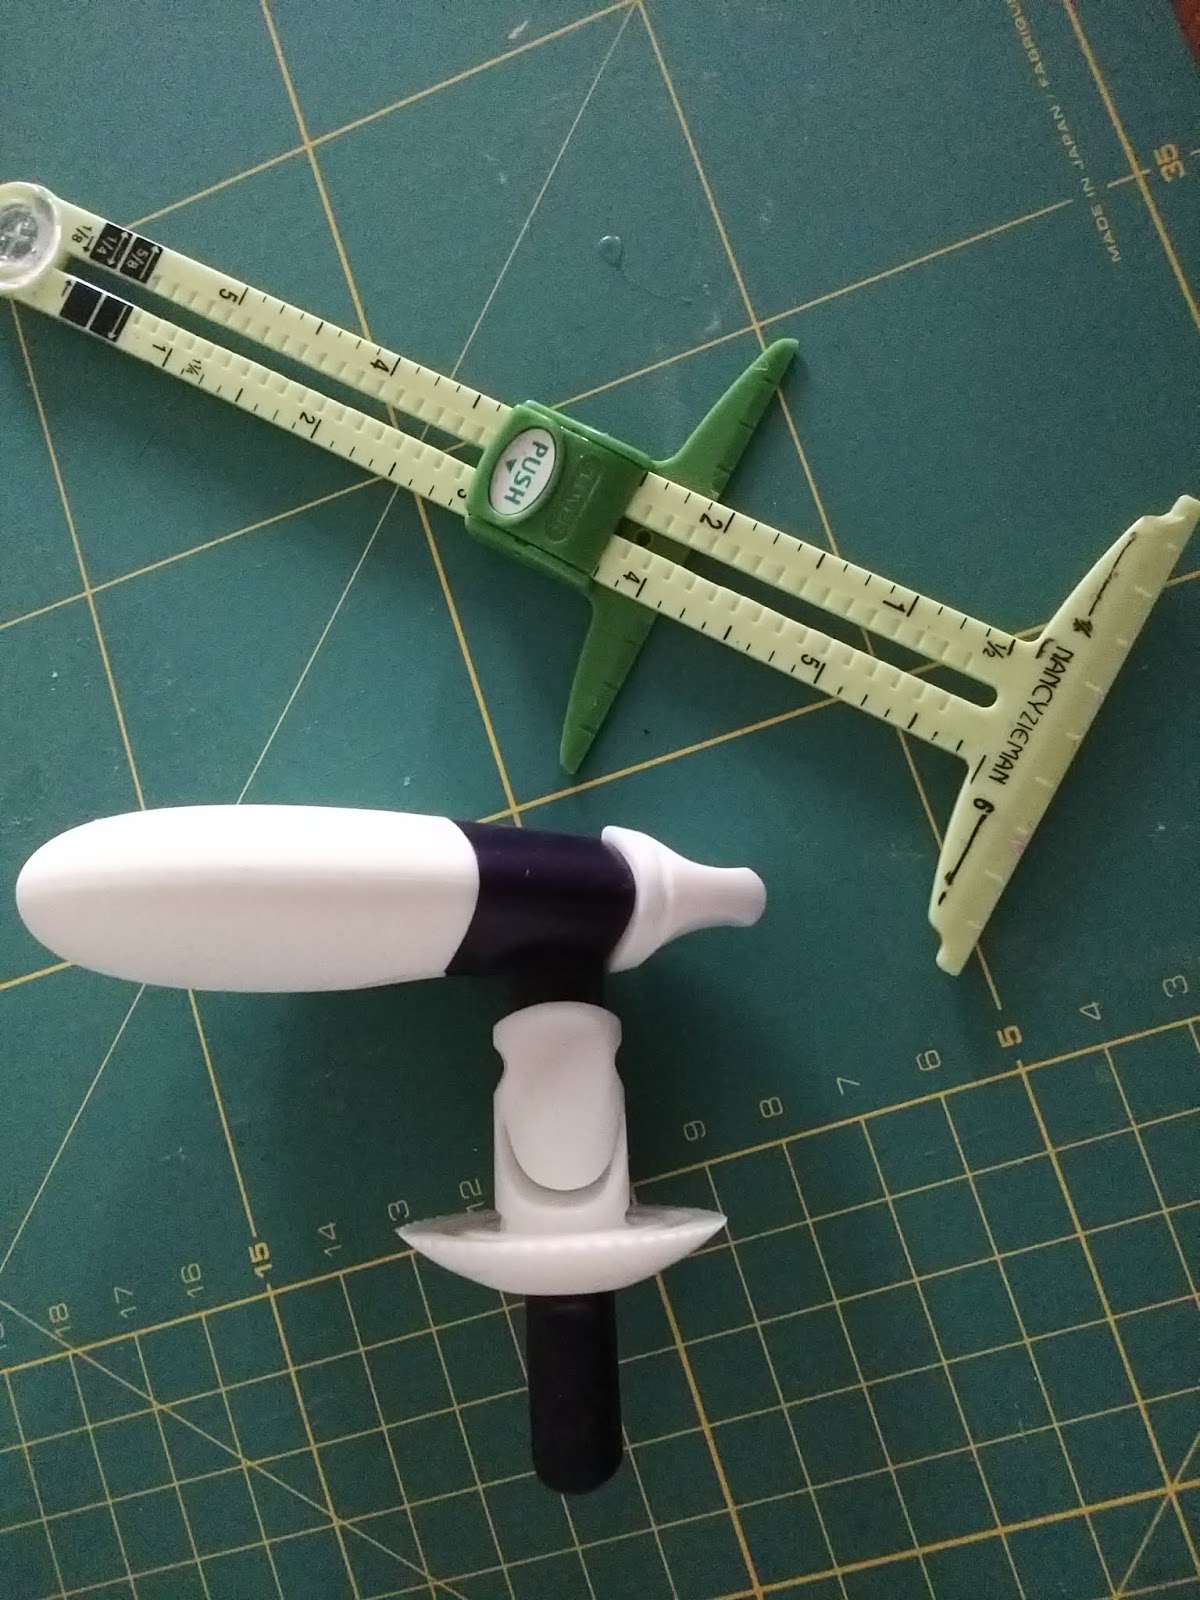
I absolutely love the Prym chalk wheel it is fabulous for marking hems and for lengthening or shortening pattern pieces .
I also love the Clover marking guage again for marking hems you will also need a Sewing guage or ruler to mark seam allowances and many other uses.

Something I use occasionally is Carbon paper you will also need a Tracing Wheel. This is not suitable for a lot of fabrics, it is almost always permanent, but given the right fabric it is quick and easy to use
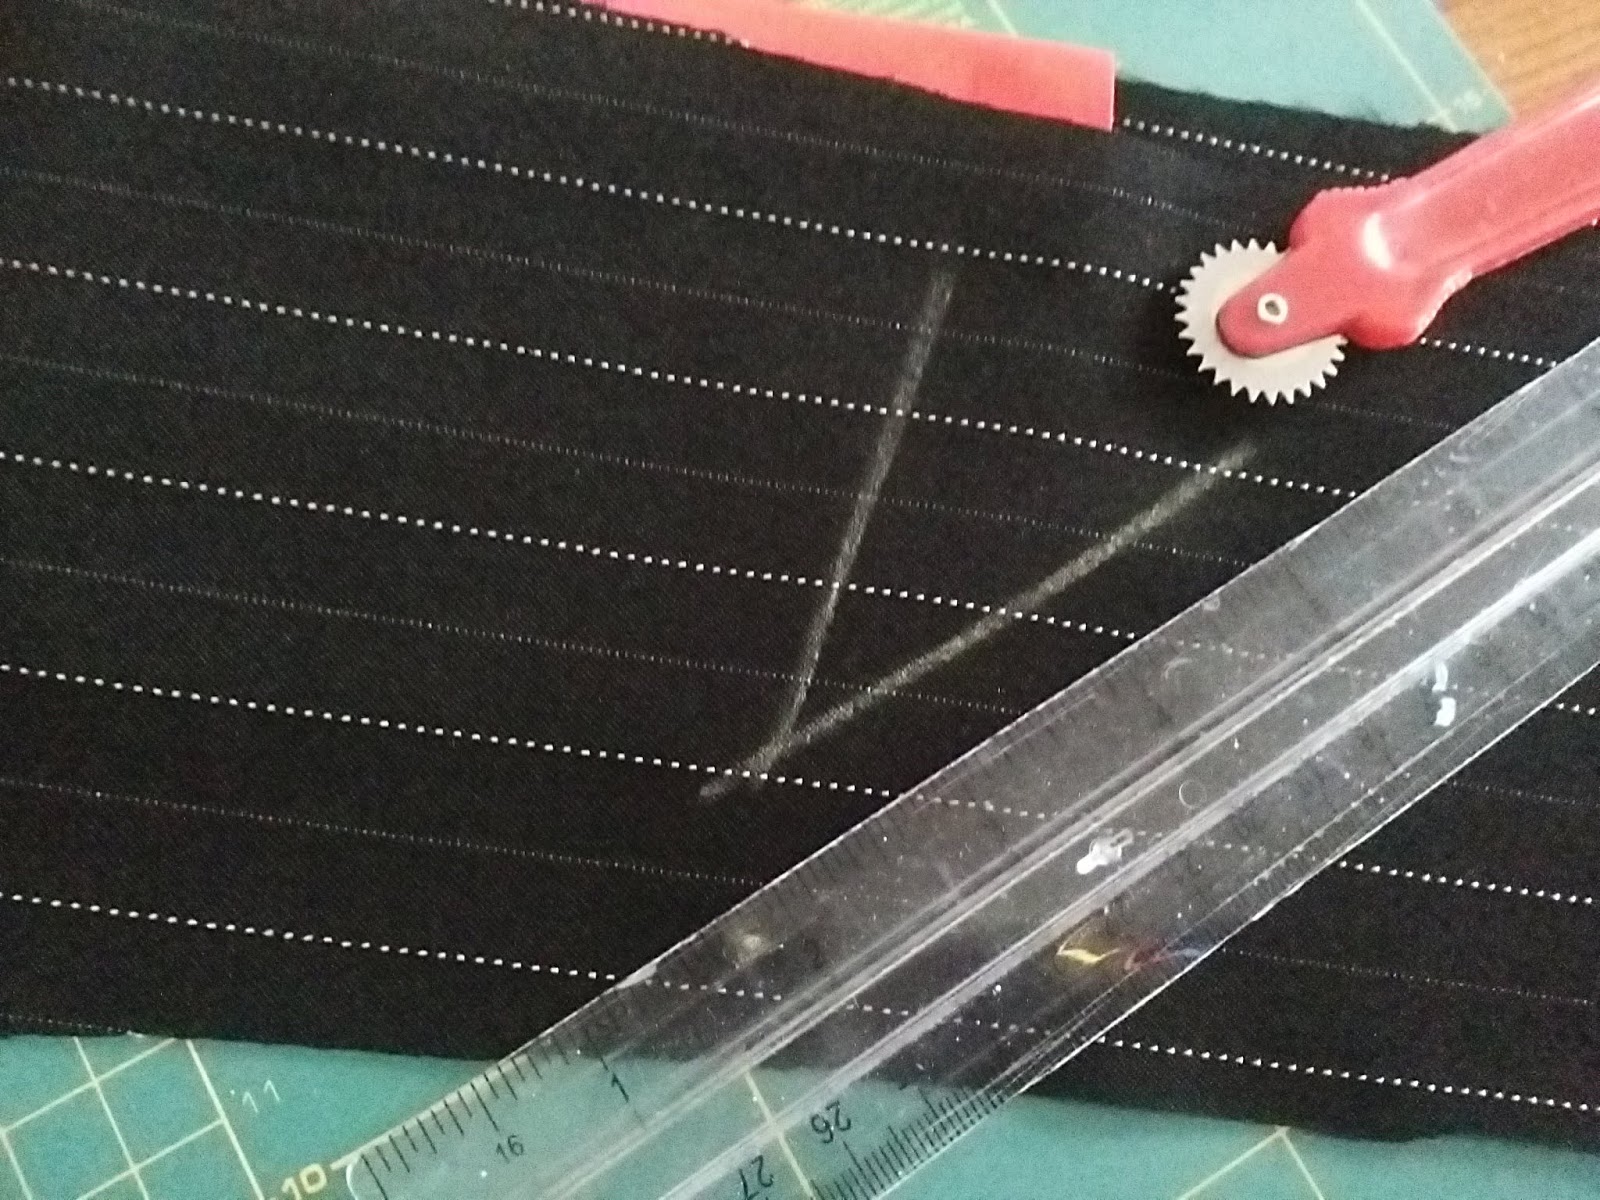
The carbon paper goes right side up on the wrong side of the fabric and the tracing wheel is used to draw along the dart for example, leaving a line on the wrong side of the fabric. Use with caution! It is not suitable for thick uneven fabrics or for very fine fabrics.

My favourite marking tool is the simplest and is the method i was taught and which I still use.
Tacking Thread. Is used to mark darts, hems and everything else. It is easy to remove, quick and convenient.
Tacking Thread is made from short fibres of cotton which makes it stay put until you remove it. It is not strong enough for general sewing
It is also used to temporarily hold a garment together for fitting.
You will notice that I use hole strengtheners from a stationary shop to reinforce the points where tailors tacks are placed. This is not compulsory but is something I have always done.
To make a tailors tack take a couple of stitches on the spot leaving long loops.
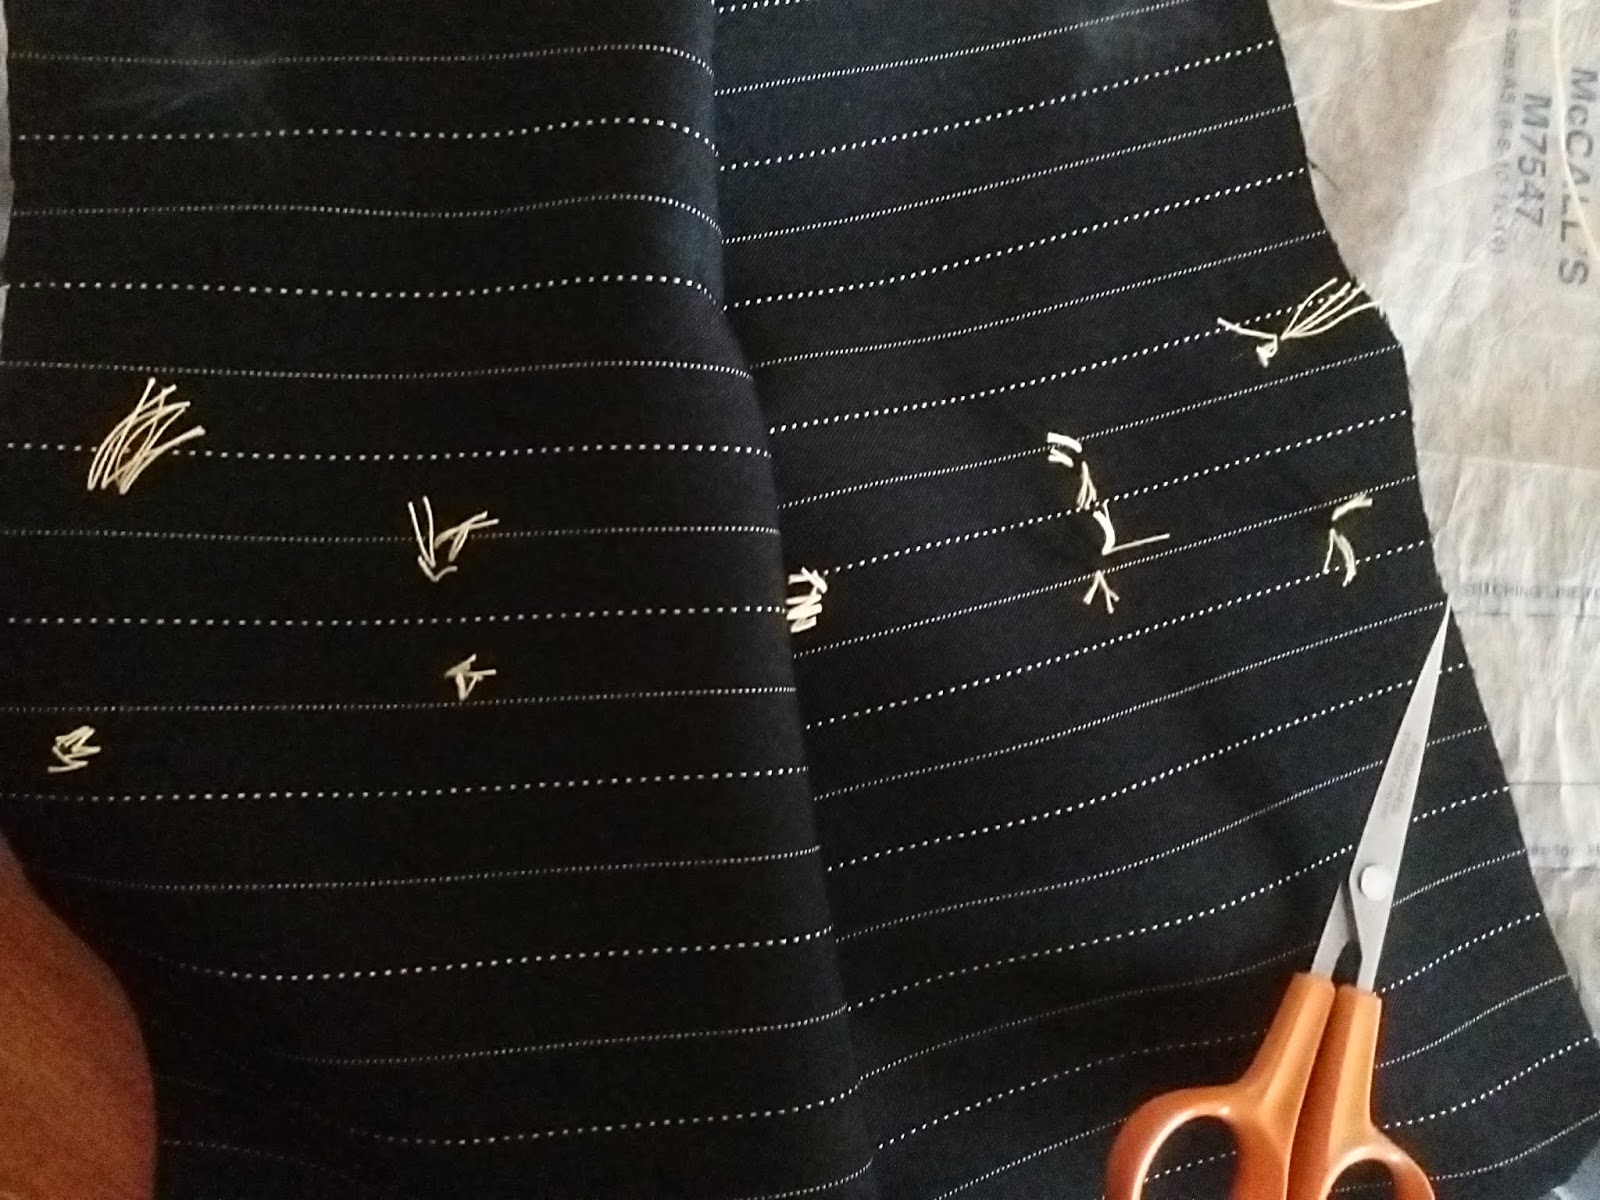
Carefully ease the fabric apart and snip the centre of the line of threads linking the two pieces of fabric together. And that's it, done.
I pull my tacking out as I machine stitch to stop it from becoming trapped in my machine stitches and long lengths can be used again!

Now you may want pockets on the back , I don't particularly. But if you do want them don't leave them plain!
Plan a design on a template and stitch along the lines in one or more colours of Topstitching thread and make your pockets a thing of beauty.

Don't forget to reverse the design for left and right sides
And why not make your pocket making easier by using a Pocket Template set. This set helps you to cut out and fold perfect pockets every time, so whenever a garment calls for a pocket use thiss set which also includes ironing guides. You will love this !
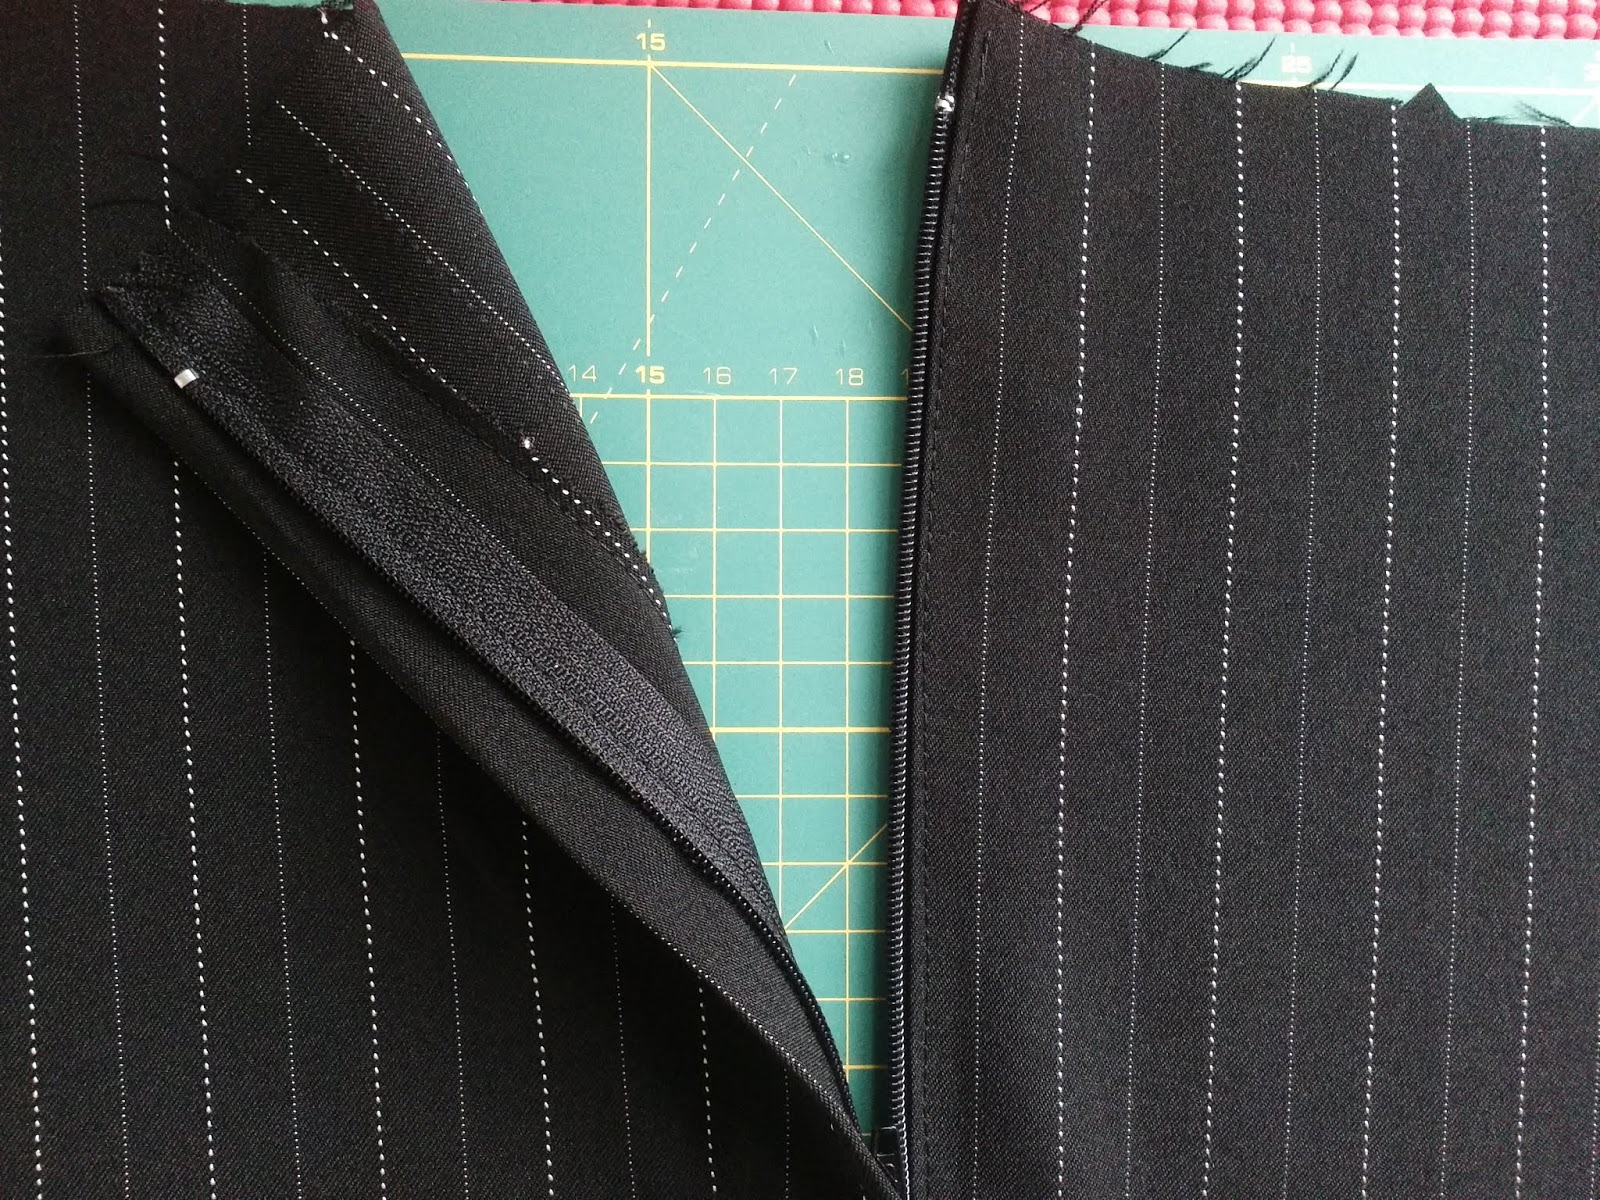
Lapped zips are very easy to sew and look great. Full instructions are given in the pattern. All you need is a 7" regular closed end Zip and a zipper foot. I used a Narrow zip foot as it enables me to stitch closer to the teeth than the one which comes with the machine. For different brands do speak with Jaycotts
There are lots and lots of different types and lengths of zips - you may prefer to use a jeans zip instead for example , or you may want a different length so do take a look at the full range Zips at Jaycotts
When sewing trousers I always sew the zip in before I do anything else. This is to make it easier to for me to fit the garment. After inserting the zip I tack the trousers together and check the fit before making any adjustments.
After sewing the side seams I put the trousers on again and check the fit before measuring the waistband - adding more length for the wrap over.
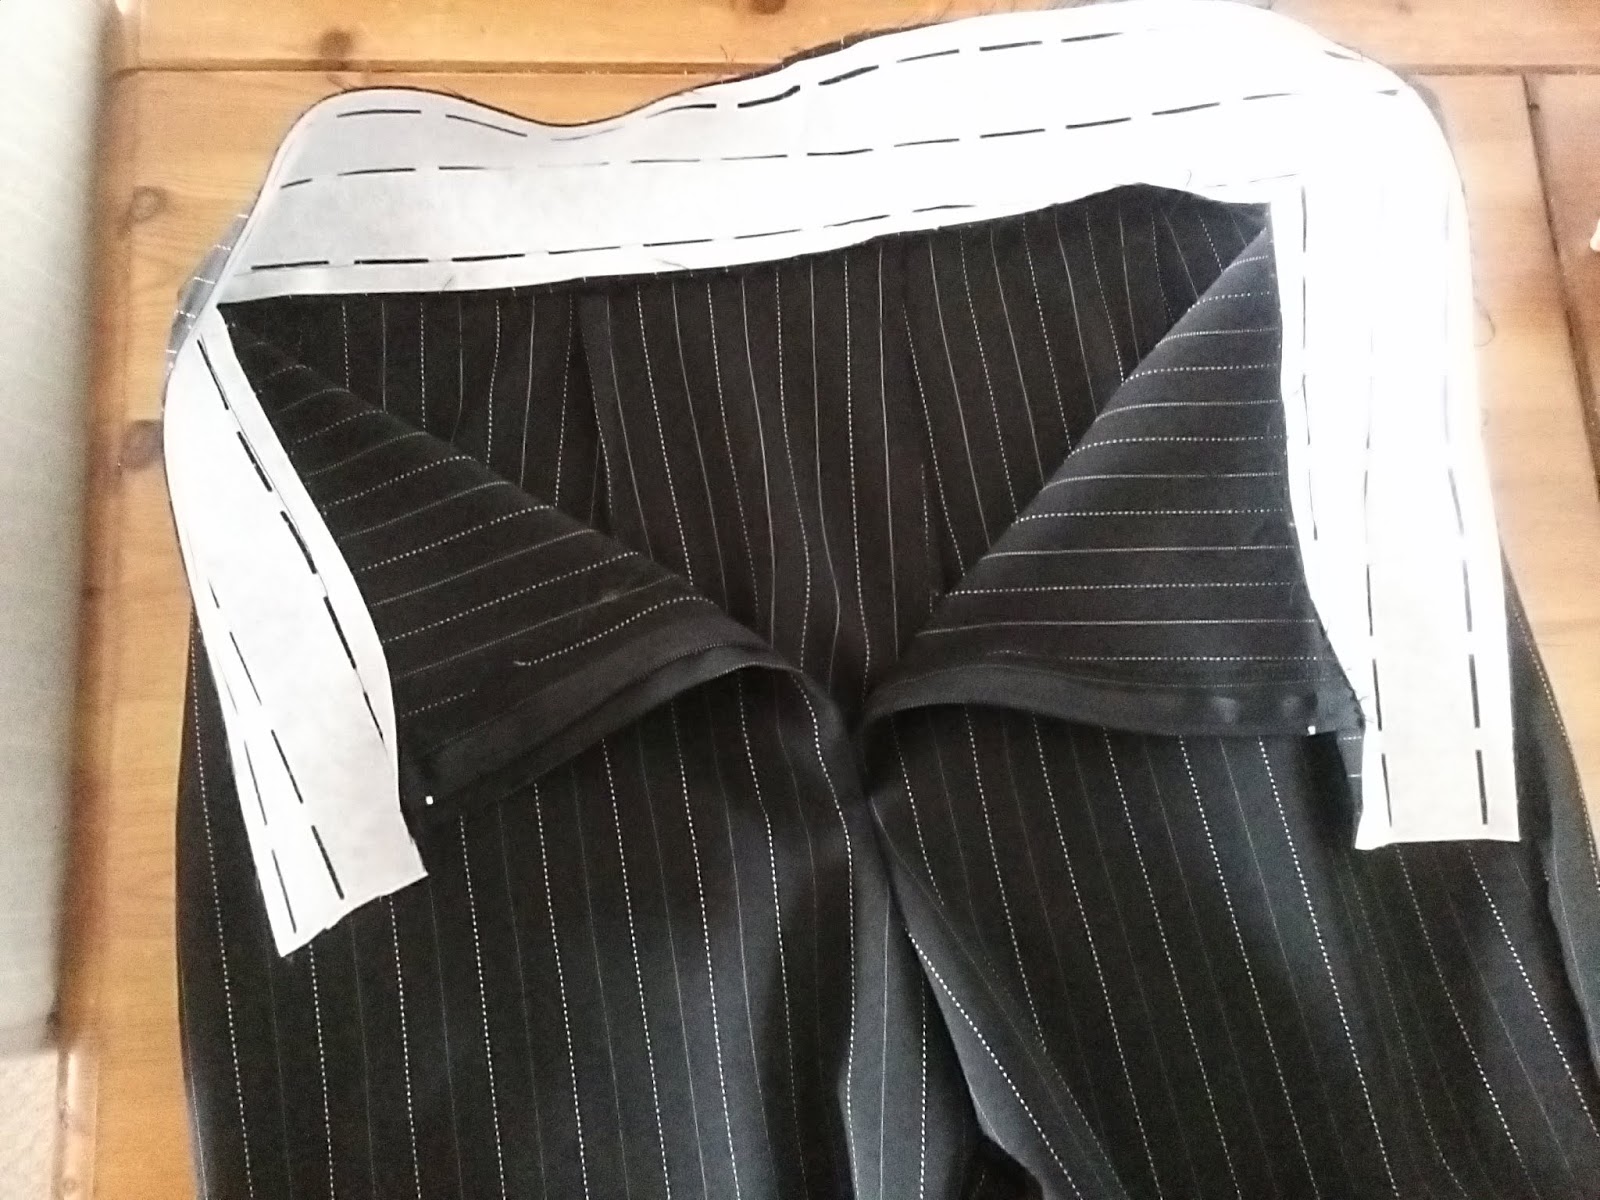
There are a lot of different ways of interfacing the waistband on trousers or skirt. My favourite is Fuse and fold waistband facing or fold-a-band . I like it because it is so easy to use and always gives a neat finish. Simply iron it onto the reverse of your fabric - use a dry iron and a pressing cloth and press your iron down , don't slide it .
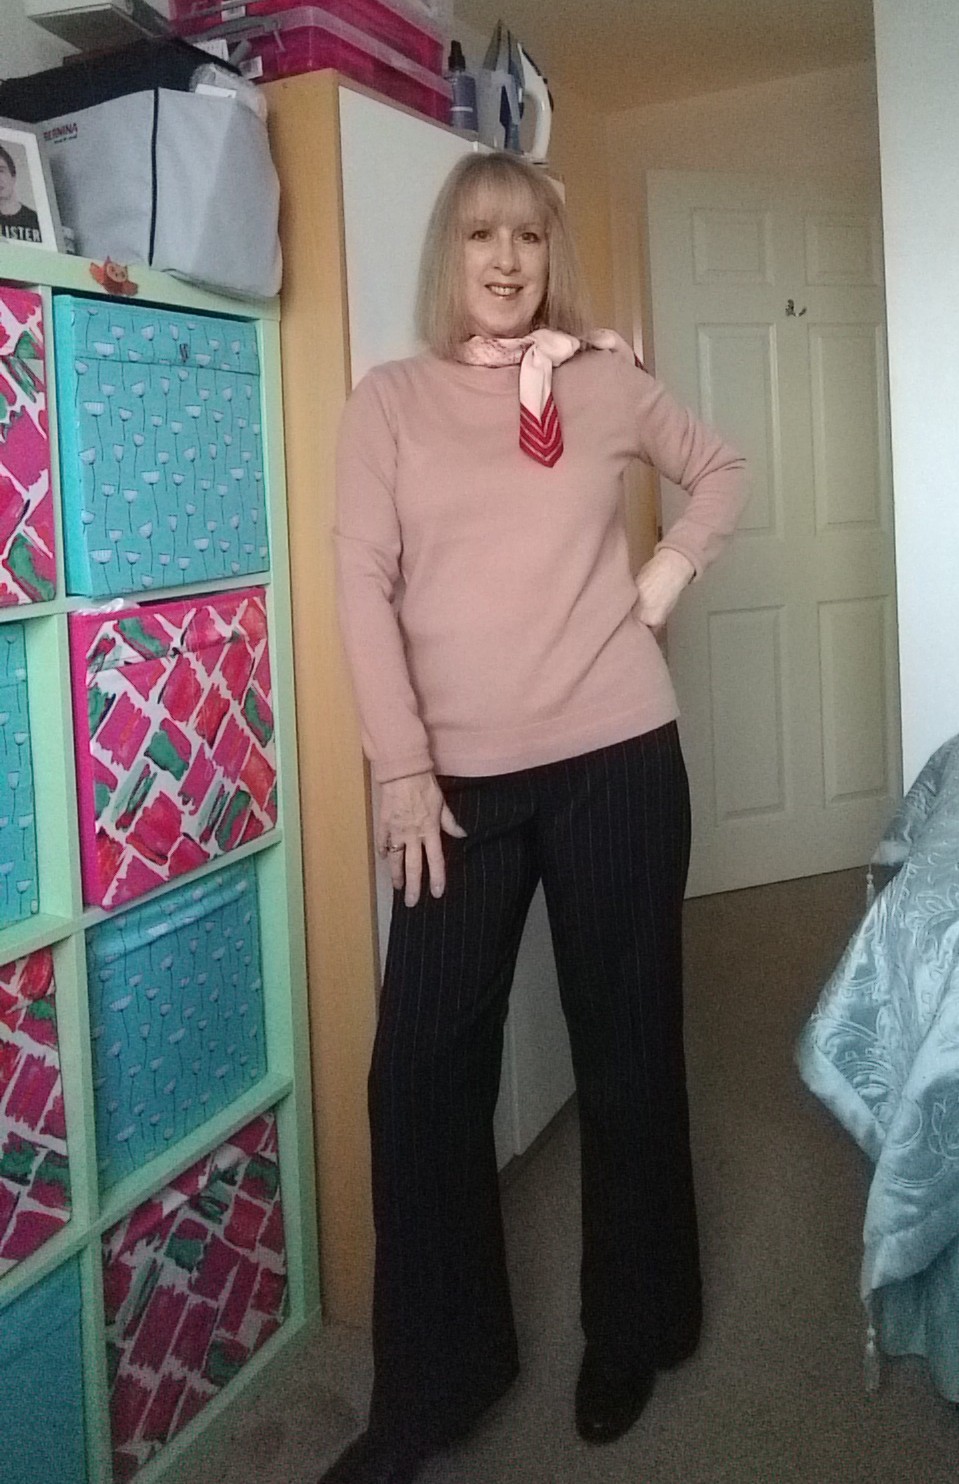
The perforations give stitching and folding lines. By the way if you are using a striped fabric like mine the seams and darts will make it almost impossible to pattern match. If it bothers you then add the belt carriers included in the pattern and wear a belt
After the waistband has been attached to the trouser waist press the seam and then press the band in half along the centre slots. Then fold the other seam allowance in and press. Slip stitch in place.
Finish with a Trouser bar to close.

To finish the hem I measured a pair of trousers which I already have and are at the length I want these to be.
Then I tacked the hem up and tried them on - perfect!
I cut off a couple of inches and marked my paper pattern that the length is too long ready for next time.
Then I over-locked the bottom and pressed the hem up. I used my blind hem foot on my Sewing machines at Jaycotts
Your sewing machine manual will explain exactly how to sew a blind hem on your particular machine.
Don't want to do a blind hem? Turn the hem up to no more than an inch and top stitch .
Be proud that you made trousers and that they fit!
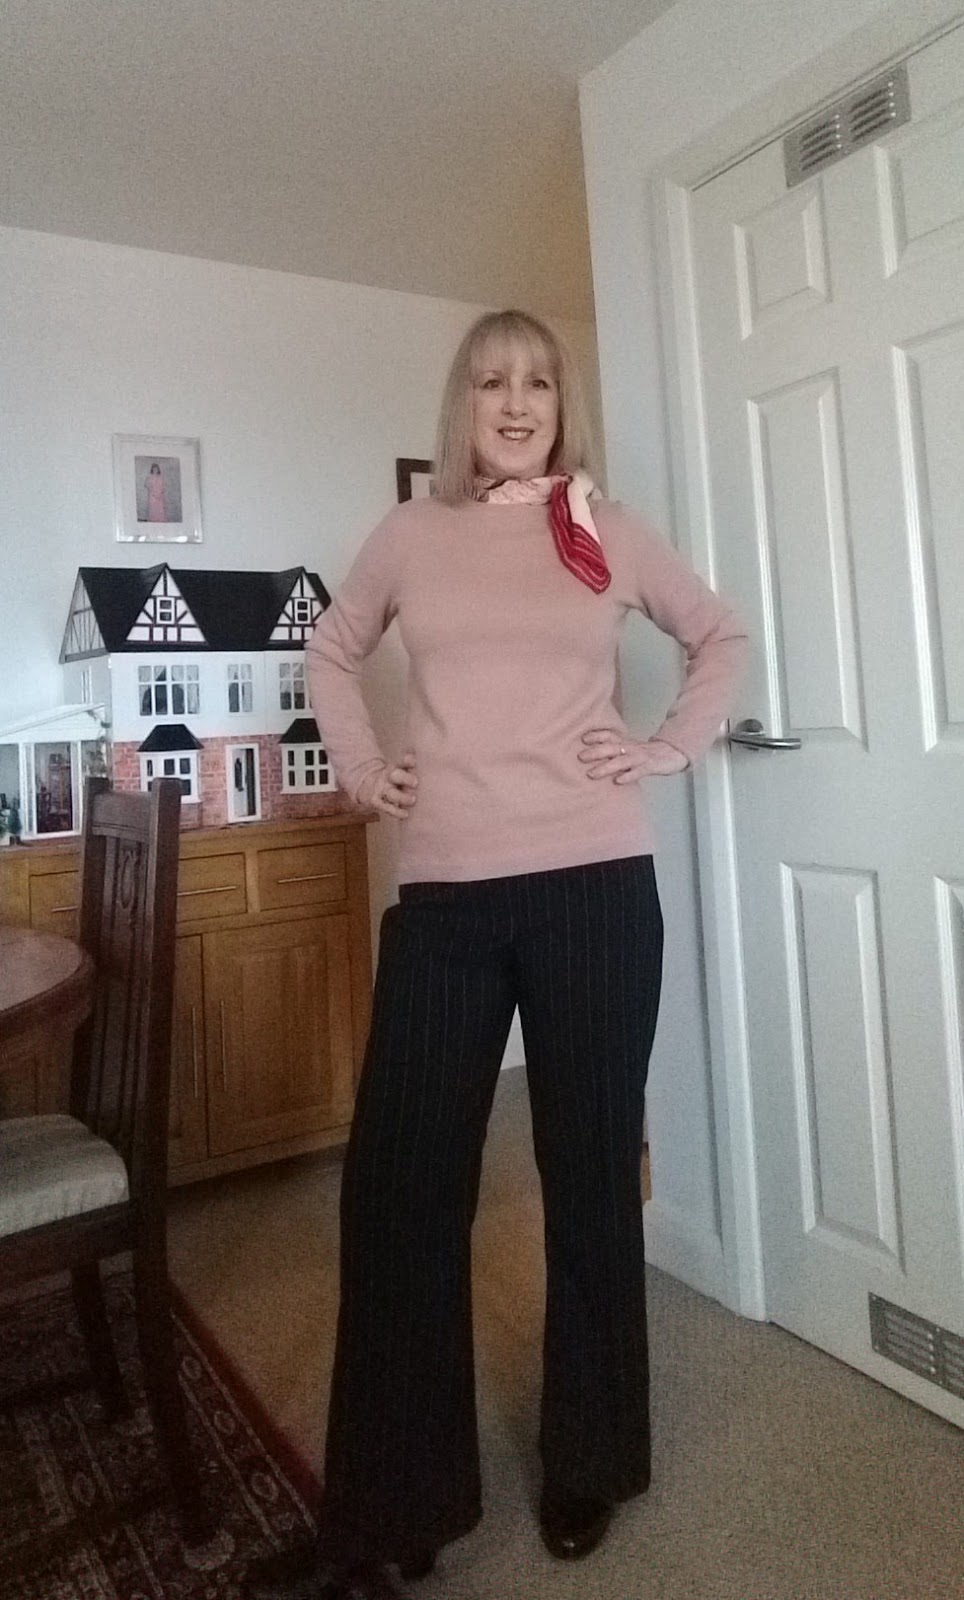
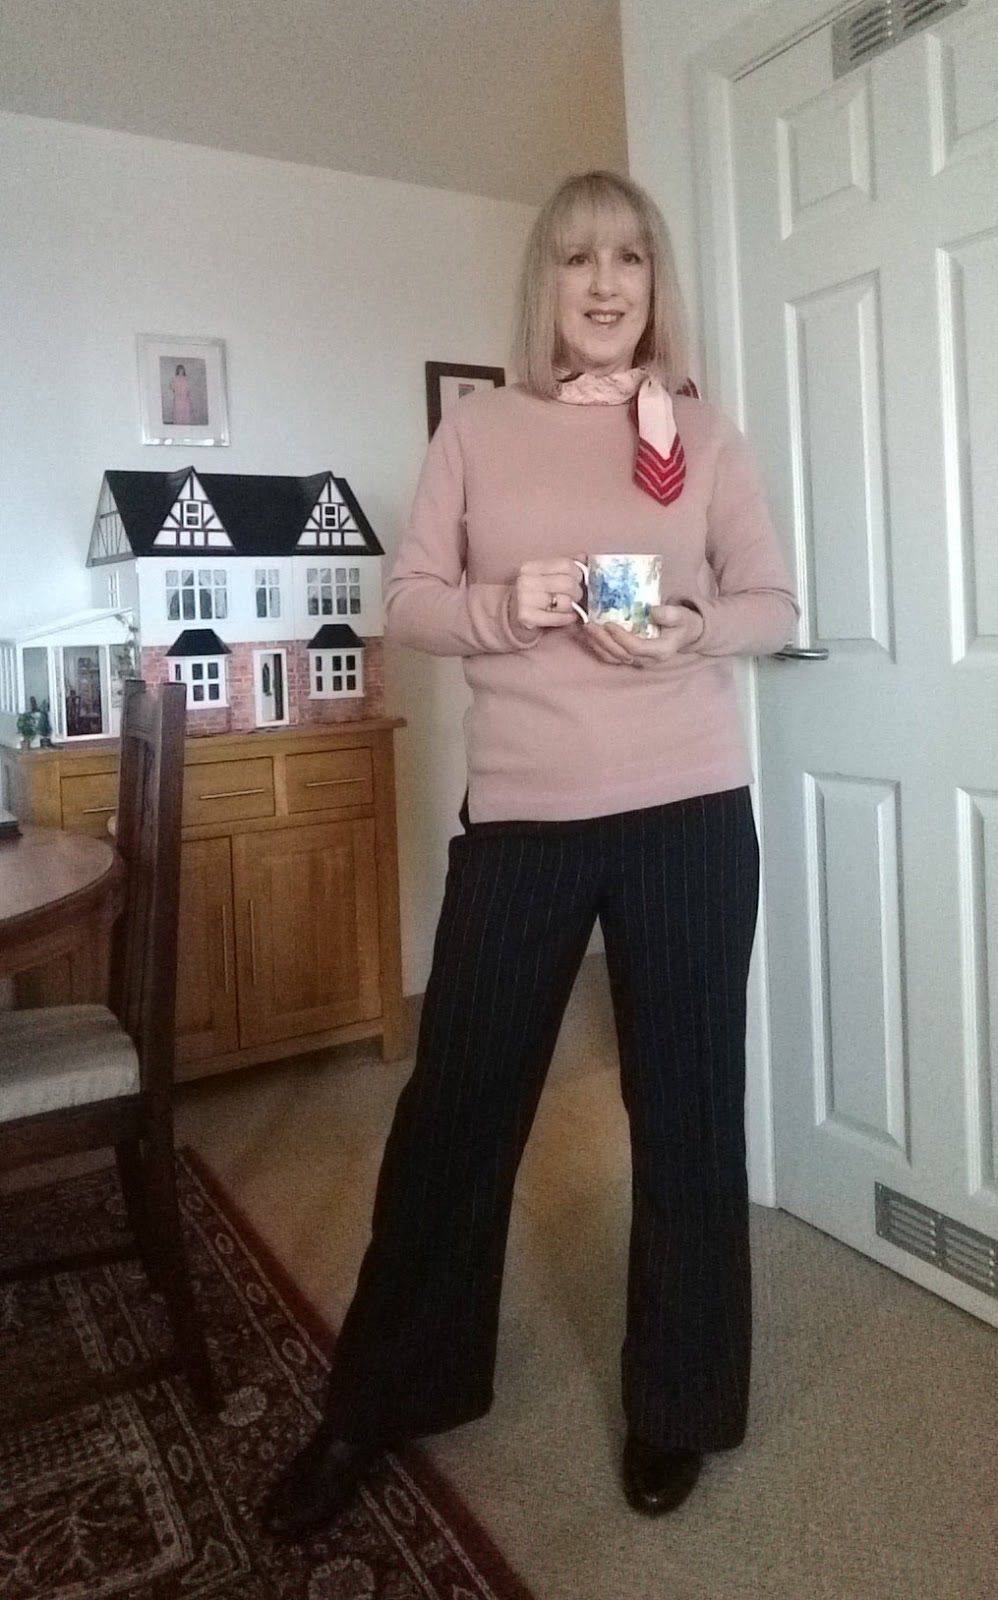
I think that straight leg trousers make a lovely change from the usual skinny leg which I am getting bored with. Straight leg trousers can take you anywhere.
There is a YouTube video below which gives an outline of cutting out, paying particular attention to using fabrics which have a definite right and wrong way up, in this case velvet.

The link to this YouTube video is Cutting out and pattern placement
The fabric I used is covered in gold glitter and there is glitter everywhere even after washing! My kitchen floor still sparkles despite frequent mopping.

So what did I make? This evening dress actually!
I adapted the long dress shown on the pattern at the top of this post by making the slit deeper and catching the front opening together with a few stitches at the top .
I did away with the zip - I found that stretch velvet was easy enough to get in and out of without worrying about any sort of fastening.
The final adaptation I made was to line the sleeve flounce with some dark red silk.
Some more hints and tips:-
Your fabric stash looks good displayed on shelves but don't do it, mine is carefully folded into boxes be wise over time the light will fade the folded edges. It is nice to have a supply of fabric, but don't just buy it because you might need it one day. I am not buying any new fabric at the moment I am using fabric I already owned
My fabric storage is shown at the end of this post.
Do look after your sewing machine and keep it clean and well maintained. I give my machines a good clean at least once a month and a quick clean, lint removal, and new needle after every project. It soon becomes habit.
If I am giving a garment to the charity shop and I bought expensive buttons for it, I remove them and replace them with a cheaper version.