I recently got this Sew Over It BETTY dress pattern from Jaycotts and I could not wait to make it.
I originally wanted to make it up in this "Paris" fabric but after trying every way I could gave up trying and raided my stash for this cotton viscose mix.
The dress has a full circle skirt so it does take a lot of fabric. The only other things you need are some interfacing, an invisible zip and some thread. A large spool of thread!
The pattern instructions are fabulous, inside the strong envelope is a booklet explaining each step in great detail. Fantastic.
The very first thing I did was to make a toille of the bodice. I used some lightweight cotton fabric and transferred all the pattern markings onto it with a fabric marking pen.
I hand tacked the darts and joined the front to the back
I quickly tacked in a spare zipper so that I could try it on properly. The result? Much too big! I cut it out again but in the smaller size down, tried it on again and the fit was much better
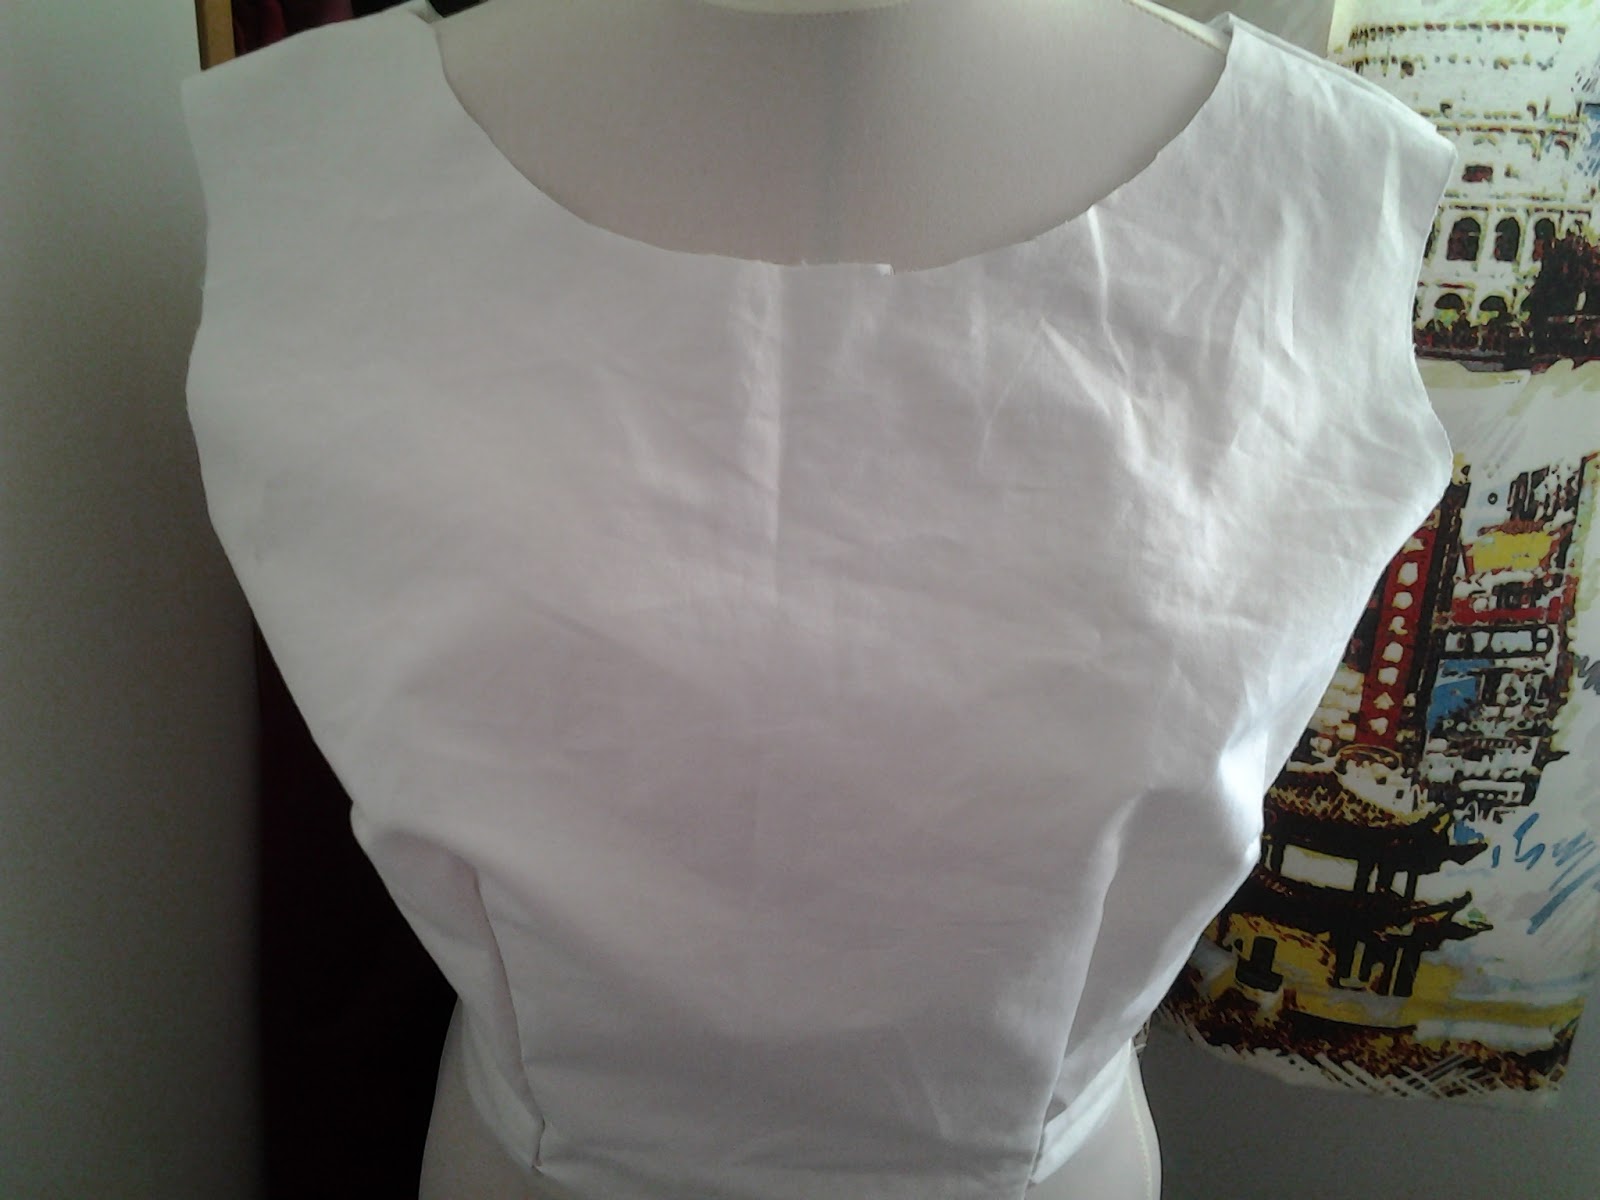
I started to put the bodice together. It has very nice shaping, the darts making it a very fitted bodice. Do not stitch the side seams at this stage.
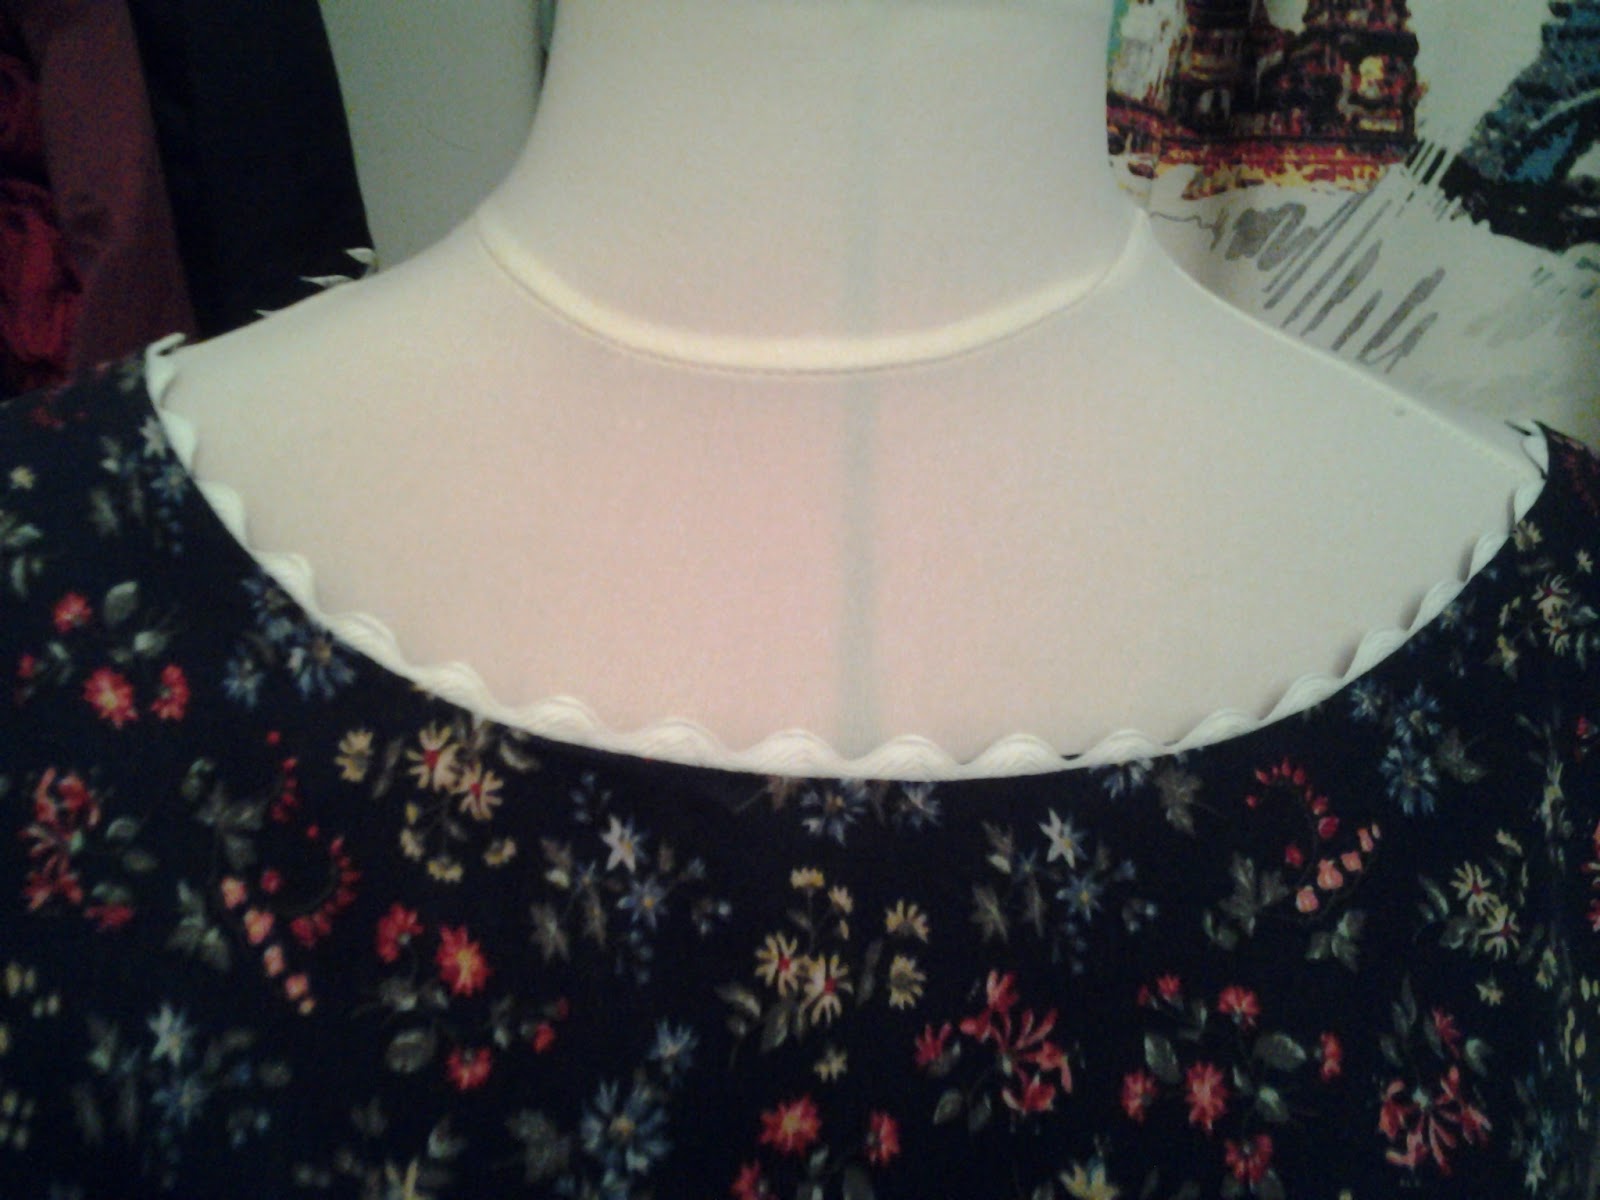
As the fabric is dark and I wanted to lift it near to my face I stitched some jumbo ric-rac braid to the neckline inside the seam allowance. This will form a really nice edging.
I ironed on some interfacing to the facings and overlocked the edges. Join the facings at the shoulder seam and place the facing on the bodice right sides facing.
Stitch the facing to the bodice around the neckline and armholes. Clip the curves, press.
Using a large safety pin pull the bottom of the back bodice right the way through the armholes on both sides. It is easy, honest! You will then have in front of you a faced bodice which just needs pressing. Once you have mastered an all in one facing you will want to do it all the time, it really looks very neat on sleeveless tops and dresses
You can now go ahead and stitch the side seams, taking in the facing. Overlock the edges.
Many people are worried about overlocker, because they hear reports that they are hard to thread. This can be the case, especially in older models like mine, but in my opinion they are worth their weight in gold because of the speed they work at and for the results they give. Despite occasional threading issues with mine I would not be without it.
For more information on overlocker please do contact Jaycotts, they will give you the very best advice on which machine is right for you
This is the front of the bodice which is almost ready to be attached to the skirt.
There are still some fitting issues with the back. I have a narrow back and when I tried the bodice on again there was a lot of gaping. I pinned and tacked it so that it fit me and traced a new seam line with hand tacking stitches.
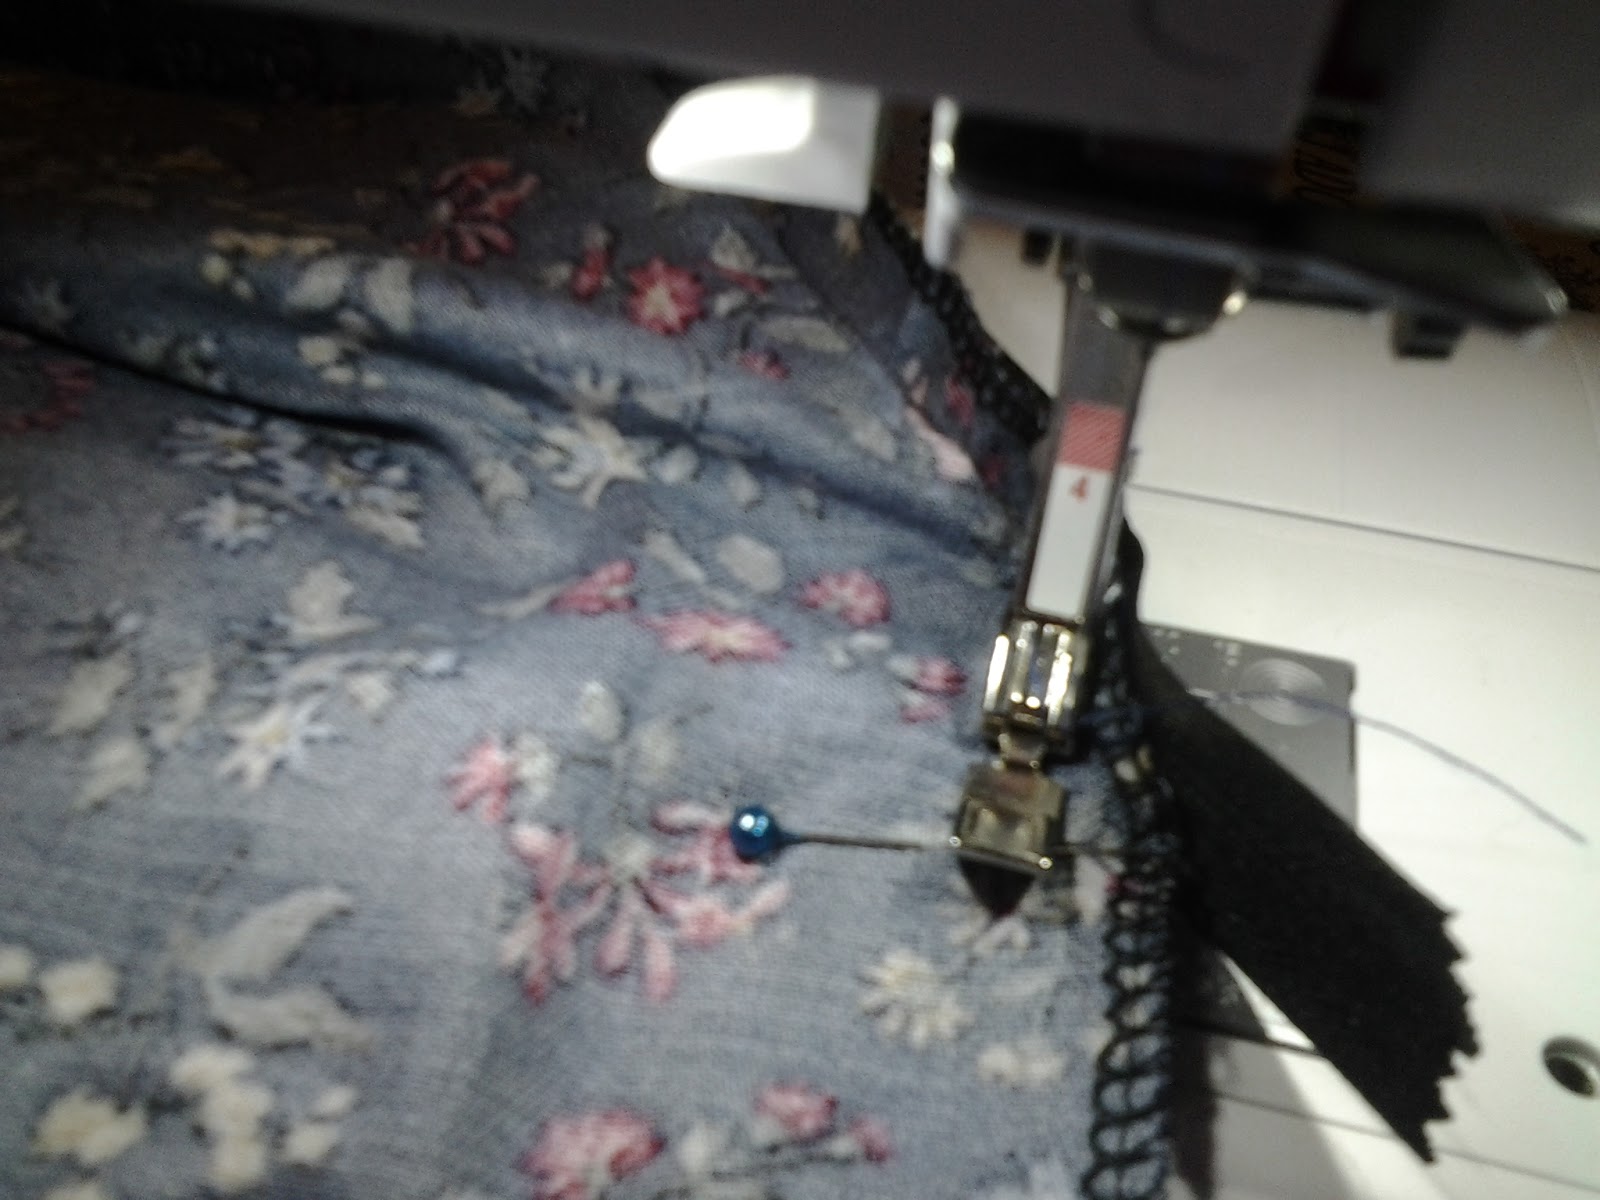
The skirt is a full, circle but only has a front and two backs. Join them together, overlock the side seams and join the skirt to the bodice. Overlock the entire back edges.
I love invisible zips. I also love this double sided basting tape which is fabulous for attaching your zip to the fabric whilst you machine it in place. I really do highly recommend this product, it makes sewing in zips so very easy and accurate
To buy it visit Jaycotts by clicking the link
I use my invisible zip foot to attach the zip quickly and easily. You may not know this tip but if you use an ordinary zipper foot to stitch the back seam below the zip you will be able to stitch right up to the edge of the zipper with no gaps!
For the hem, the is no way I am hand sewing a circular hem so I used my overlocker to finish the edge, I then folded it over and machined a single I
Line around 5/8" from the edge
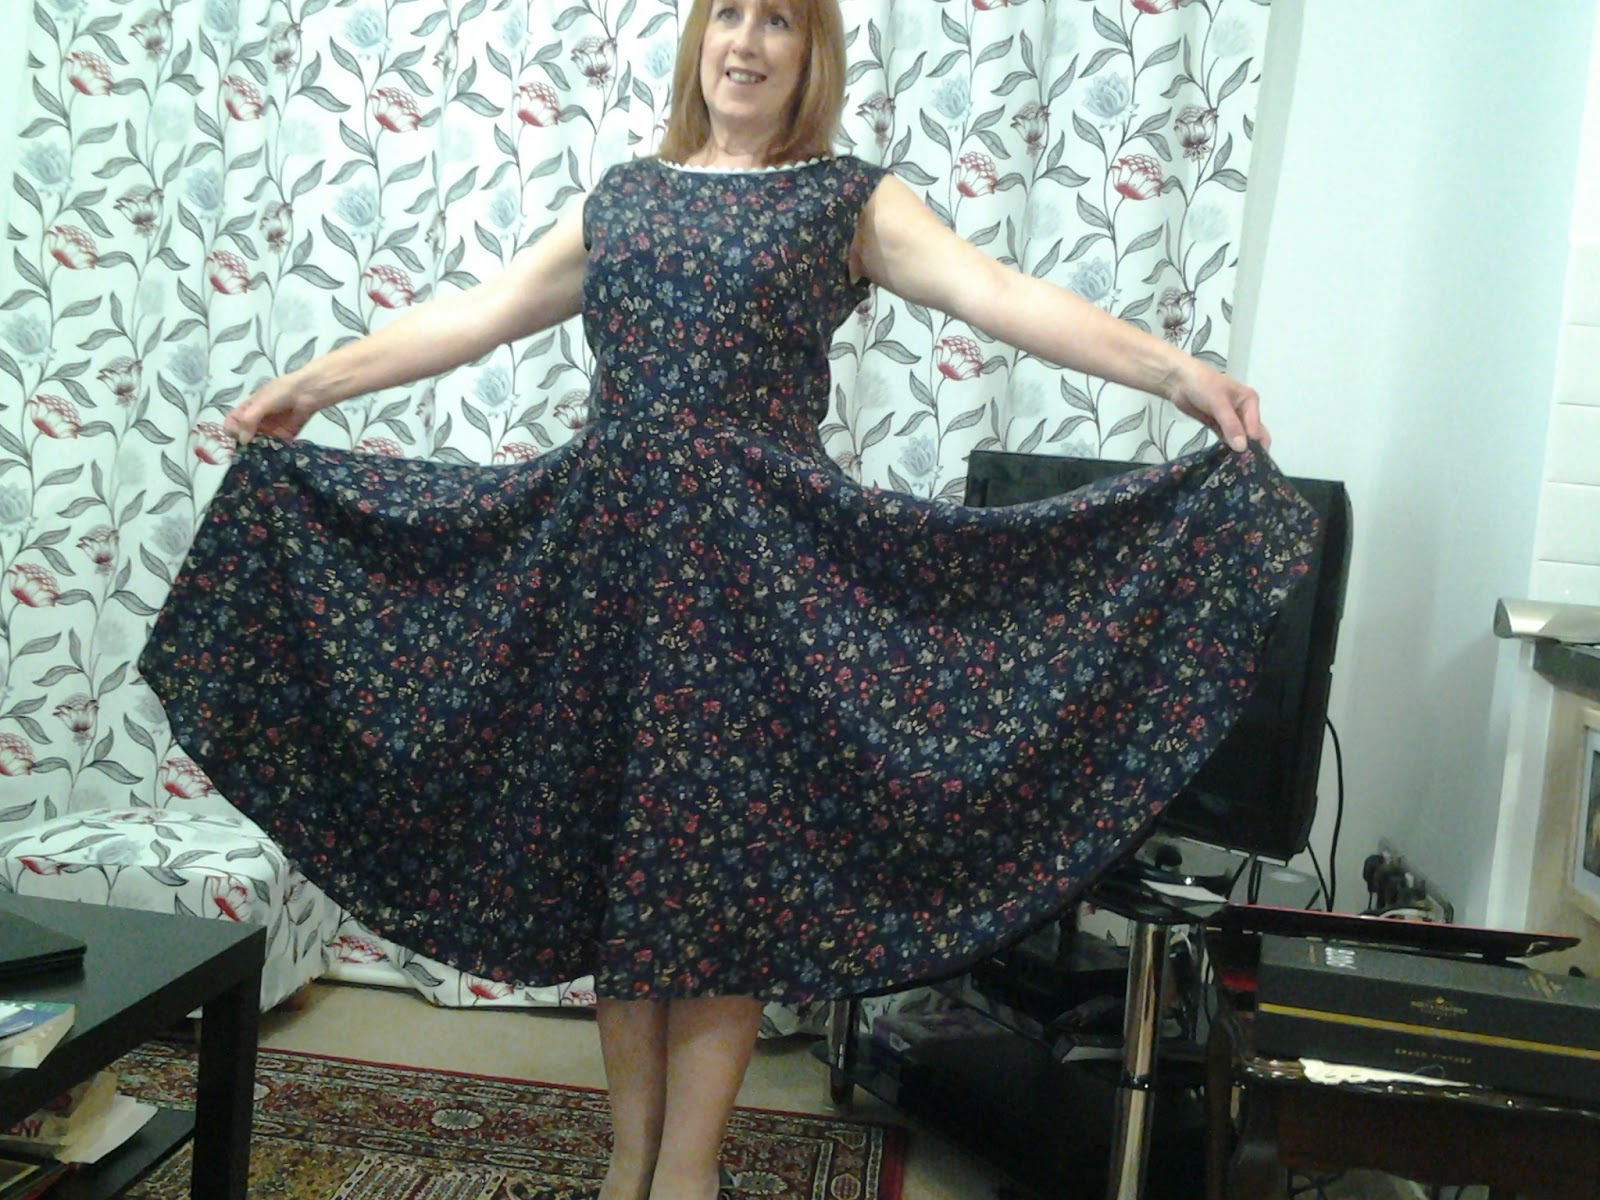
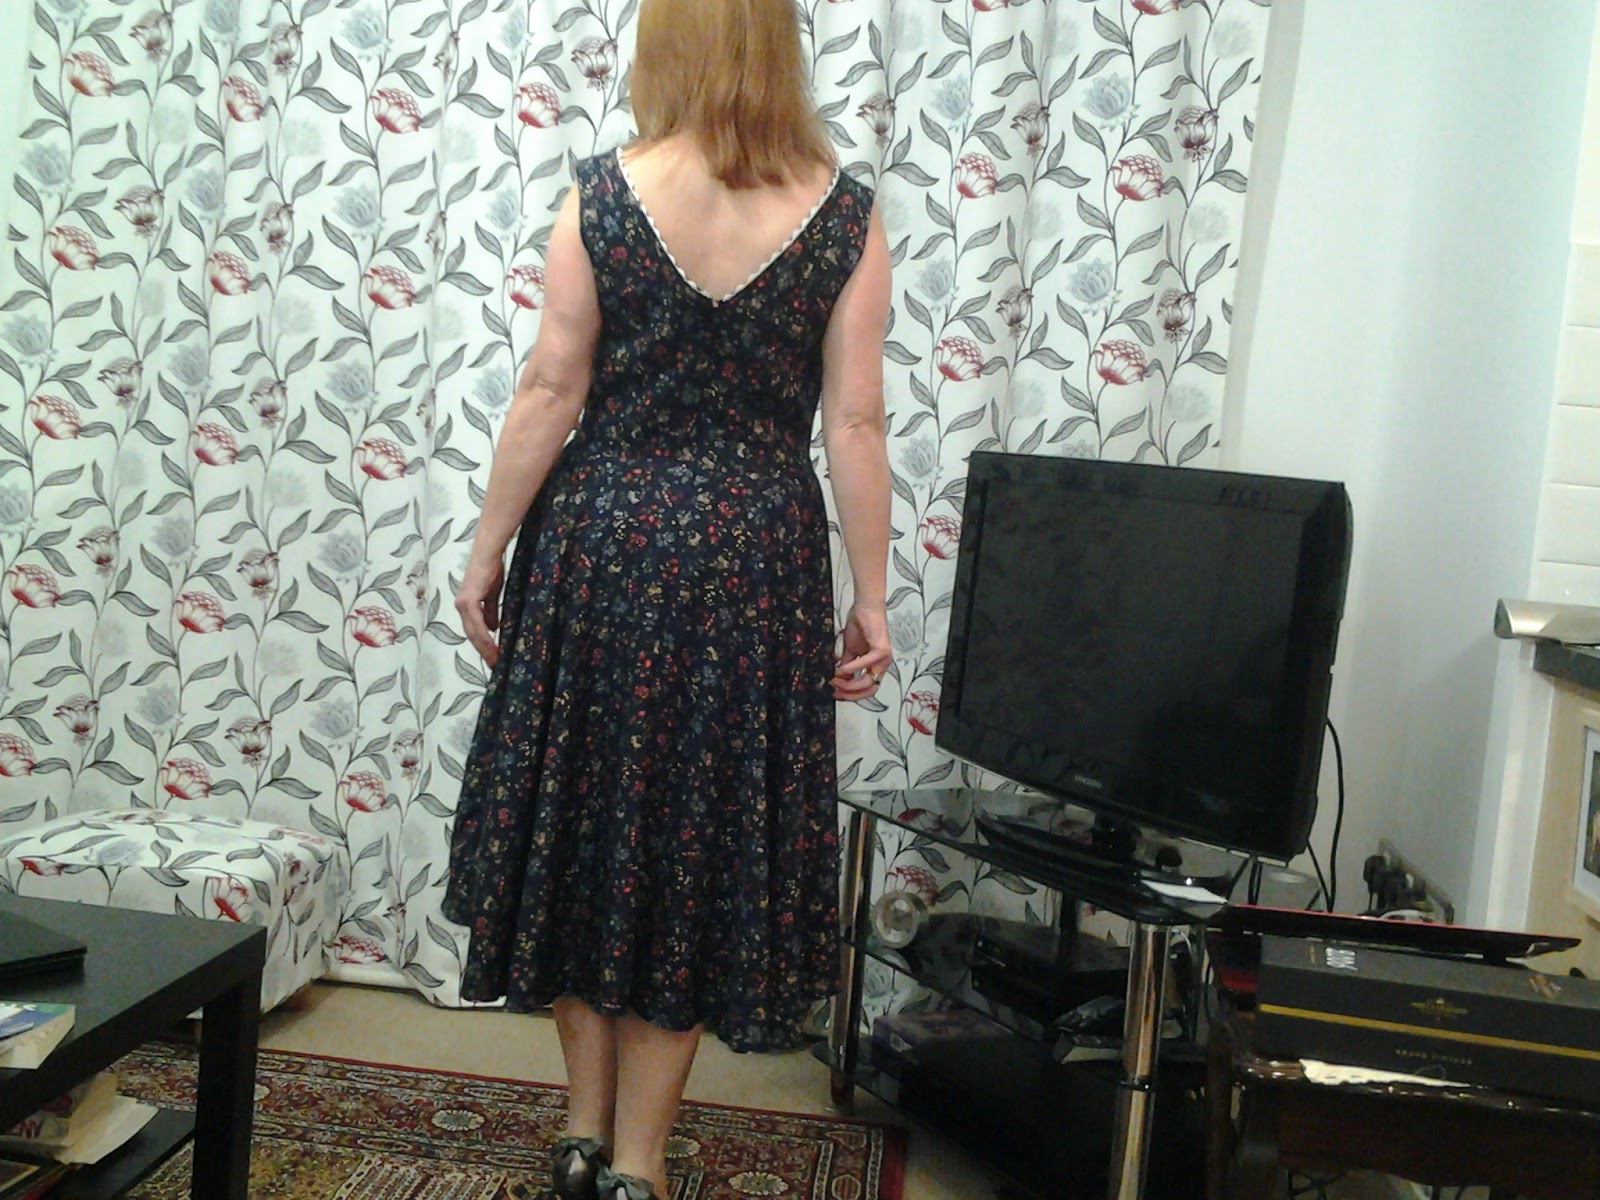
So, here it is! The skirt is amazing don't you think?
I love the back, the low neckline is very flattering
It is a very pretty summer dress, but you can make it look more vintage by adding petticoats and a wide belt.
I am delighted with my BETTY dress. This is the first time I have used a
Sew Over It pattern it will not be the last
Angela.
http://sewangelicthreads.blogspot.com/2015/08/how-i-made-my-lovely-sew-over-it-betty.html